The steps 1 to 12 of this NSX-T Installation series focused on the setup of the NSX-T Datacenter components i.e. NSX-T Management Cluster, Host and Edge Transport Nodes. From, Step 13 onwards, the focus shifted to building logical network topology that I alluded to in Step 0 – High Level Design.
Links to all the steps of the Second Phase for quick jump:
Step 20 – Configure Route Distribution on T0 (Tier-0) Gateway – this blog
The previous step, we followed step-by-step instructions to connect a T1 (Tier-1) Gateway to a T0 (Tier-0) Gateway and validating the learnt routes via command line. This blog is part of the Second Phase i.e. building the logical network topology and the “Step 20” of the NSX-T Installation series, in which we will follow the step-by-step instructions to configure Route Distribution on T0 (Tier-0) Gateway, validate advertised routes and external connectivity via command line.
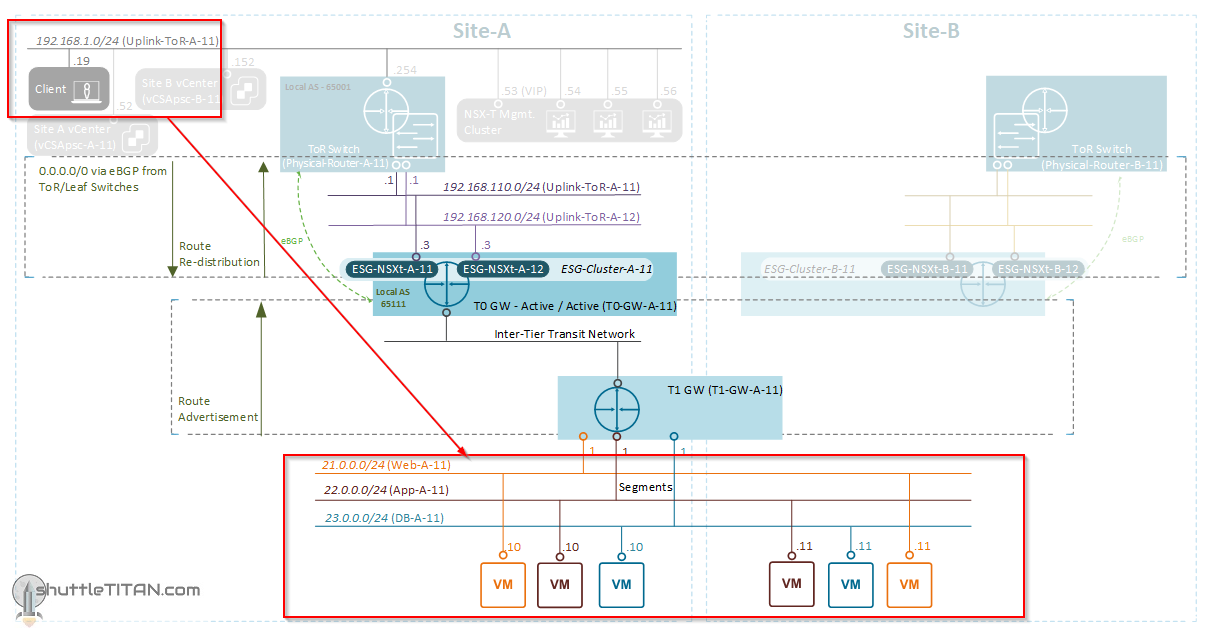
The image below highlights the logical entity of the “Routing Design” this step focuses on:
It is assumed that you have NSX-T Management Cluster deployed, Host and Edge Transport Nodes configured and ready to use. If not, please refer the steps 1 to 12 in this NSX-T Installation series for guidance.
If you are deploying this in your home lab or performing a PoC in a nested vSphere Environment, I would also suggest you have a quick glance of my blog Home Lab Setup – Nested ESXi Host’s networking for NSX-T. ——————————————————————————————————————————————————
With that lets get started…
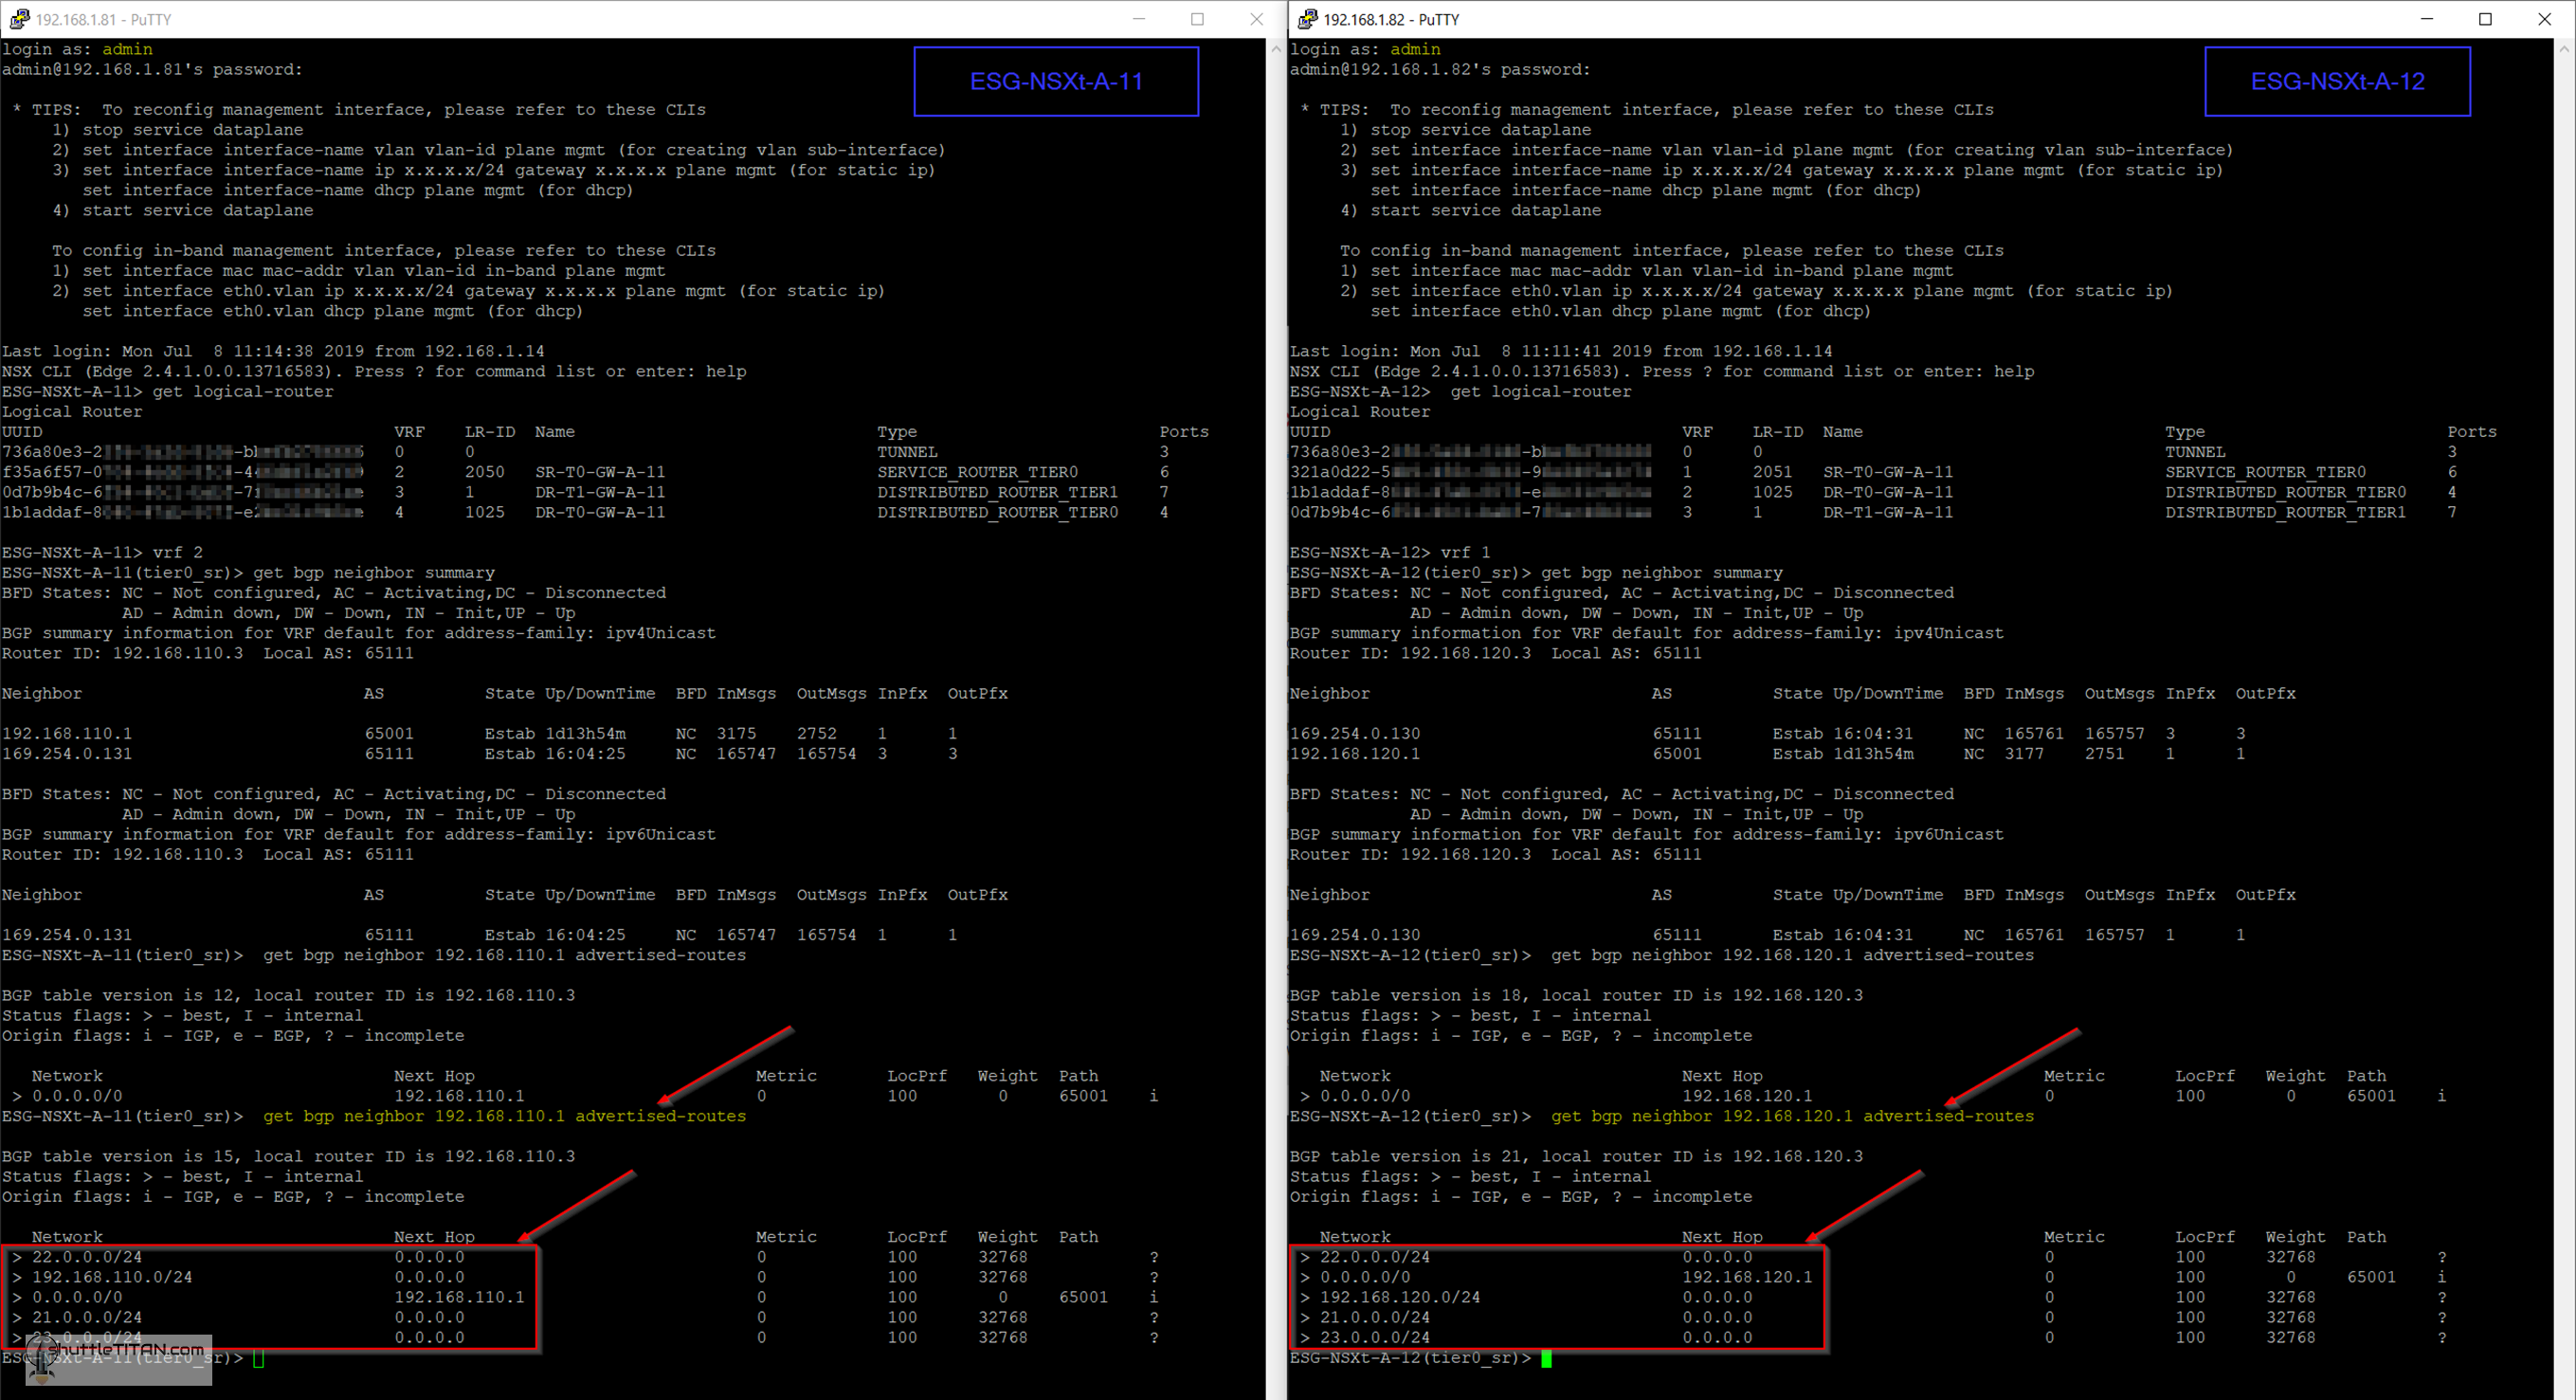
1. Logon to both Edge Nodes via “admin” credentials and run the commands highlighted in yellow in the image below:
Note:get bgp neighbor 192.168.110.1 advertised-routes shows only the default route and none of the overlay segment subnets.
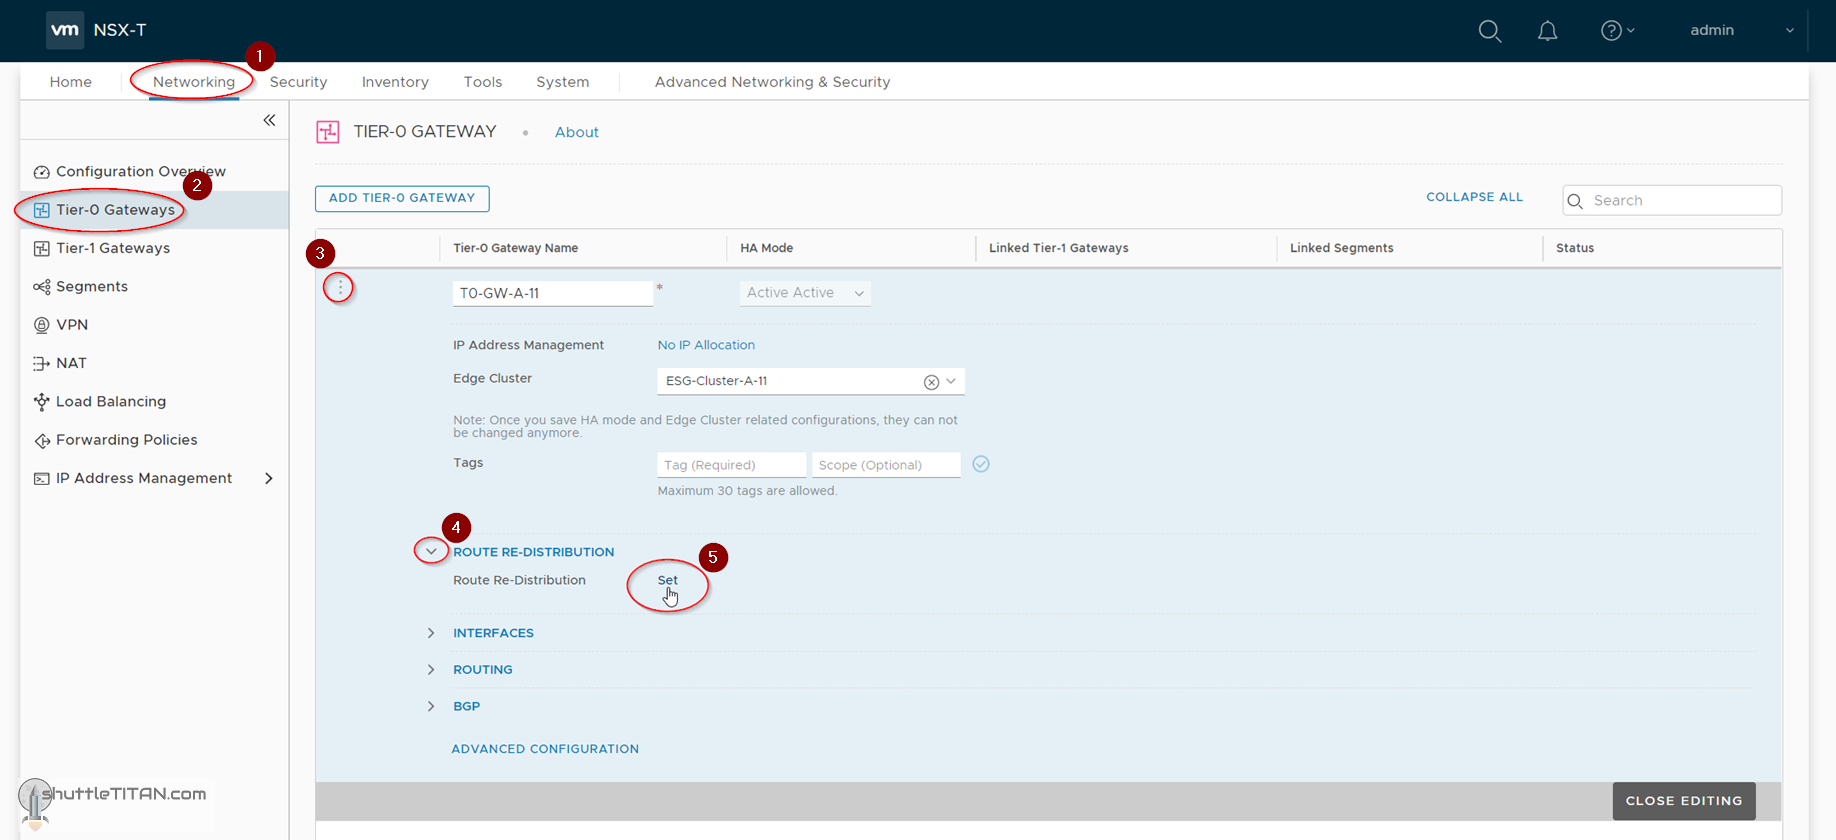
2. Go to NSX-T Manager UI, Click Networking -> Tier-0 Gateways -> Click the three dots (and Edit), expand “ROUTE RE-DISTRIBUTION”, click “Set”:
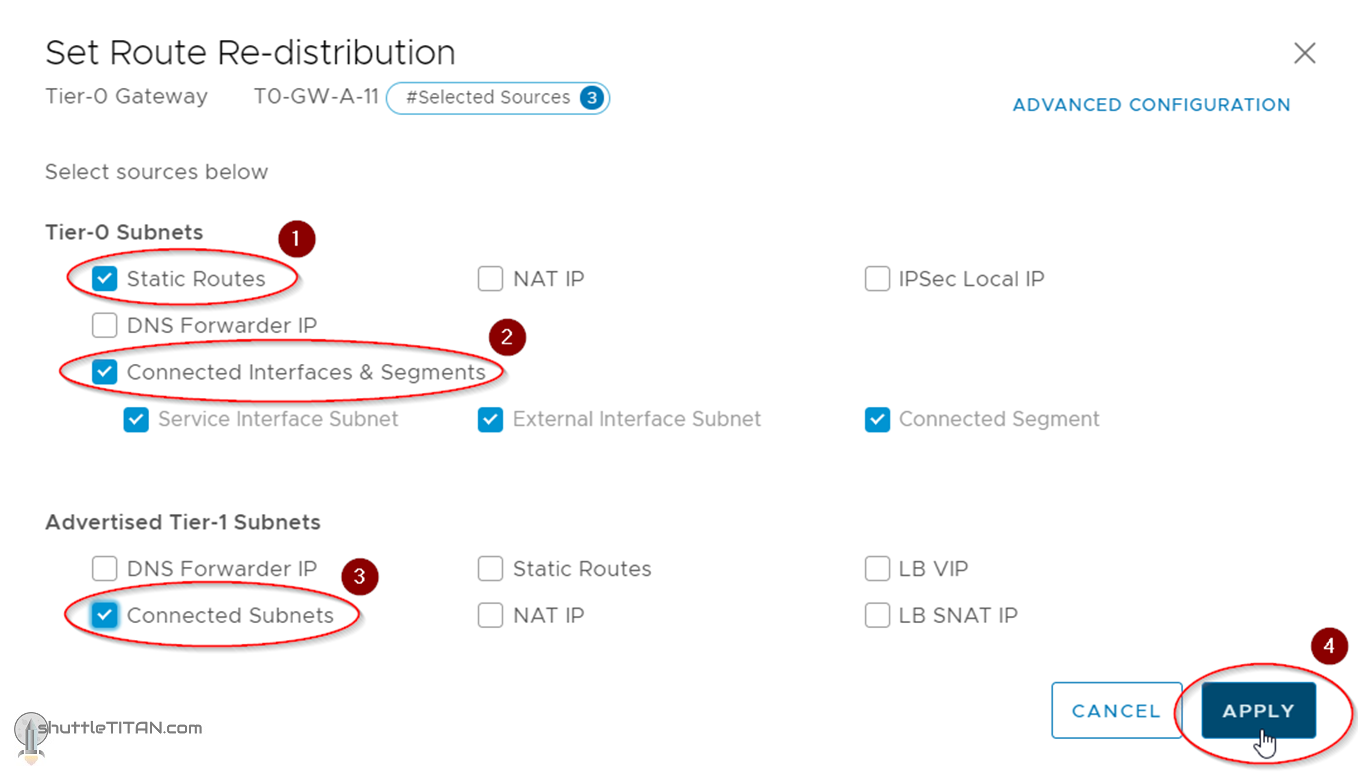
3. Check the box next to “Static Routes”, “Connected Interfaces & Segments” under Tier-0 Subnets; “Connected Subnets” under Advertised Tier-1 Subnets, click Apply:
4. Click SAVE and CLOSE EDITING:
Ok, lets validate the configuration now:
1. Go back to the Edge Nodes, run the same commands as before (highlighted in yellow in the image below):
Note:get bgp neighbor 192.168.110.1 advertised-routes shows all of the overlay segment subnets.
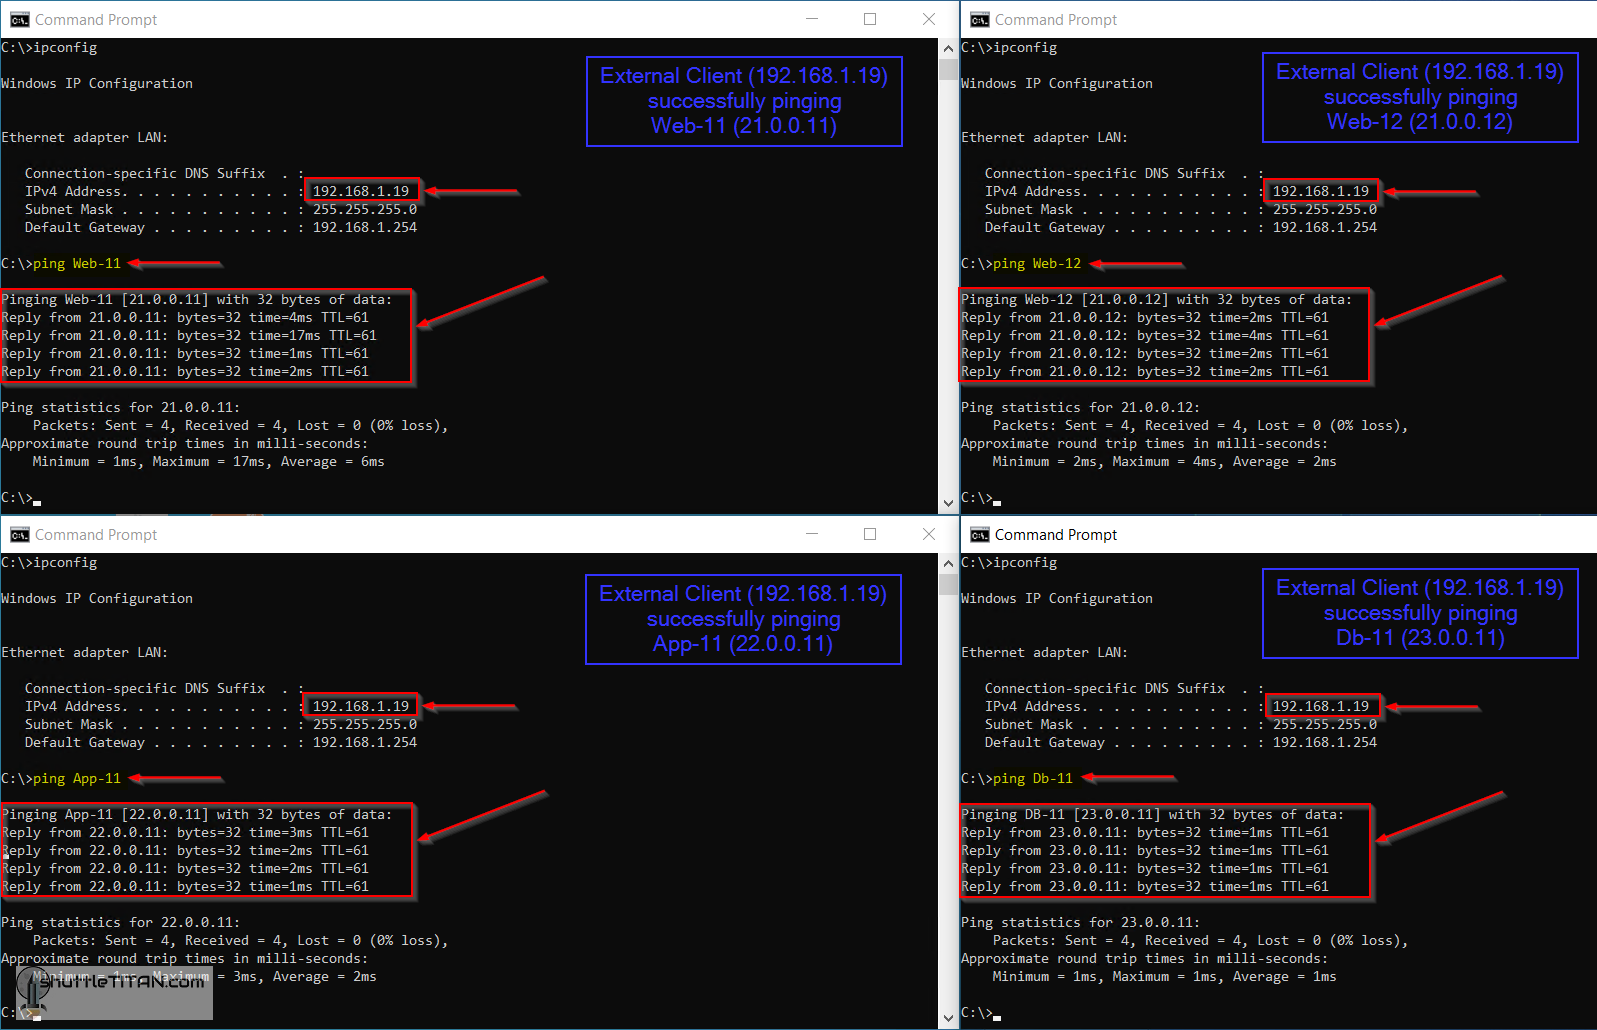
2. Ping from an “External Client” which is on the physical network (connected to the ToR switch) as shown in the screenshot below, to the Overlay VMs:
3. If you get a response, that confirms the ingress connectivity i.e. External Client to Overlay VMs:
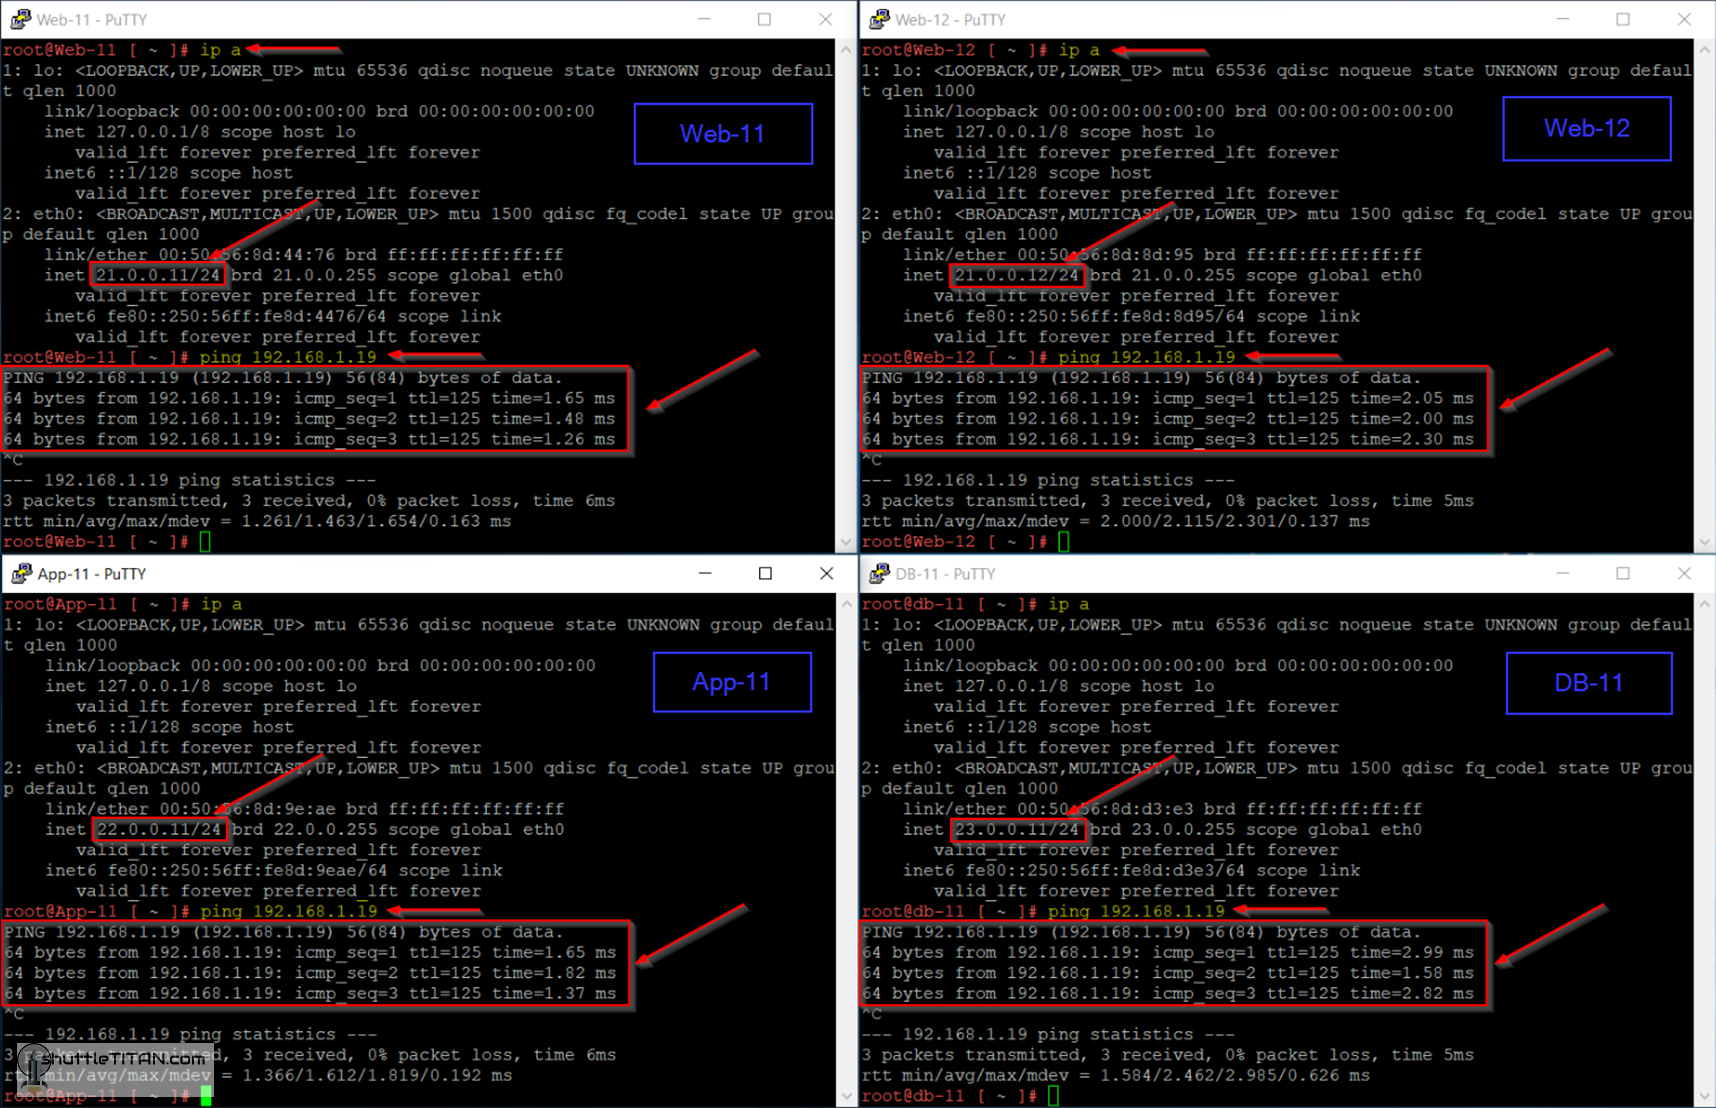
4. You could also confirm egress connectivity i.e. Overlay VMs to External Client:
That concludes the last step of the Second Phase.
Congratulations! you have now successfully completed the NSX-T Installation series. I commend your efforts of spending valuable time in getting your hands dirty with NSX-T Datacenter.
Thank you so much Varun bro for sharing both phases of configuring NSX-T. I studied each post and you explained each step very beautifully. Thanks again for your efforts and sharing…
Thank you ! Indeed this is one of best blog which very nicely pointed all the steps which required in order to install NSX T along with explanation of each task.
We use cookies on our website to give you the most relevant experience by remembering your preferences and repeat visits. By clicking “Accept”, you consent to the use of ALL the cookies.
This website uses cookies to improve your experience while you navigate through the website. Out of these cookies, the cookies that are categorized as necessary are stored on your browser as they are essential for the working of basic functionalities of the website. We also use third-party cookies that help us analyze and understand how you use this website. These cookies will be stored in your browser only with your consent. You also have the option to opt-out of these cookies. But opting out of some of these cookies may have an effect on your browsing experience.
Necessary cookies are absolutely essential for the website to function properly. This category only includes cookies that ensures basic functionalities and security features of the website. These cookies do not store any personal information.
Any cookies that may not be particularly necessary for the website to function and is used specifically to collect user personal data via analytics, ads, other embedded contents are termed as non-necessary cookies. It is mandatory to procure user consent prior to running these cookies on your website.


This is Gold! Thanks a lot for this!
Thank you so much Varun bro for sharing both phases of configuring NSX-T. I studied each post and you explained each step very beautifully. Thanks again for your efforts and sharing…
Thank you ! Indeed this is one of best blog which very nicely pointed all the steps which required in order to install NSX T along with explanation of each task.
Thank you very much
Thank you Varun .. Awesome work !
Never thought NSX-T can be so simple before reading this 🙂