In Step 0, we discussed the overall design and what we are going to achieve at the end of this NSX-T Installation series, via a couple of visio diagrams and few key points. This is the first step towards that end goal, which shows the “step-by-step” instructions and screenshots of the first NSX-T Manager node deployment.
————————————————————————————————————————————————————— But before we proceed, I would encourage you to briefly skim through my blogs below, which you may find useful for this step:
If you are deploying this in your home lab or performing a PoC in a nested vSphere Environment, I would also suggest you to have a quick glance of my other blog Home Lab Setup – Nested ESXi Host’s networking for NSX-T. —————————————————————————————————————————————————————
I would also recommend referring the VMware Product Interoperability Matrices (custom link here) to make sure your existing product versions are supported with the NSX-T version you are deploying.
With that, let’s get started…
Firstly, create four “Host A” records in your DNS server for the three NSX-T Manager nodes we will be deploying and one for the virtual IP. I have created the following, relevant to my environment:
FQDN
IP
NSXt-A-11.vsquare.lab
192.168.1.54
NSXt-A-12.vsquare.lab
192.168.1.55
NSXt-A-13.vsquare.lab
192.168.1.56
NSXt-A-VIP.vsquare.lab
192.168.1.53
1. Log on to the vCenter -> Click “VMs and Templates” -> Right Click the appropriate folder (where you would like to deploy the NSX-T Manager) -> Click “Deploy OVF Template”
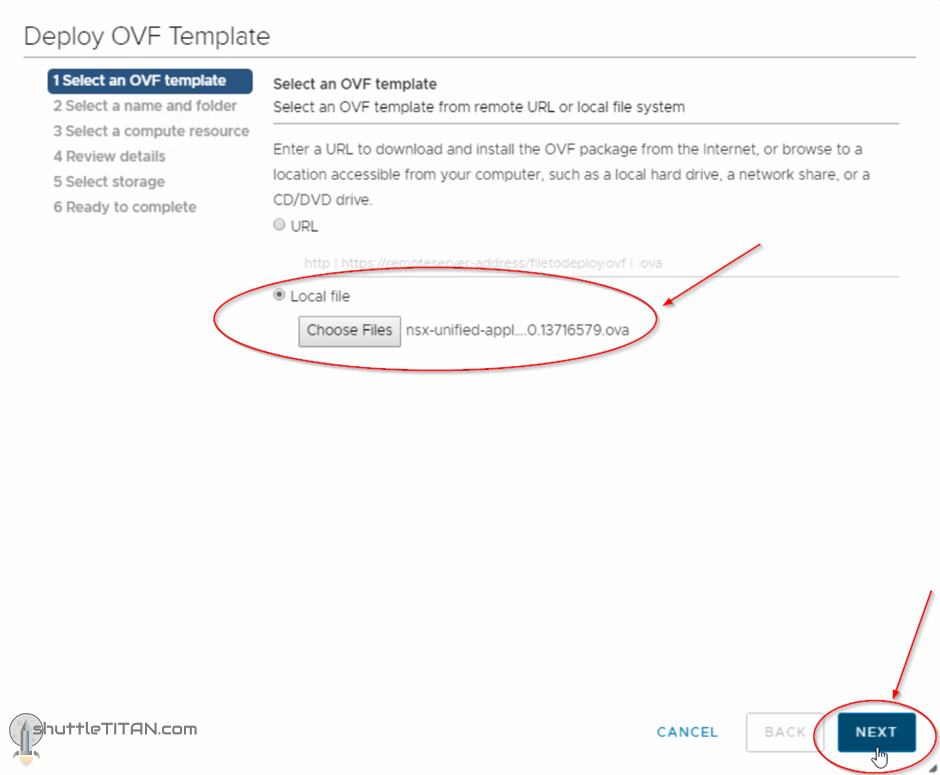
2. Either specify the URL or choose the NSX-T Manager’s ova file, and click “Next”:
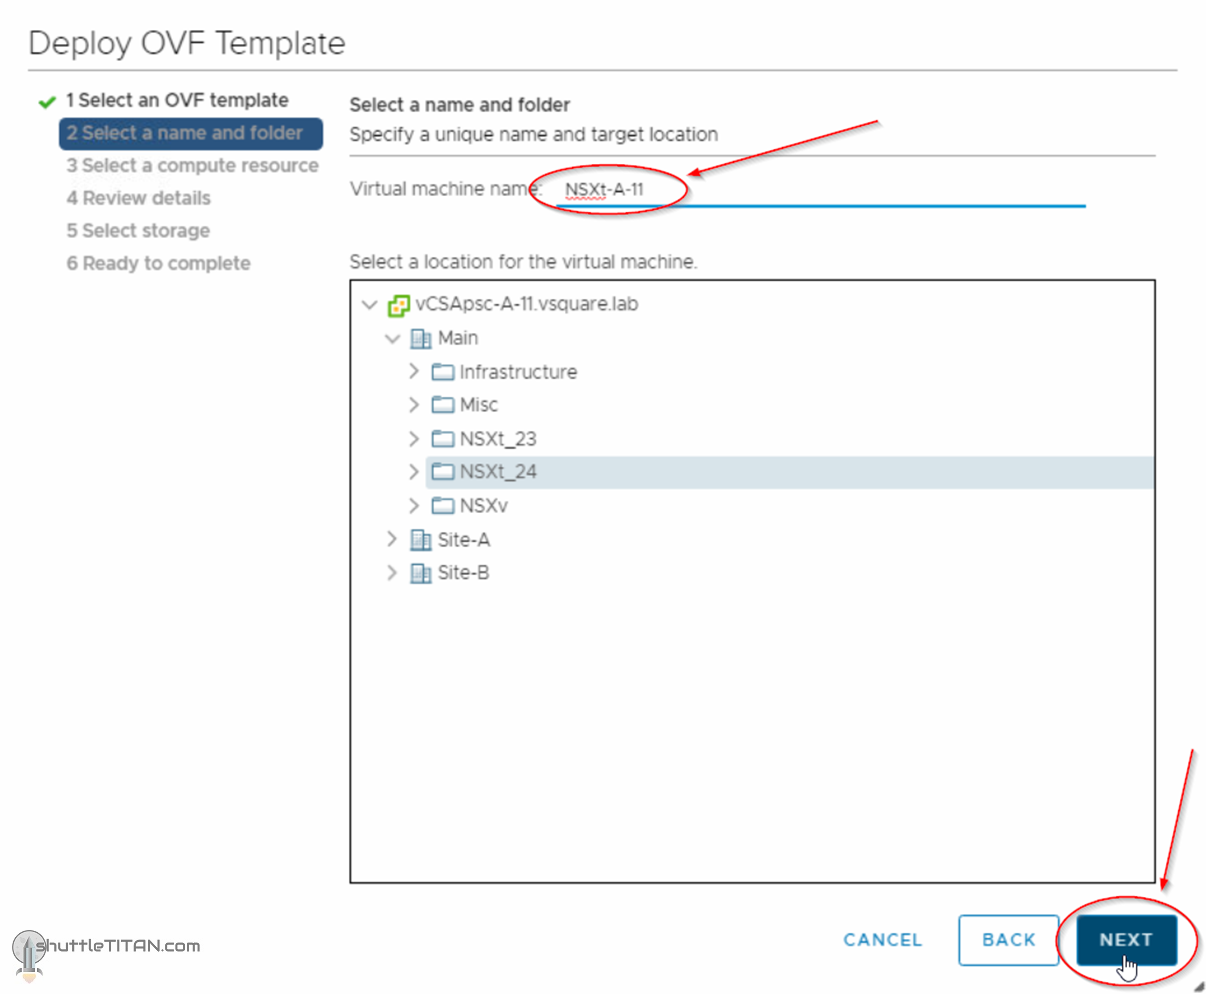
3. Specify the “name” of the virtual machine, click “Next”
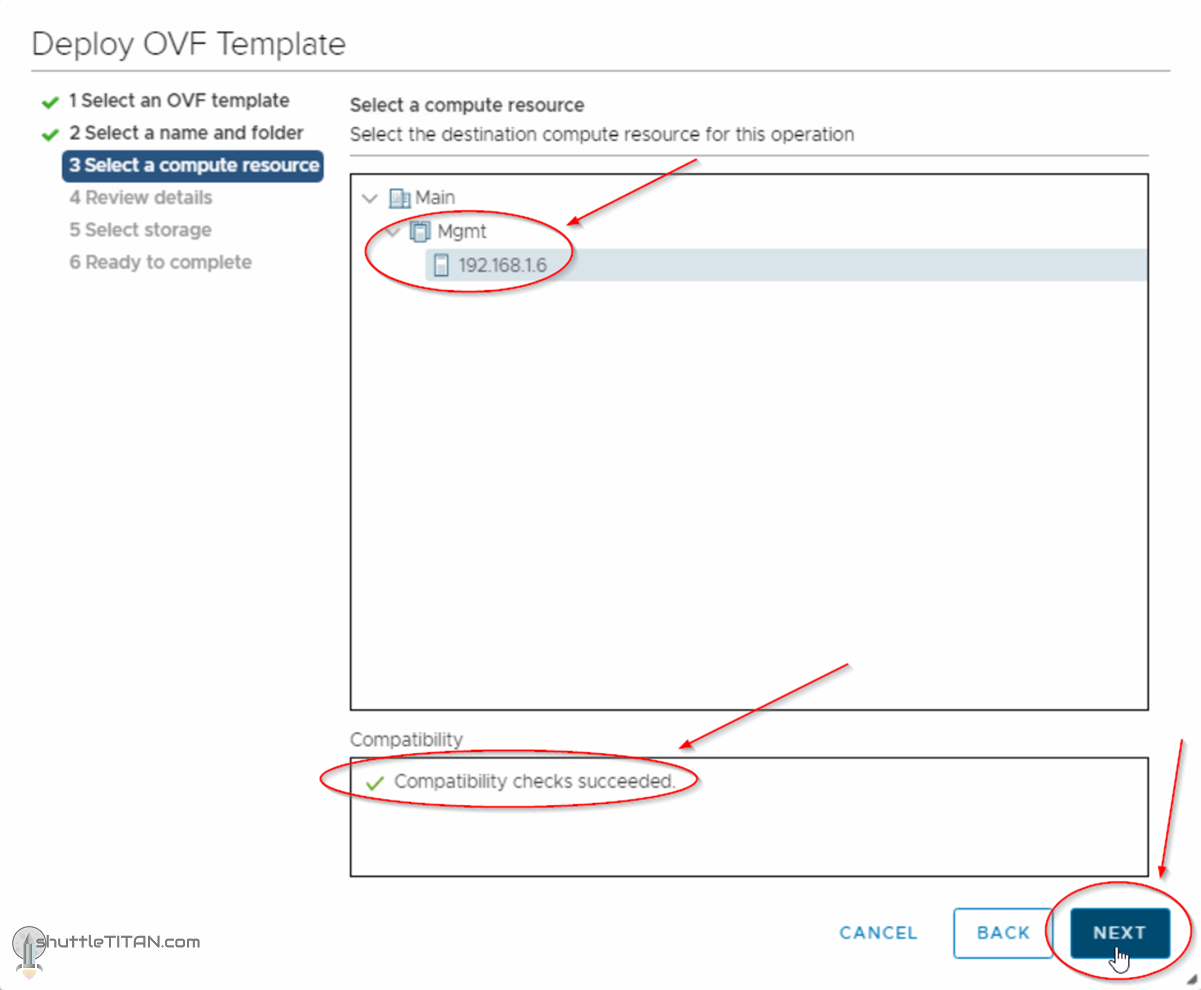
4. Select the compute resource i.e. the cluster, resource pool or the host, check compatibility has succeeded and then click “Next”:
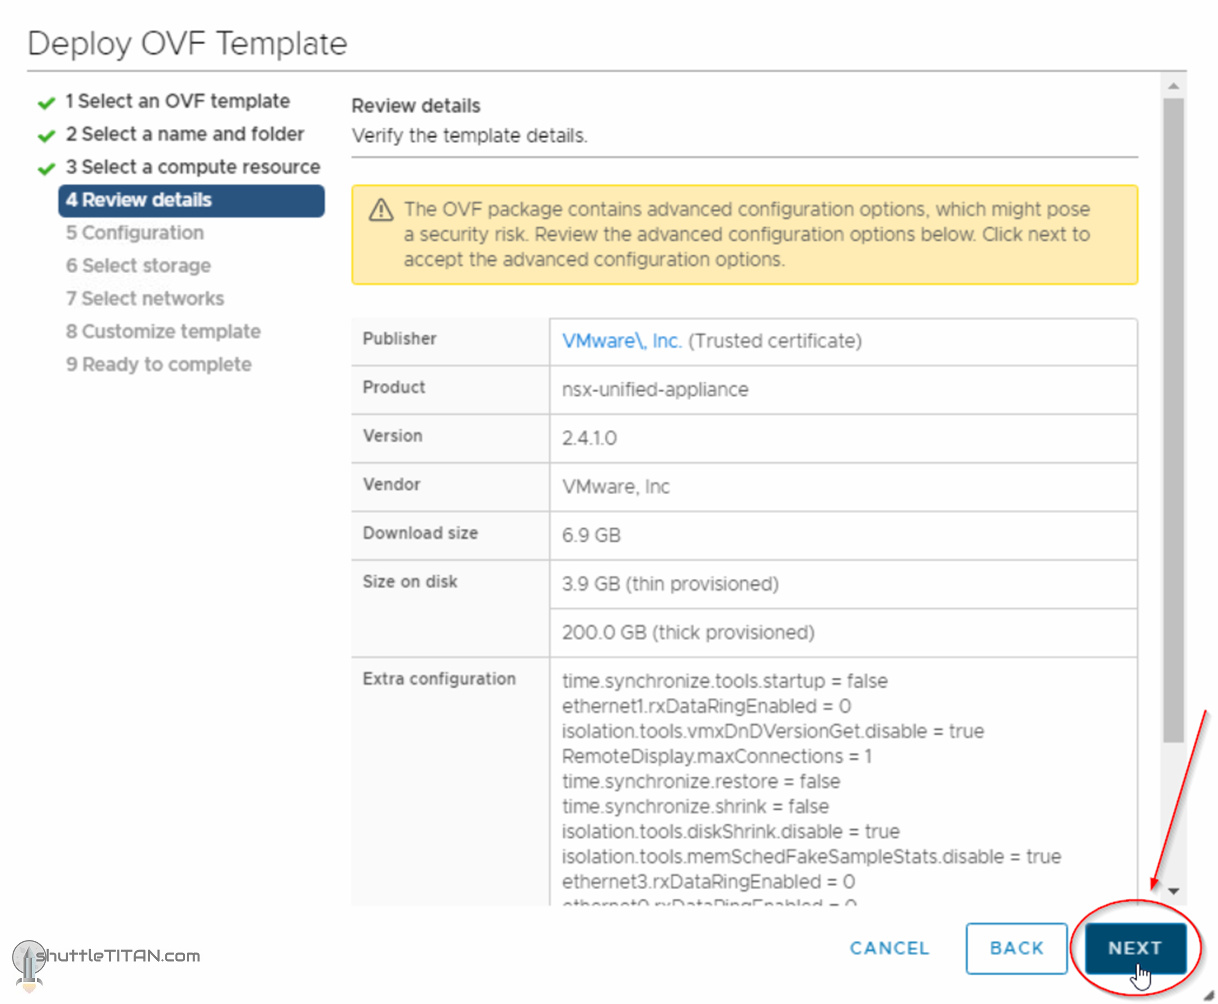
5. Review Details, and click “Next”:
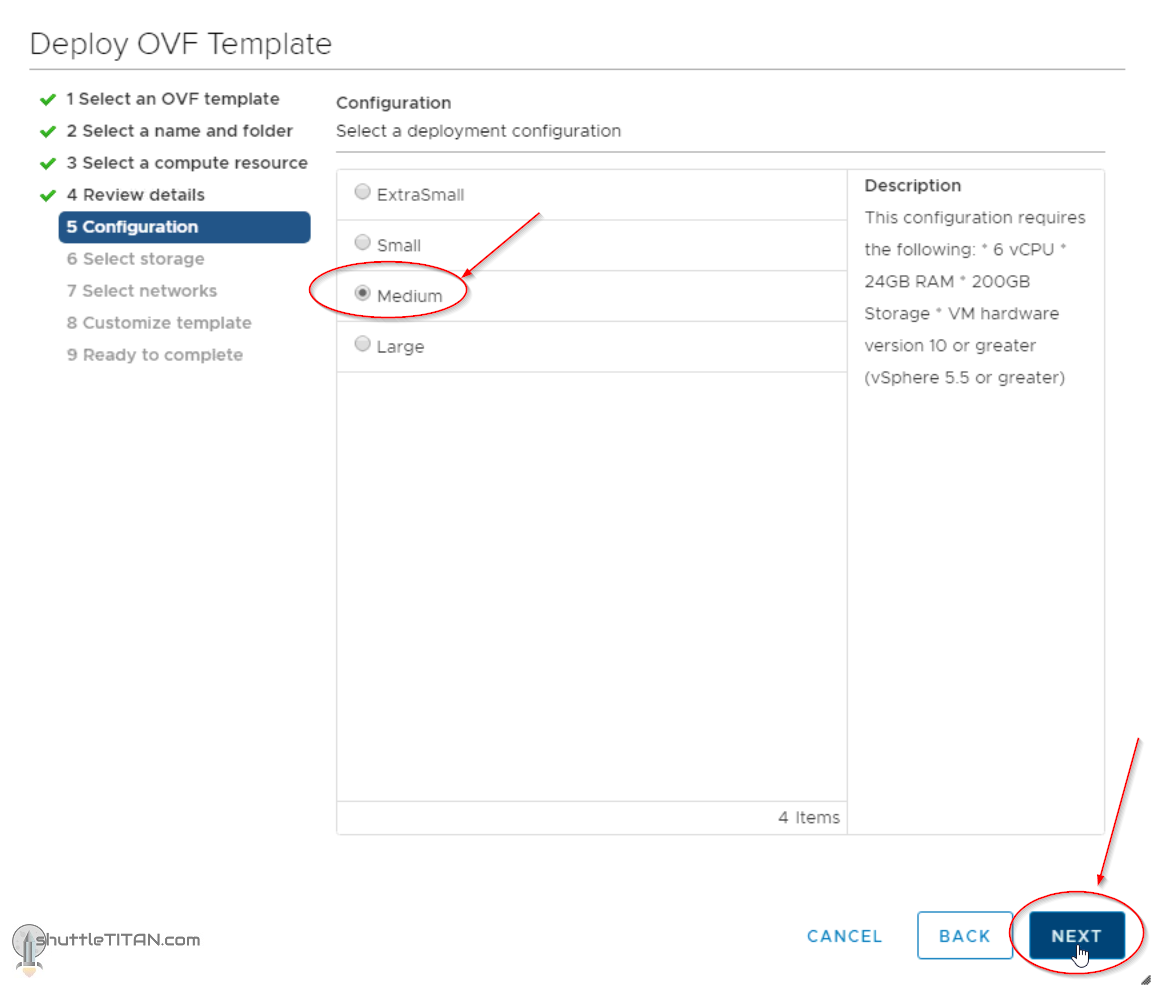
6. Select the deployment configuration size as appropriate and click Next: Note: For production only medium and large size are supported, for more details check point 11 here.
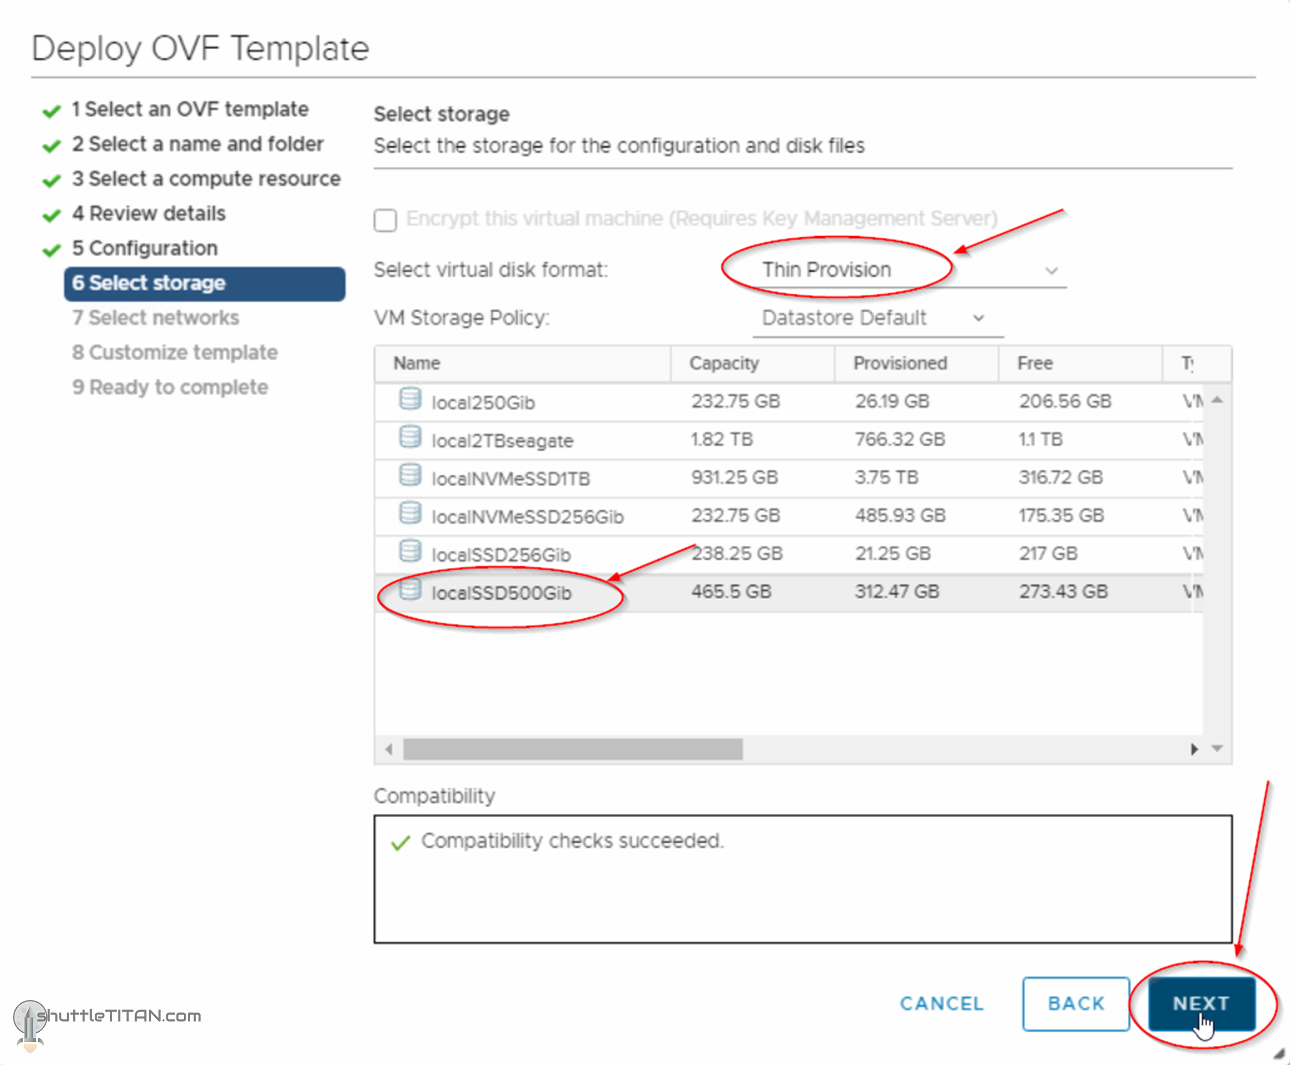
7. Select the datastore and appropriate disk format and storage policy. After the compatibility checks are succeeded, click Next:
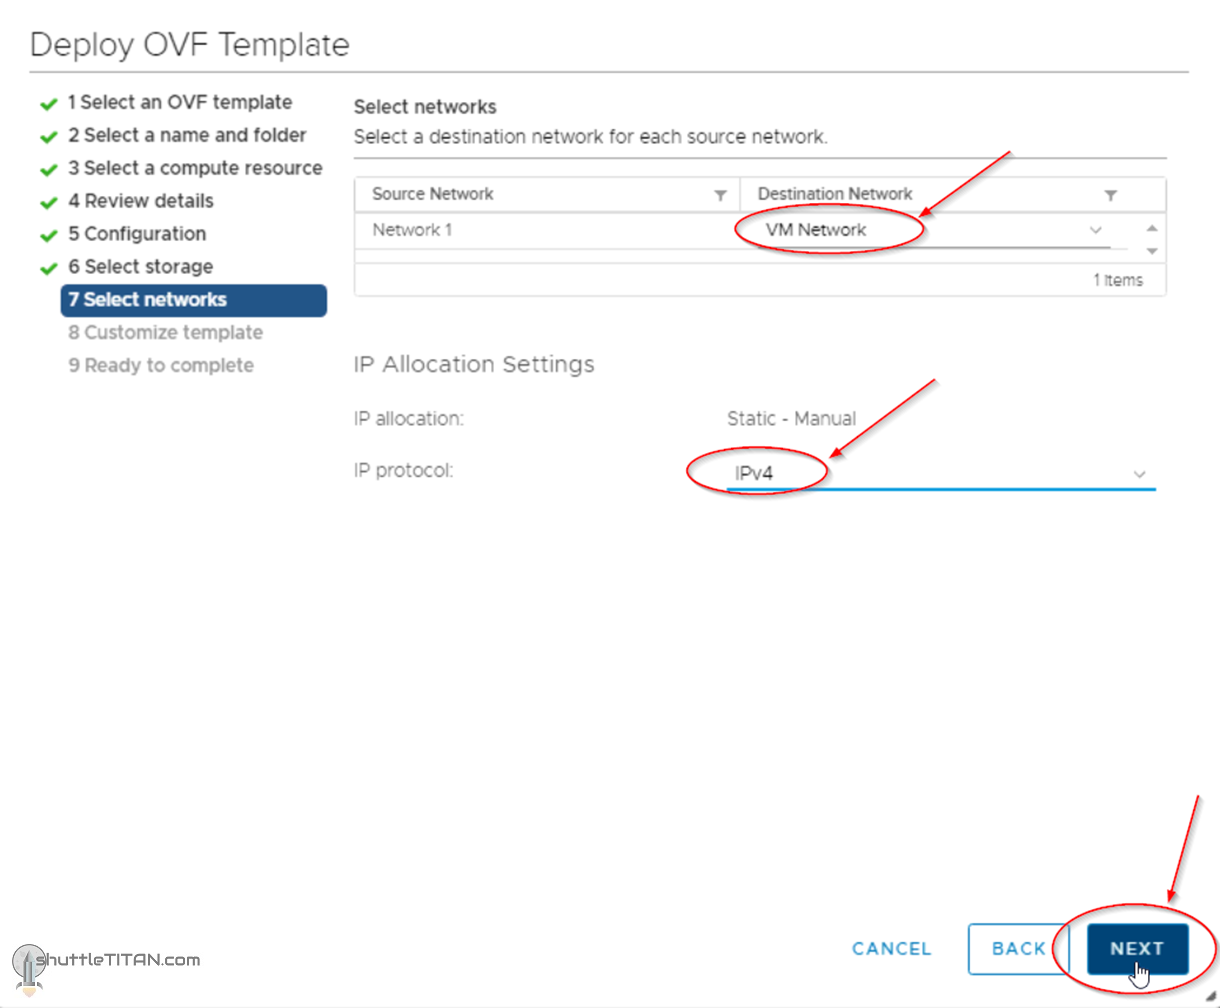
8. Select the appropriate destination network i.e. Port Group and IP Protocol, click Next:
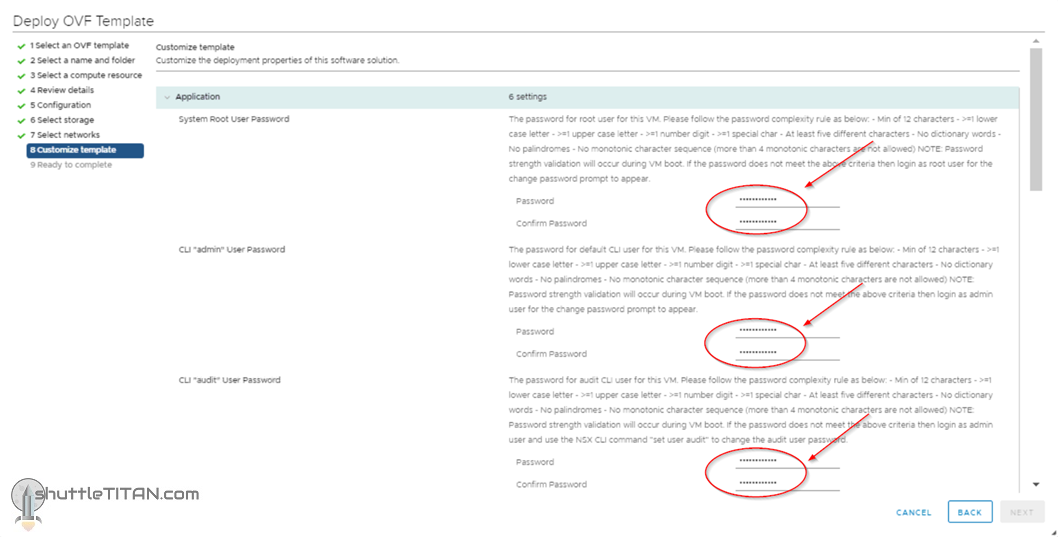
9. Specify the root, admin and audit account’s password and scroll down:
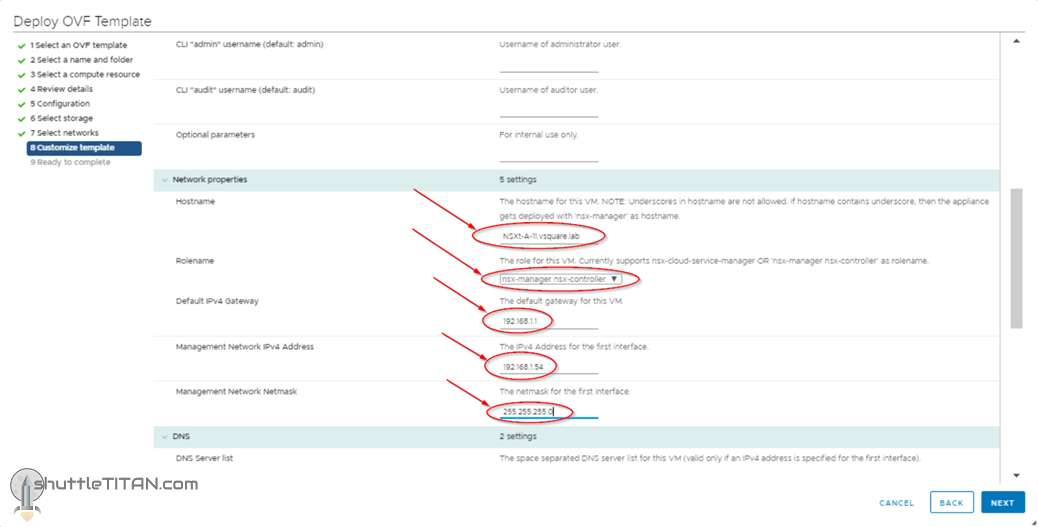
10. Specify the Hostname, role-name and networking details and scroll down:
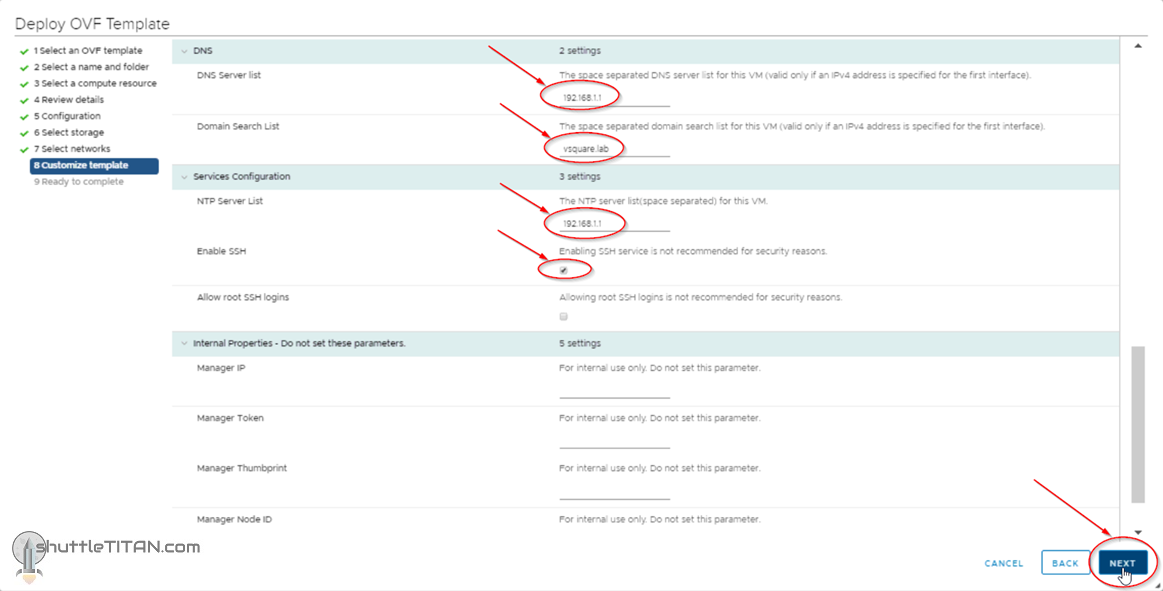
11. Specify the DNS details, NTP and whether you would require SSH to be enabled on the NSX-T Manager, click Next:
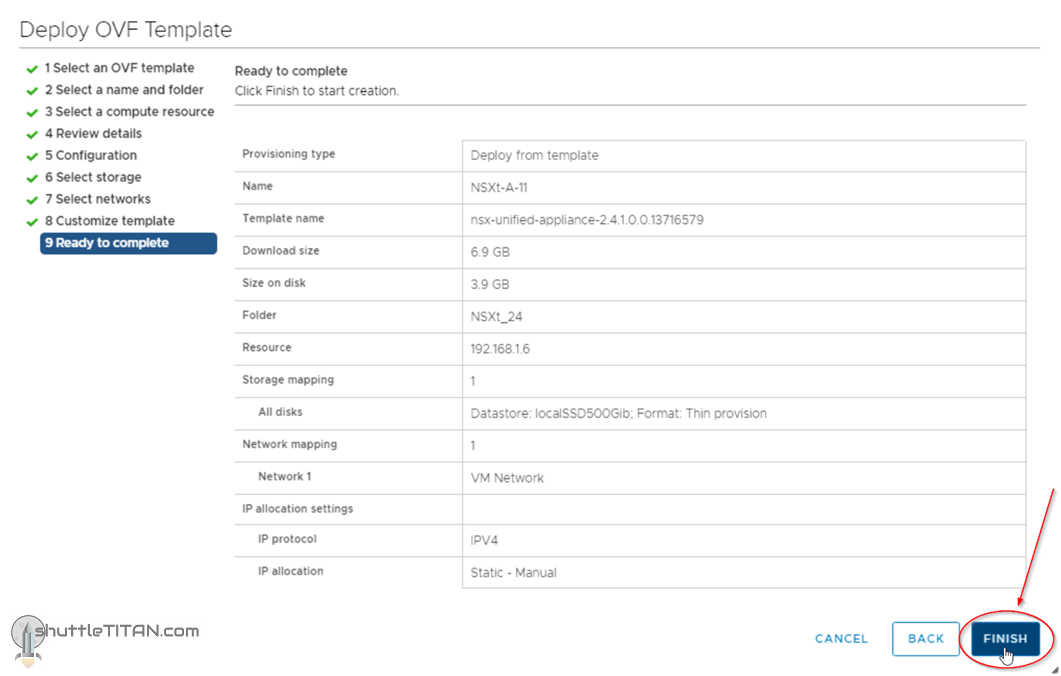
12. Review the details and click Finish:
Post deployment health checks:
Once the NSX-T Manager appliance is deployed it might take several minutes for the NSX-T Manager to start. This is normal behaviour and is also seen after an admin password change when prompted on first login.
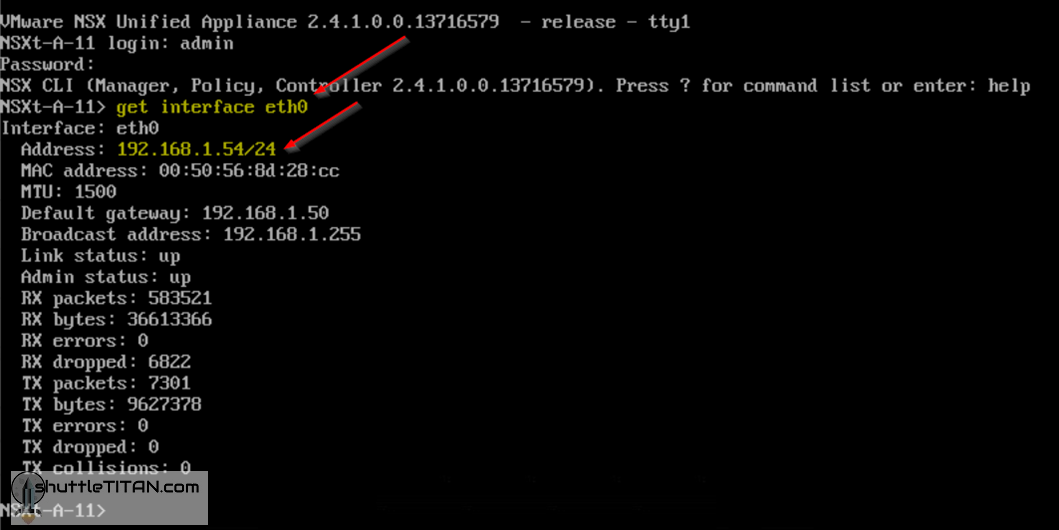
1. Open the console of the NSX-T Manager VM and login with admin credentials, upon successful logon it will show you the version number and the role it is performing:
2. Verify the network configuration by using the command below:
get interface eth0
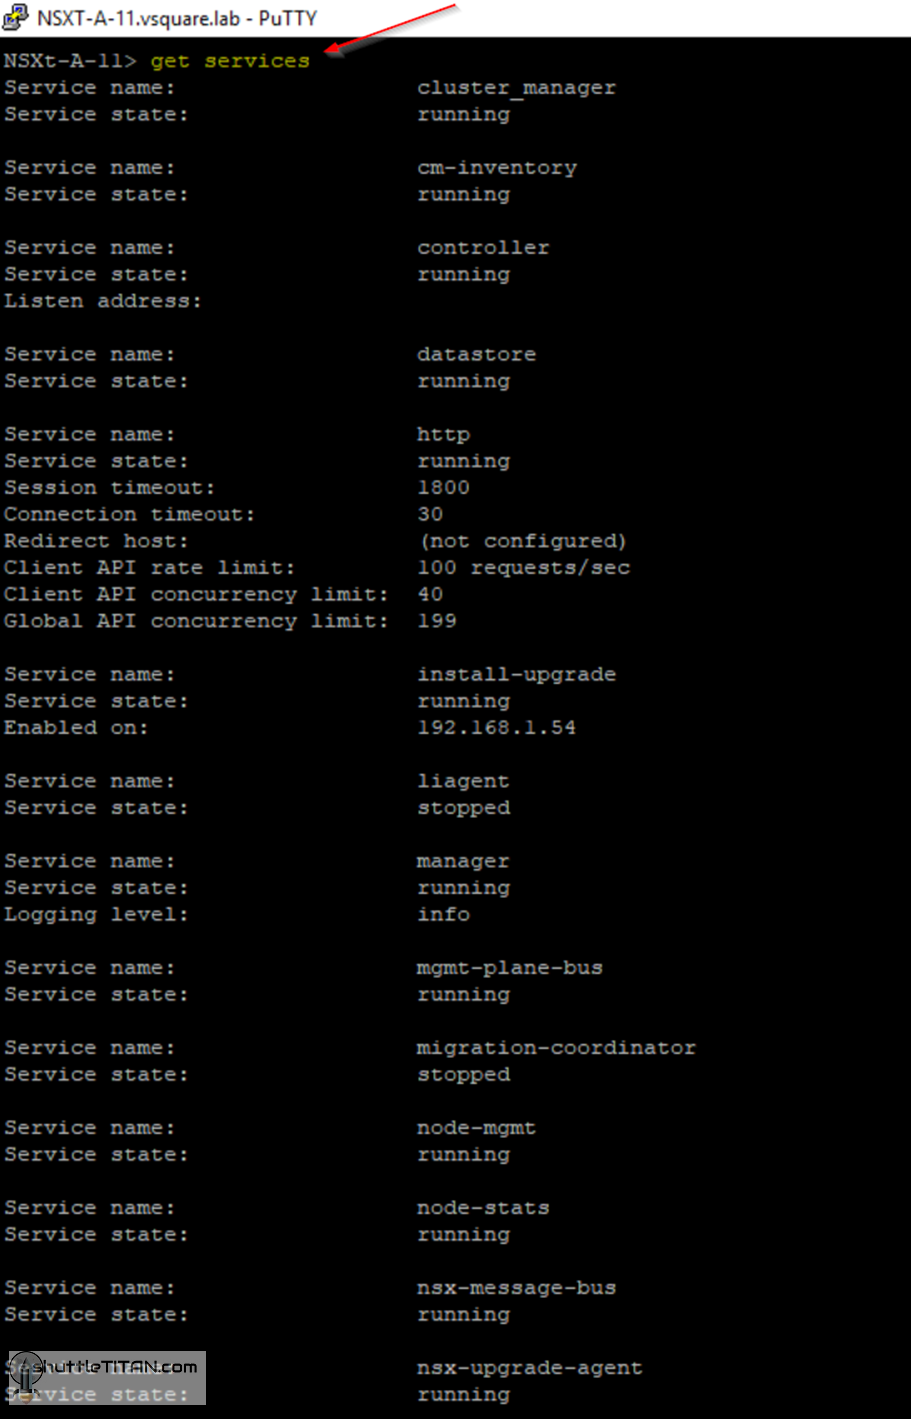
3. Check the status of the services by running the following command:
get services
Note: liagent, migration-coordinator, and snmp services are not started by default
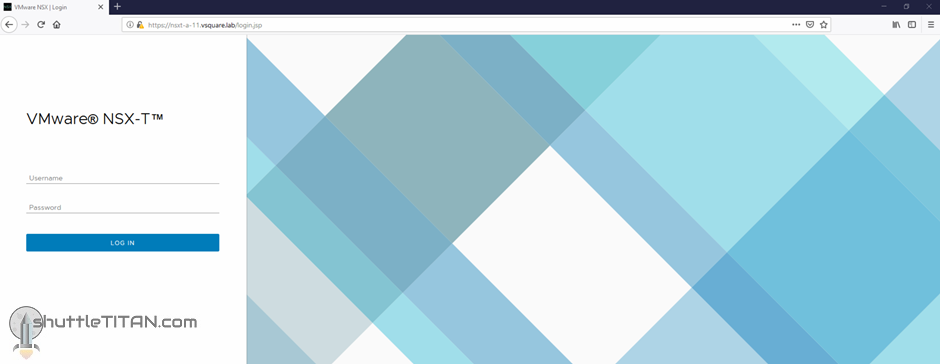
After all other services have started successfully, type “exit” command to logout. You should now be able to visit the NSX-T Manager UI login page via the URL “https://<FQDN or IP>”
This concludes this step of deploying the first node of NSX-T manager successfully.
We use cookies on our website to give you the most relevant experience by remembering your preferences and repeat visits. By clicking “Accept”, you consent to the use of ALL the cookies.
This website uses cookies to improve your experience while you navigate through the website. Out of these cookies, the cookies that are categorized as necessary are stored on your browser as they are essential for the working of basic functionalities of the website. We also use third-party cookies that help us analyze and understand how you use this website. These cookies will be stored in your browser only with your consent. You also have the option to opt-out of these cookies. But opting out of some of these cookies may have an effect on your browsing experience.
Necessary cookies are absolutely essential for the website to function properly. This category only includes cookies that ensures basic functionalities and security features of the website. These cookies do not store any personal information.
Any cookies that may not be particularly necessary for the website to function and is used specifically to collect user personal data via analytics, ads, other embedded contents are termed as non-necessary cookies. It is mandatory to procure user consent prior to running these cookies on your website.