In the previous step, we deployed NSX-T manager and used few commands for post installation health check for network configuration and services status. This blog is the “Step 2” of the NSX-T Installation series which shows step-by-step instructions to add Compute Manager.
—————————————————————————————————————————————————————
But before we proceed, I would encourage you to briefly skim through my blogs below, which you may find useful for this step:
- NSX-T Architecture (Revamped) for v2.4 and later.
- Series Overview: Step 0 – High Level Design
- Preceding step: Step 1 – Deploy NSX-T Manager
If you are deploying this in your home lab or performing a PoC in a nested vSphere Environment, I would also suggest you have a quick glance of my blog Home Lab Setup – Nested ESXi Host’s networking for NSX-T.
—————————————————————————————————————————————————————
Let’s begin with the question – What is a Compute Manager?
A compute manager in this case is a VMware vCenter Server. It hosts centralised application that manages multiple ESXi Hosts and VMs from a single glass of pane.
As the vCenter holds all the information centrally available, NSX-T Data Center polls all the compute managers to find out the changes, such as the addition or removal of hosts or VMs and updates its inventory accordingly.
Is it necessary to add a Compute Manager?
No, adding a compute manager is optional, because NSX-T can also get the inventory information without a compute manger i.e. from standalone hosts and VMs.
So the question arises, why do we add it?
In addition to NSX-T polling the compute manager and updating its inventory, it provides significant benefits of automated deployment of additional NSX-T managers, Edge Nodes and the components on ESXi Hosts being configured as Transport Nodes.
Let’s get started…
1. Logon to the NSX-T Manager UI https:// via admin credentials.
2. Click -> System -> Fabric -> Compute Managers -> Add:

3. Specify the compute manager’s name, description, FQDN or IP, credentials and click the ADD button:
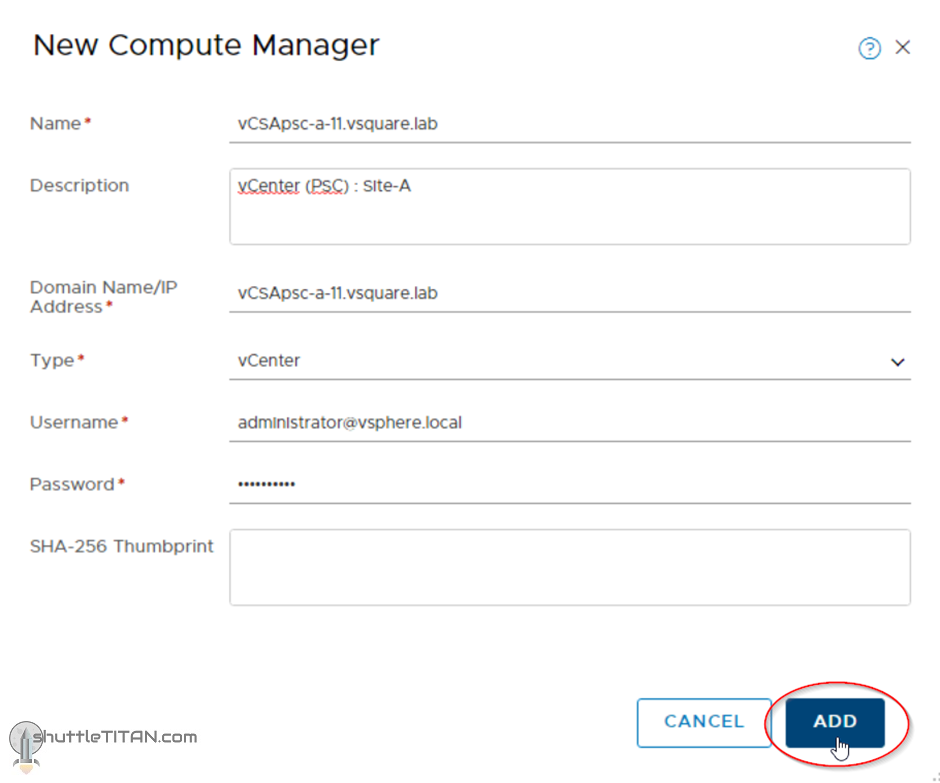
4. You will receive a warning for the thumbprint which can be ignored, click ADD:

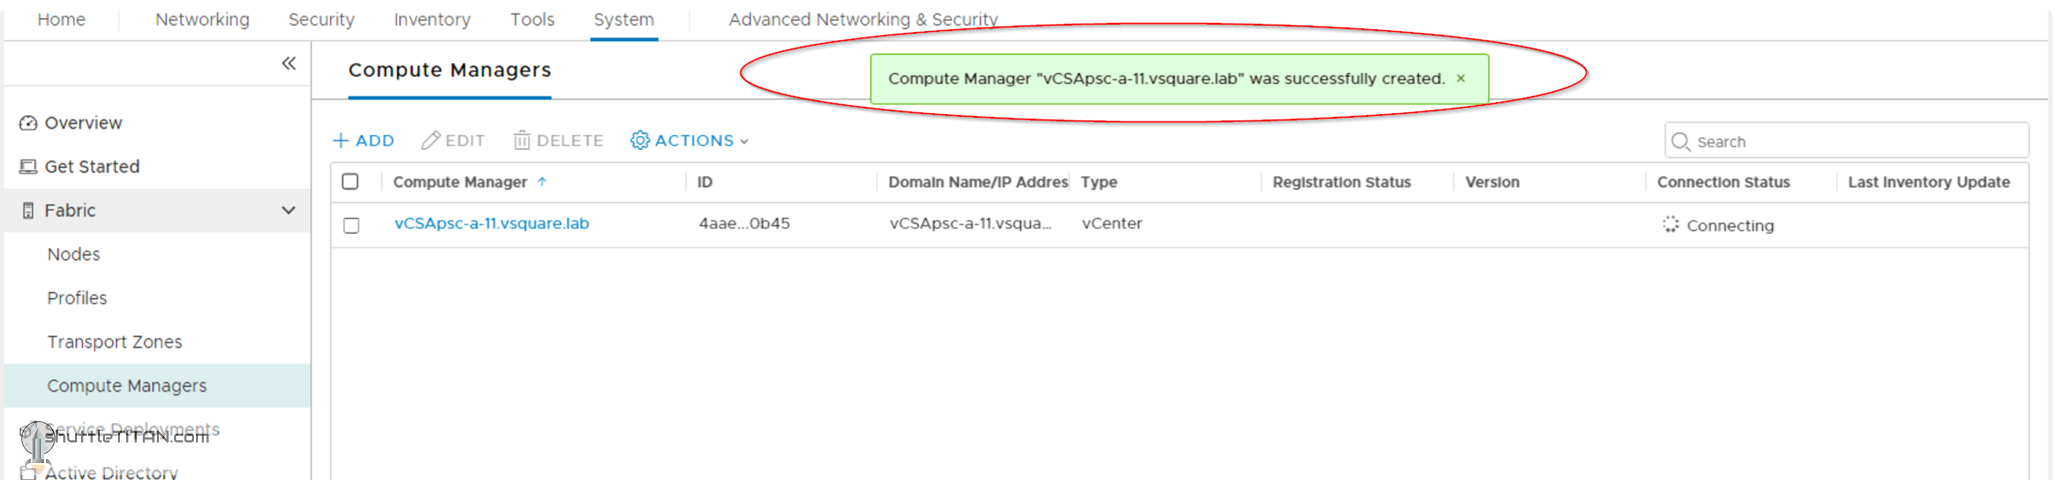
5. NSX-T Manager will show a message briefly that the “compute manager” was successfully created:
Add any other vCenter Servers in your environment (as necessary) and confirm the “Registration” and “Connection Status” as depicted in the image below:
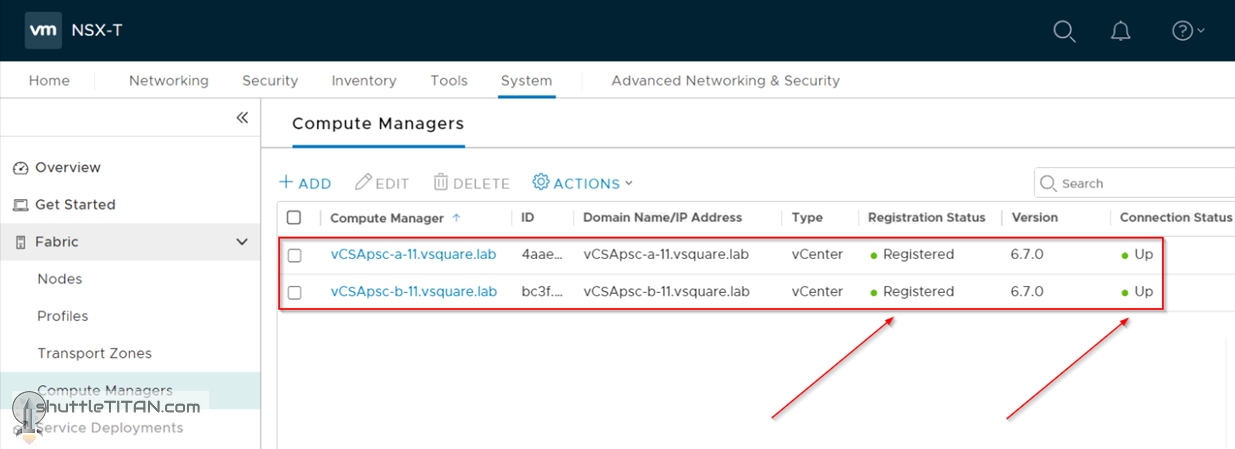
This concludes this step of adding a compute manager successfully.
Let’s proceed ahead with the next blog in this series Step 3 – Deploy Additional NSX-T Manager Nodes from UI.