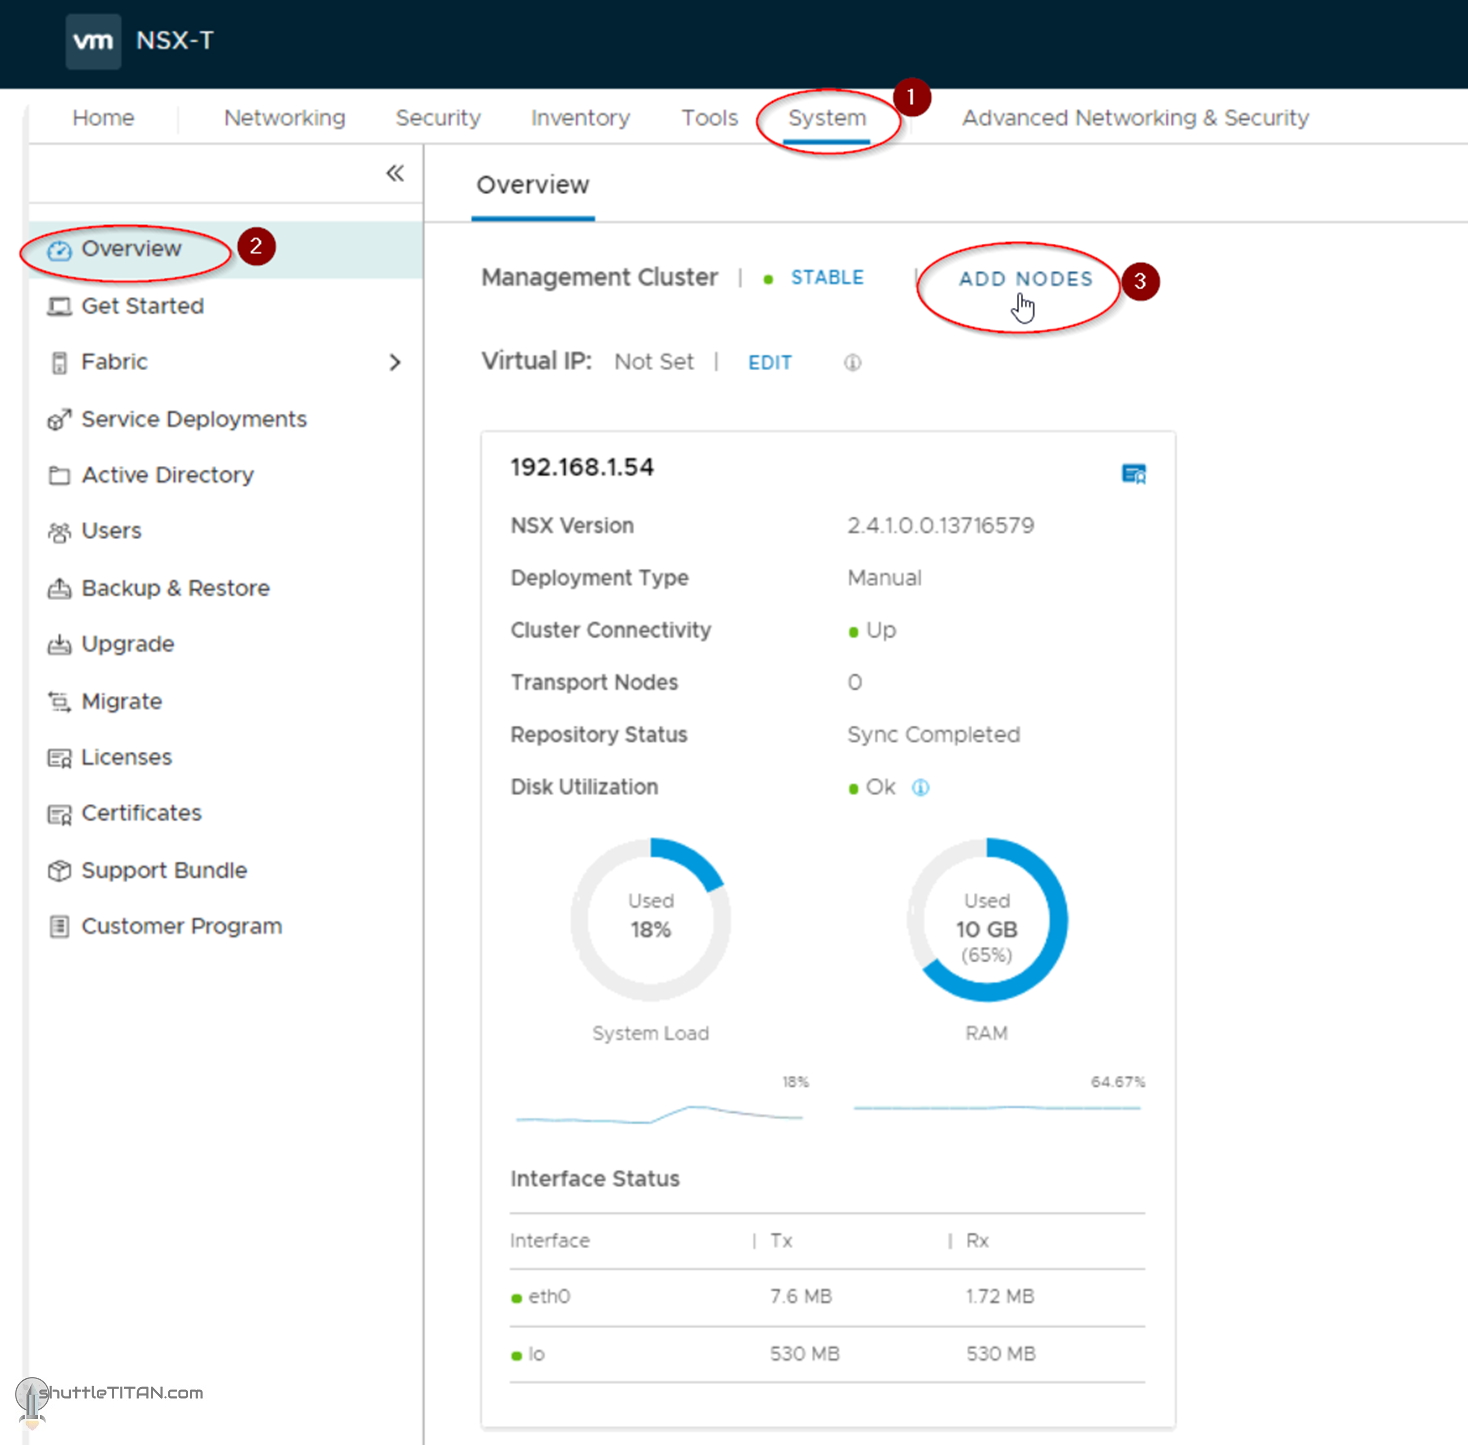
In the previous step, we discussed – what is compute manager, its benefits and the steps to add it to the NSX-T Manager. This blog is the “Step 3” of the NSX-T Installation series which shows step-by-step instructions to deploy additional NSX-T Managers from the UI to form a Cluster.
————————————————————————————————————————————————————— But before we proceed, I would encourage you to briefly skim through my blogs below, which you may find useful for this step:
If you are deploying this in your home lab or performing a PoC in a nested vSphere Environment, I would also suggest you have a quick glance of my blog Home Lab Setup – Nested ESXi Host’s networking for NSX-T. —————————————————————————————————————————————————————
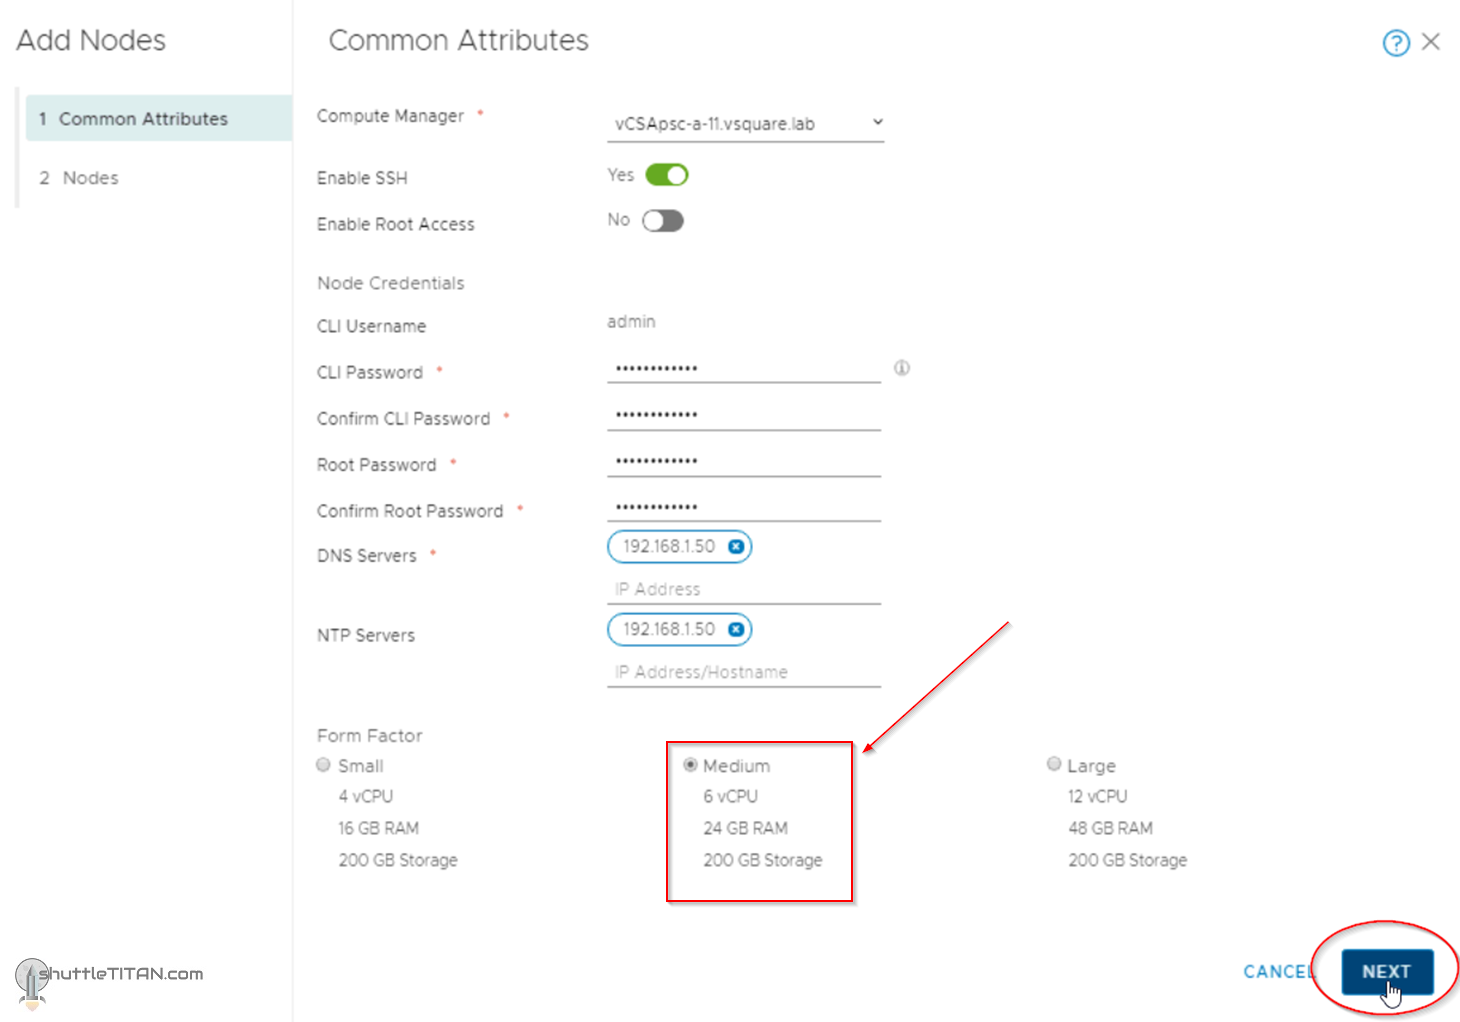
2. Select the Compute Manager from the drop-down menu, enable SSH (if required), enter the cli and root password, DNS, NTP and select the form factor:
Note: Select the same form factor as of the first NSX-T manager deployment in Step 1.
3. Specify the name, vSphere cluster, datastore and network details:
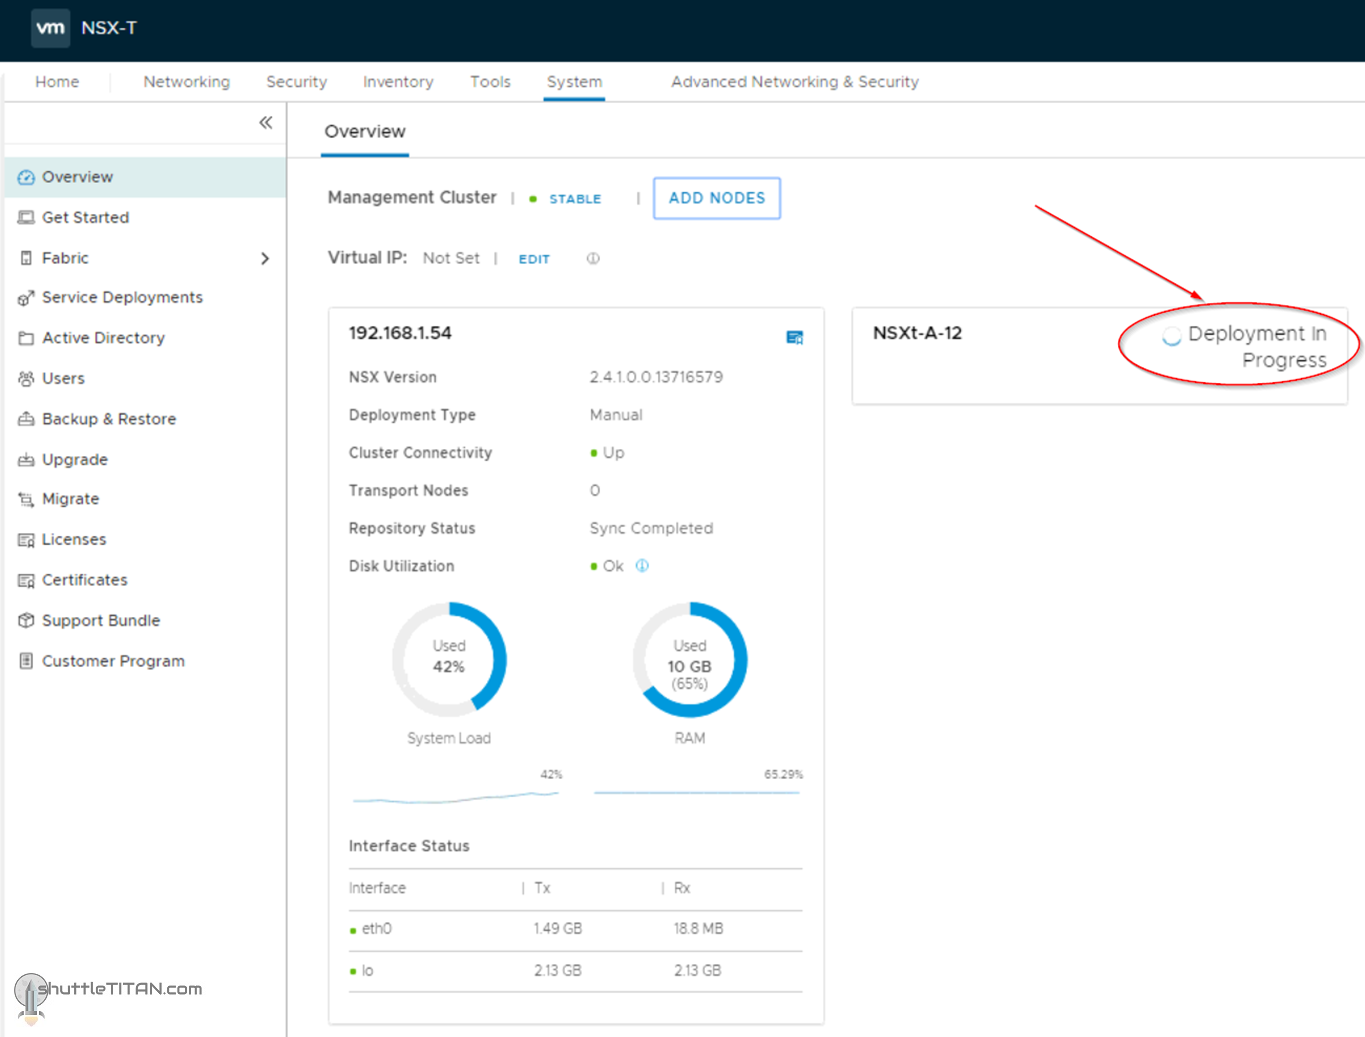
The status could now be monitored from the same screen, screenshot below showing deployment in progress:
You could also monitor the deployment from the vCenter’s Recent Tasks:
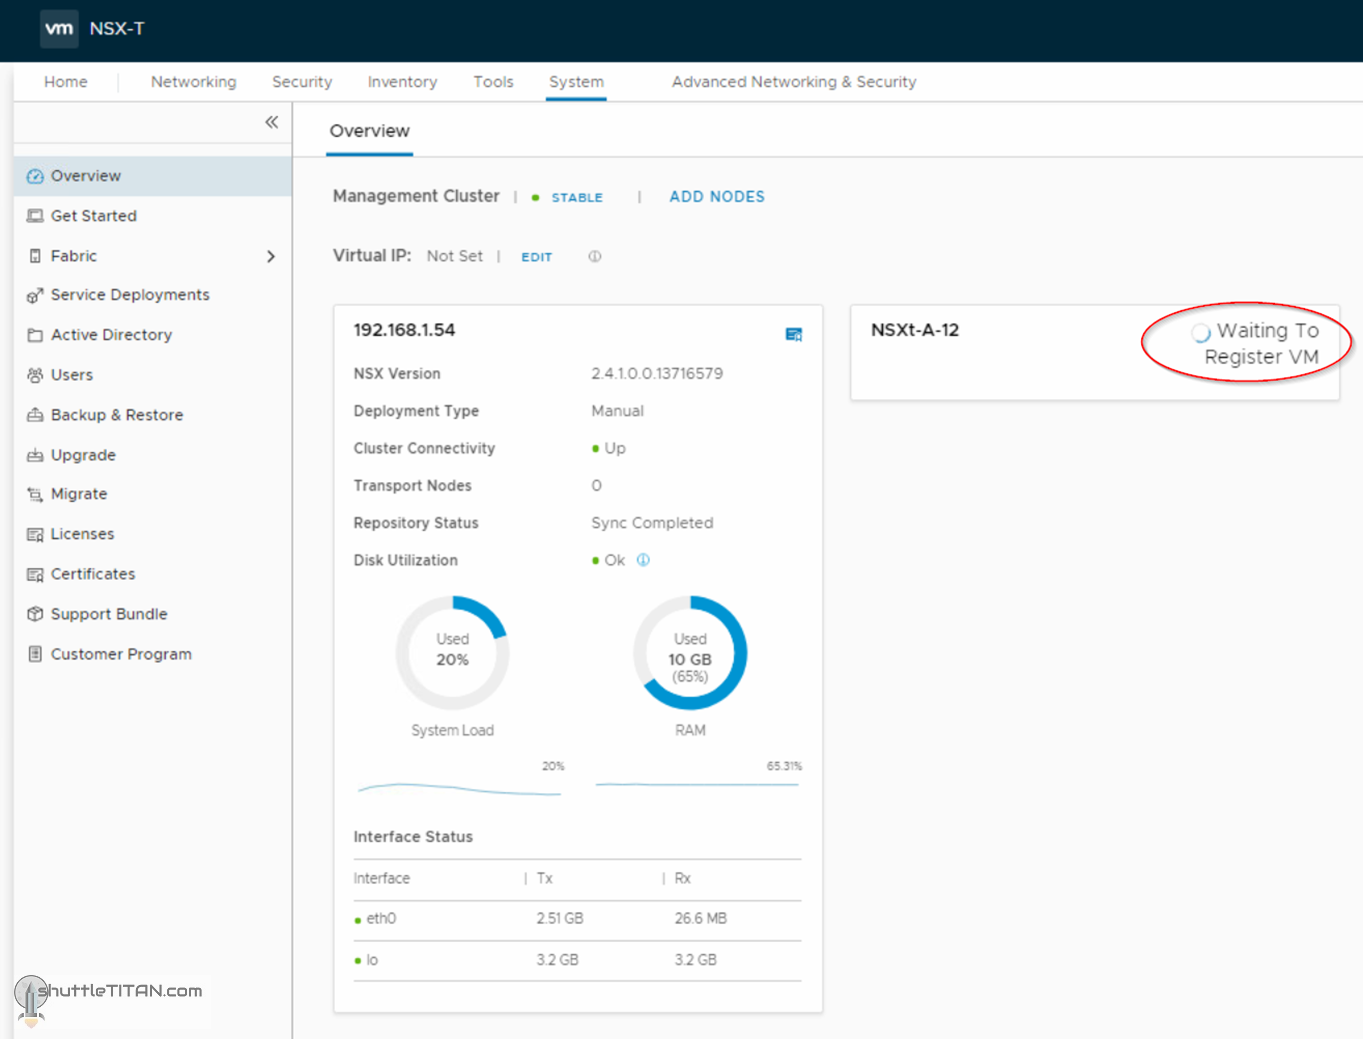
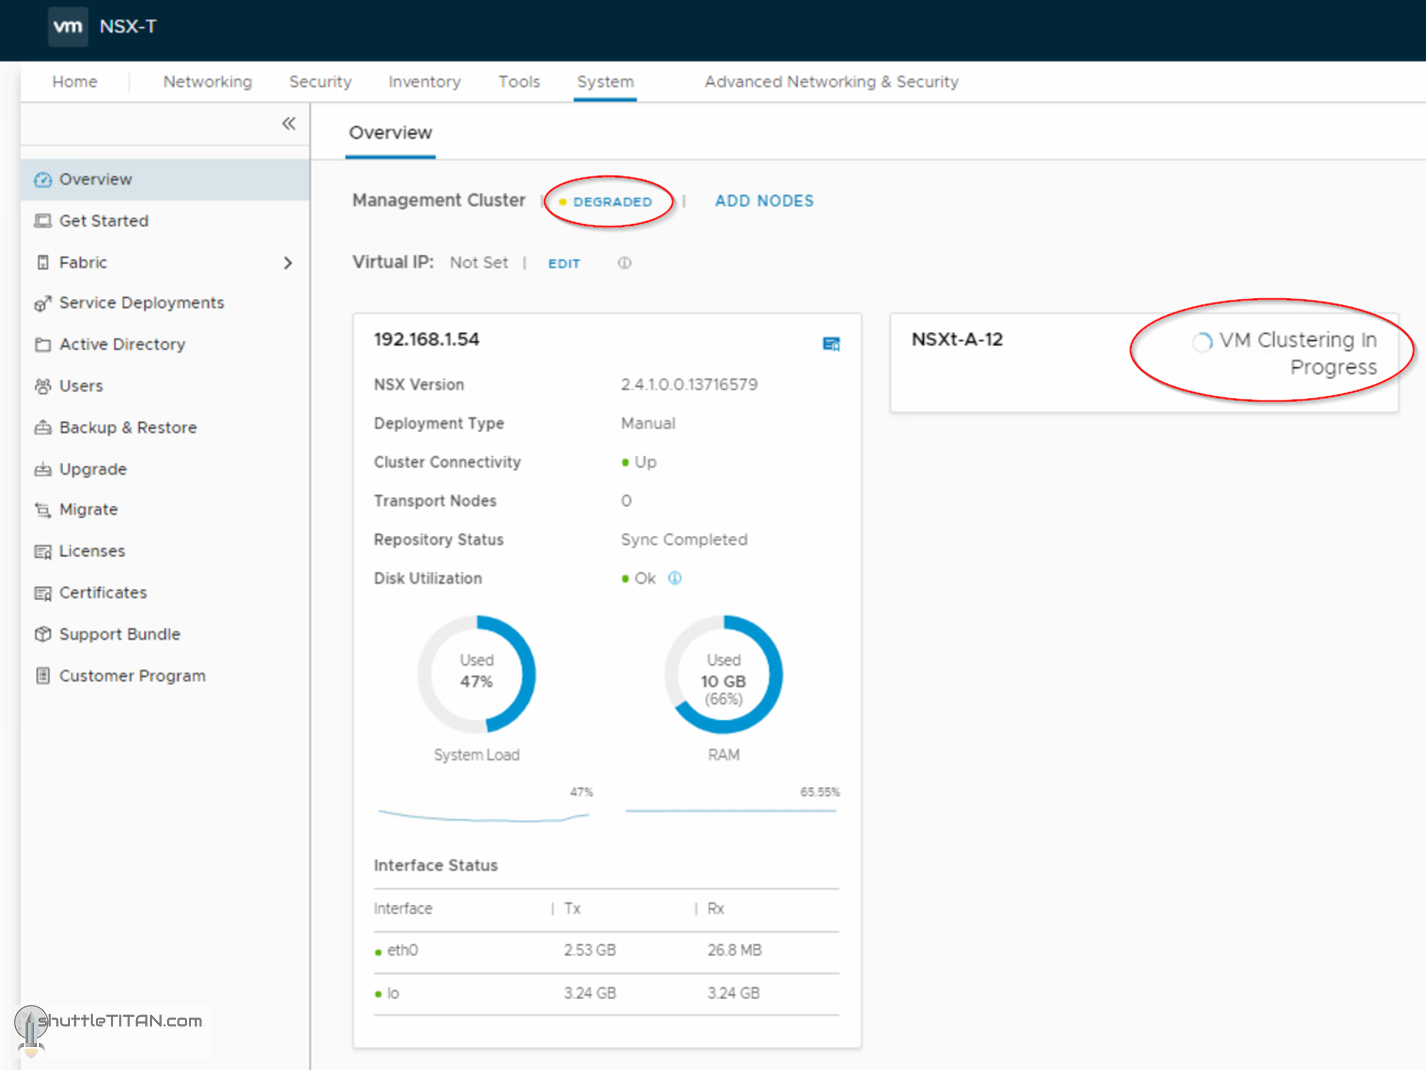
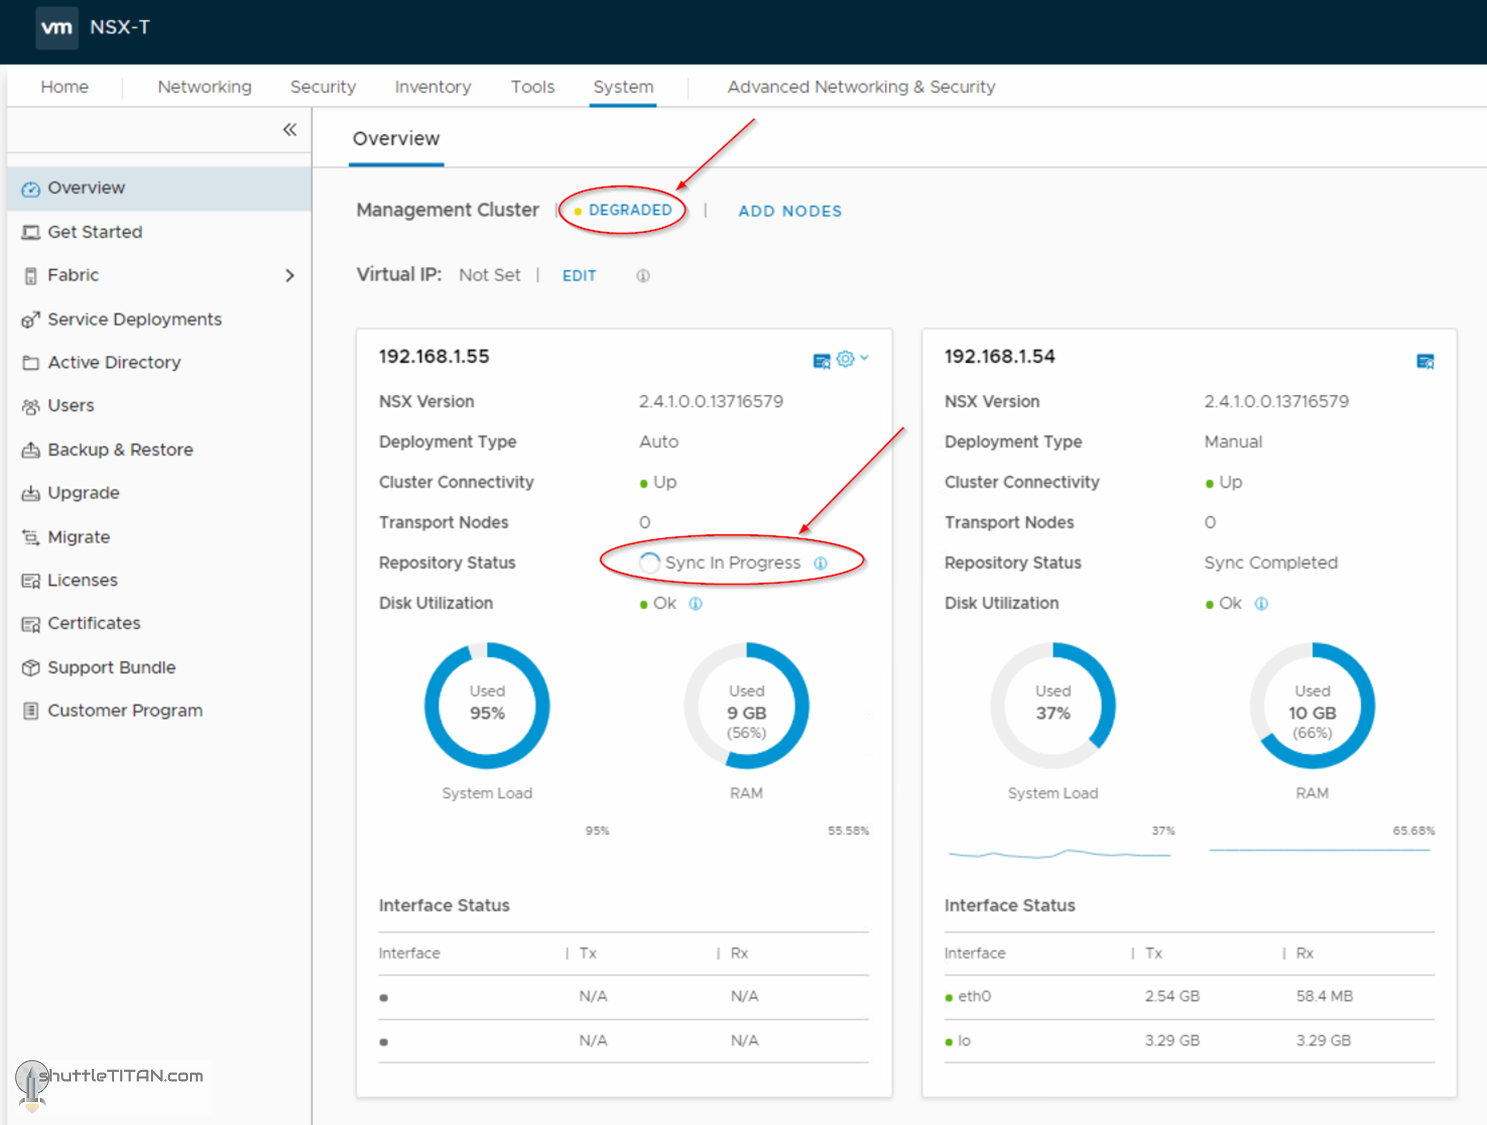
The remaining progress can be monitored from the NSX-T Manager’s Overview page – following screenshots shows progressive step-by-step changes:
A successful deployment will show the “Management Cluster” as Stable, “Cluster Connectivity” as Up and “Repository Status” as Sync Complete, as shown in the screenshot below:
Note: VMware only supports a three node NSX-T Manager cluster, repeat the steps above for adding the third node.
This concludes this step of deploying additional NSX-T Manager nodes successfully.
We use cookies on our website to give you the most relevant experience by remembering your preferences and repeat visits. By clicking “Accept”, you consent to the use of ALL the cookies.
This website uses cookies to improve your experience while you navigate through the website. Out of these cookies, the cookies that are categorized as necessary are stored on your browser as they are essential for the working of basic functionalities of the website. We also use third-party cookies that help us analyze and understand how you use this website. These cookies will be stored in your browser only with your consent. You also have the option to opt-out of these cookies. But opting out of some of these cookies may have an effect on your browsing experience.
Necessary cookies are absolutely essential for the website to function properly. This category only includes cookies that ensures basic functionalities and security features of the website. These cookies do not store any personal information.
Any cookies that may not be particularly necessary for the website to function and is used specifically to collect user personal data via analytics, ads, other embedded contents are termed as non-necessary cookies. It is mandatory to procure user consent prior to running these cookies on your website.