The previous step, discussed Host Transport Nodes, step-by-step instructions on how to configure ESXi Host as Host Transport Node, TEP IP Identification and basic connectivity validation. This blog is the “Step 10 (Option 1)” of the NSX-T Installation series, where we will discuss NSX-T Edge Nodes and step-by-step instructions on how to install NSX-T Edge VM on ESXi using vSphere UI.
—————————————————————————————————————————————————————
But before we proceed, I would encourage you to briefly skim through my other blogs below, which you may find useful for this step:
- NSX-T Architecture (Revamped)for v2.4 and later
- Series Overview: Step 0 – High Level Design
- Quick Tip: How to get the NSX-T Manager’s Thumbprint and Node UUID
- Quick Tip – How to generate a registration token from NSX-T Manager
- NSX-T Edge types, limitations and considerations before Install/Deployment
- Quick Tip: Enable/Disable a service e.g. SSH/SNMP to persist on NSX-T EDGE VM reboots
If you are deploying this in your home lab or performing a PoC in a nested vSphere Environment, I would also suggest you have a quick glance of my blog Home Lab Setup – Nested ESXi Host’s networking for NSX-T.
—————————————————————————————————————————————————————
Unlike NSX-V Edge, an NSX-T Edge is an empty container appliance and does not do anything until you create logical routers. Each logical router contains a services router (SR) and a distributed router (DR). A DR is distributed across all transport nodes that belong to the same transport zone and an SR is centrally instantiated on the Edge Appliance(s). An SR instance is required for services that cannot be distributed i.e. Physical Connectivity, NAT, DHCP, Load Balancers, etc.
There are two ways to Install an NSX Edge VM via the UI:
Option 1 – Install NSX-T Edge VM on ESXi using vSphere UI – this blog
Option 2 – Install NSX-T Edge VM on ESXi using NSX-T Manager UI
Note: The Option 2, joins the NSX-T Edge VM to the Management plane automatically and configures the N-VDS – which is a separate Step 11 in this NSX-T Installation series.
I would highly encourage you to visit NSX-T Edge types, limitations and considerations before Install/Deployment to make an informed decision.
With that let’s get started…
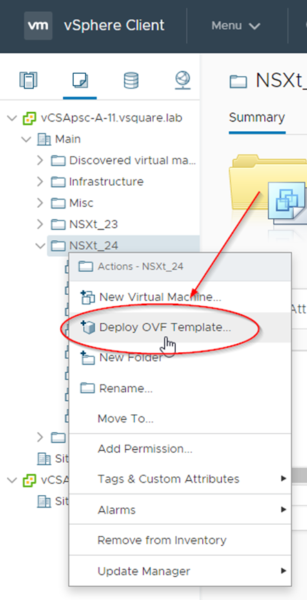
1. Log on to the vCenter -> Click “VMs and Templates” -> Right Click the appropriate folder (where you would like to deploy the NSX-T Edge VM) -> Click “Deploy OVF Template”
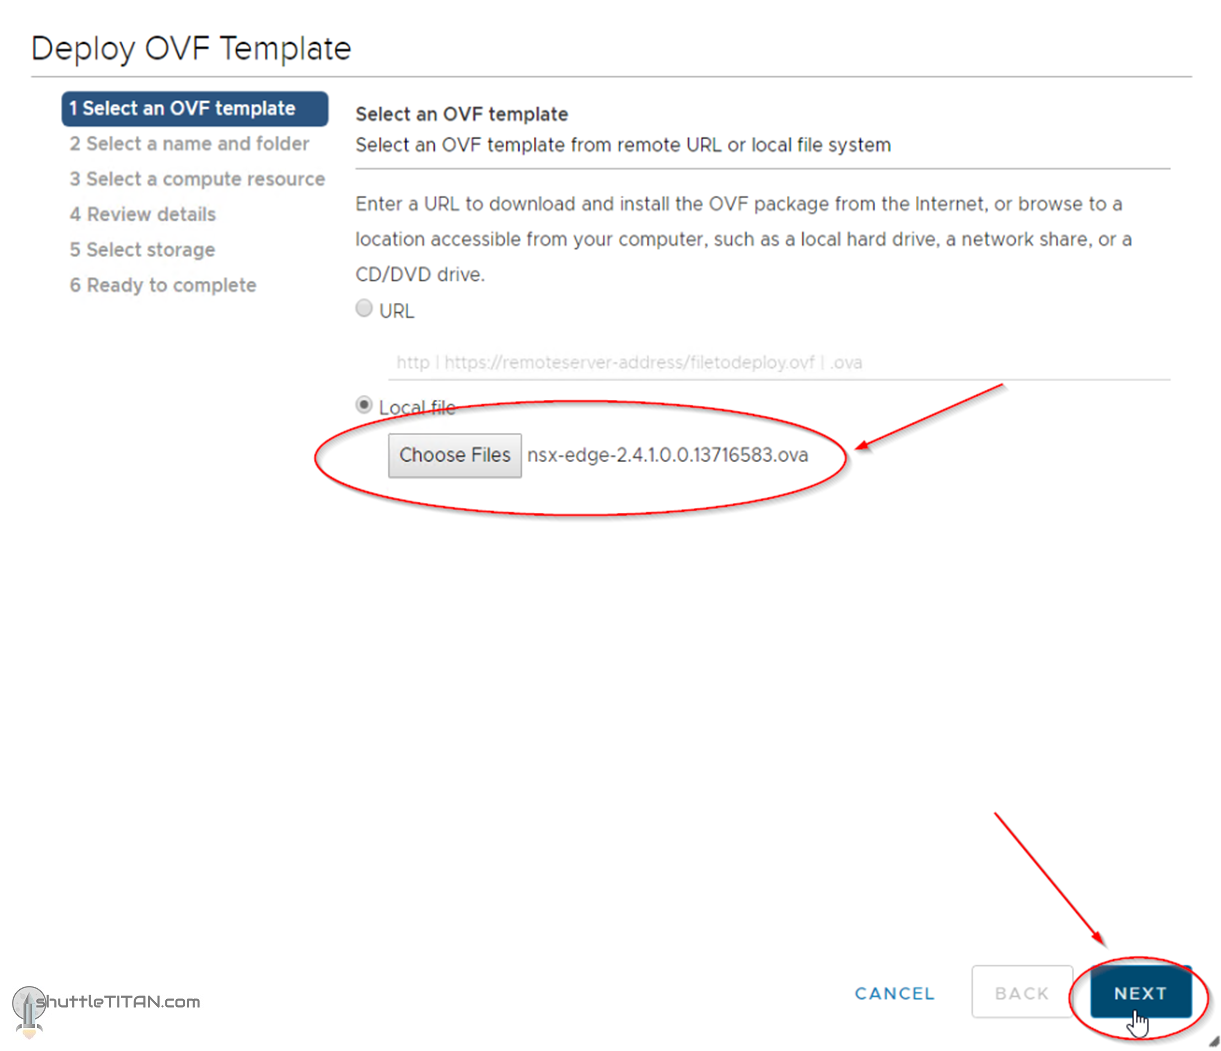
2. Either specify the URL or choose the NSX-T Edge VM’s ova file, and click “Next”:
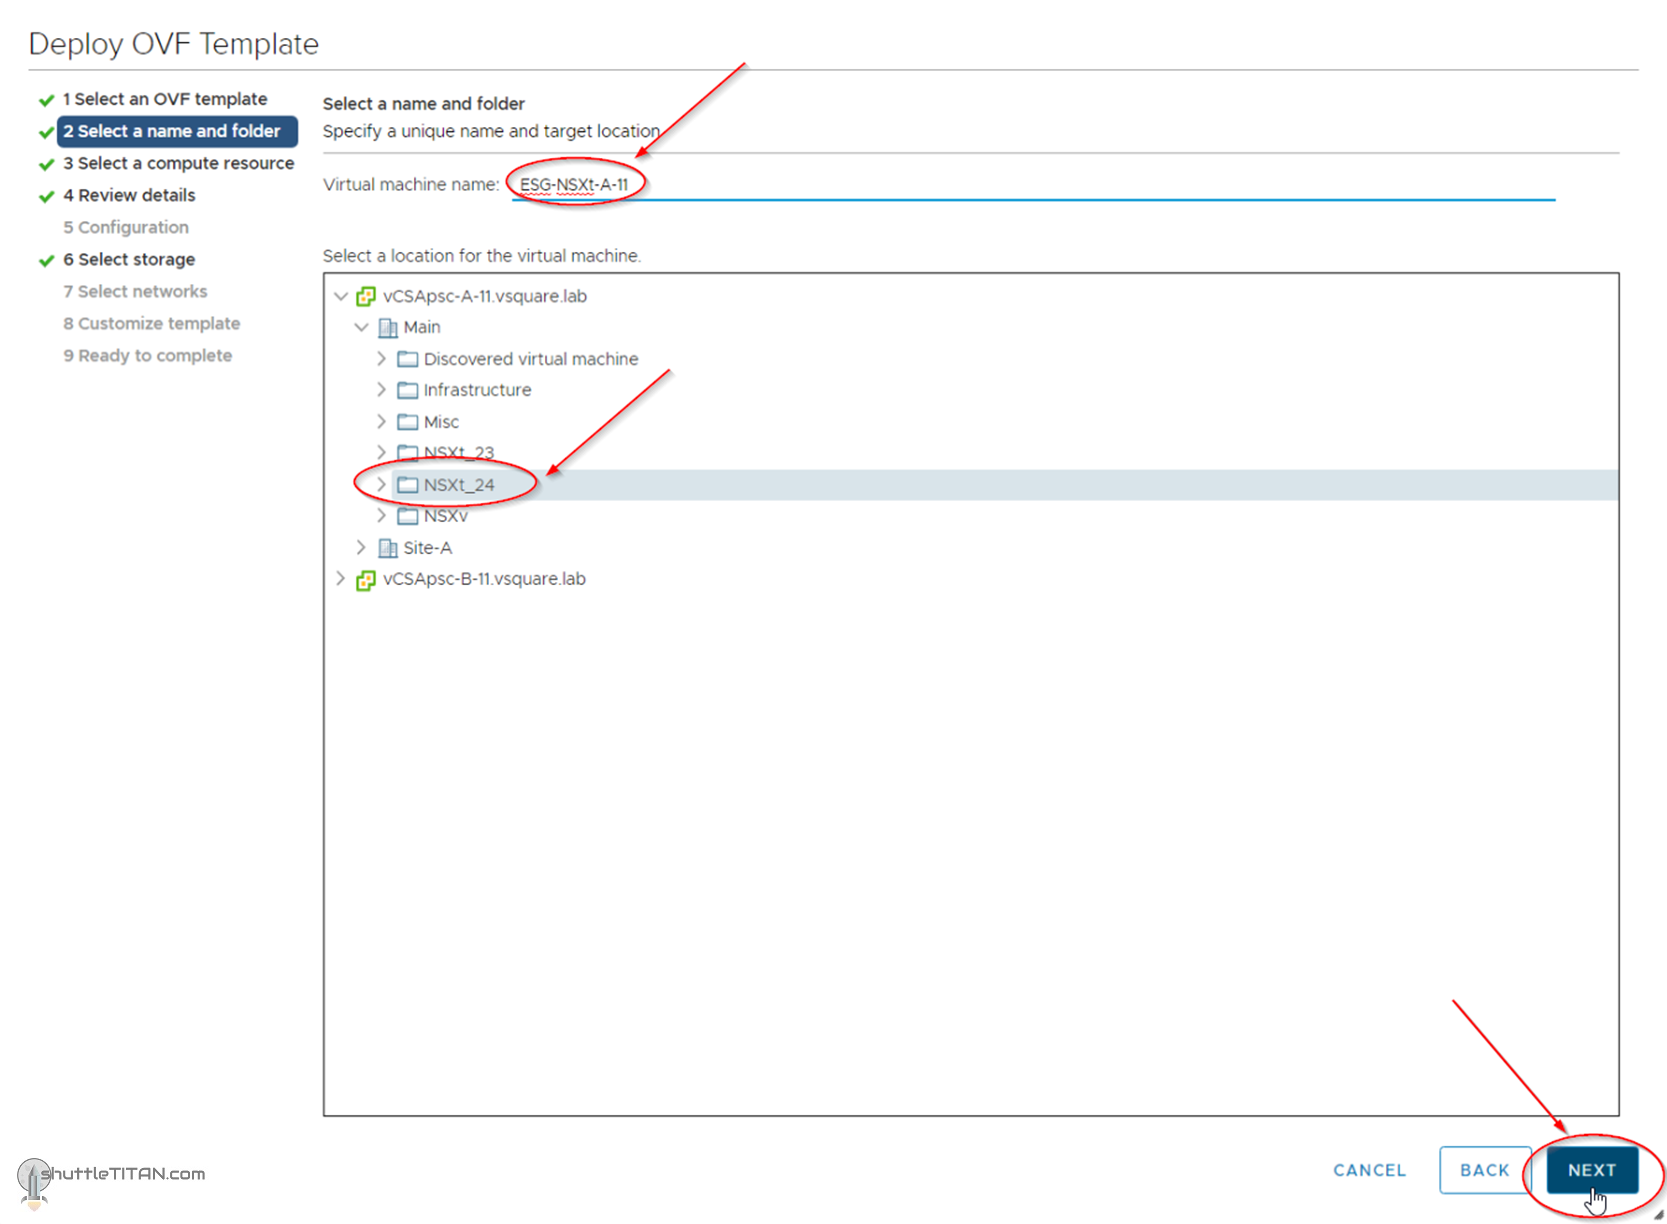
3. Specify the “name” of the virtual machine, click “Next”:
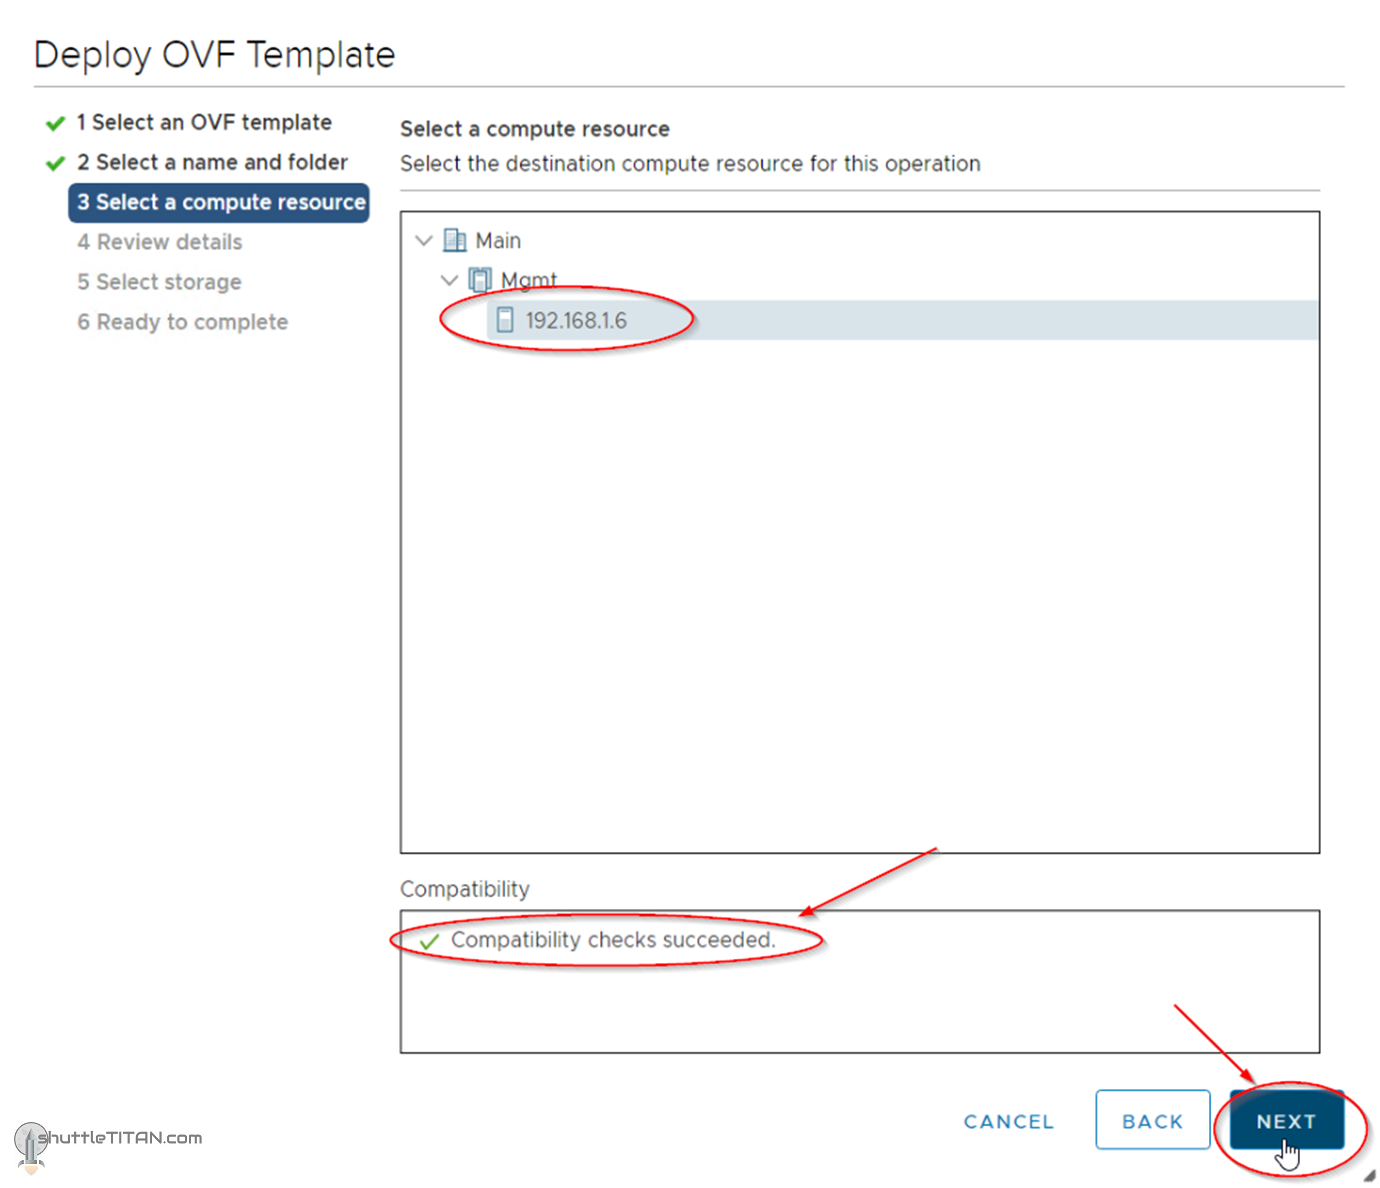
4. Select the compute resource i.e. the cluster, resource pool or the host, check compatibility has succeeded and then click “Next”:
5. Review Details, and click “Next”:
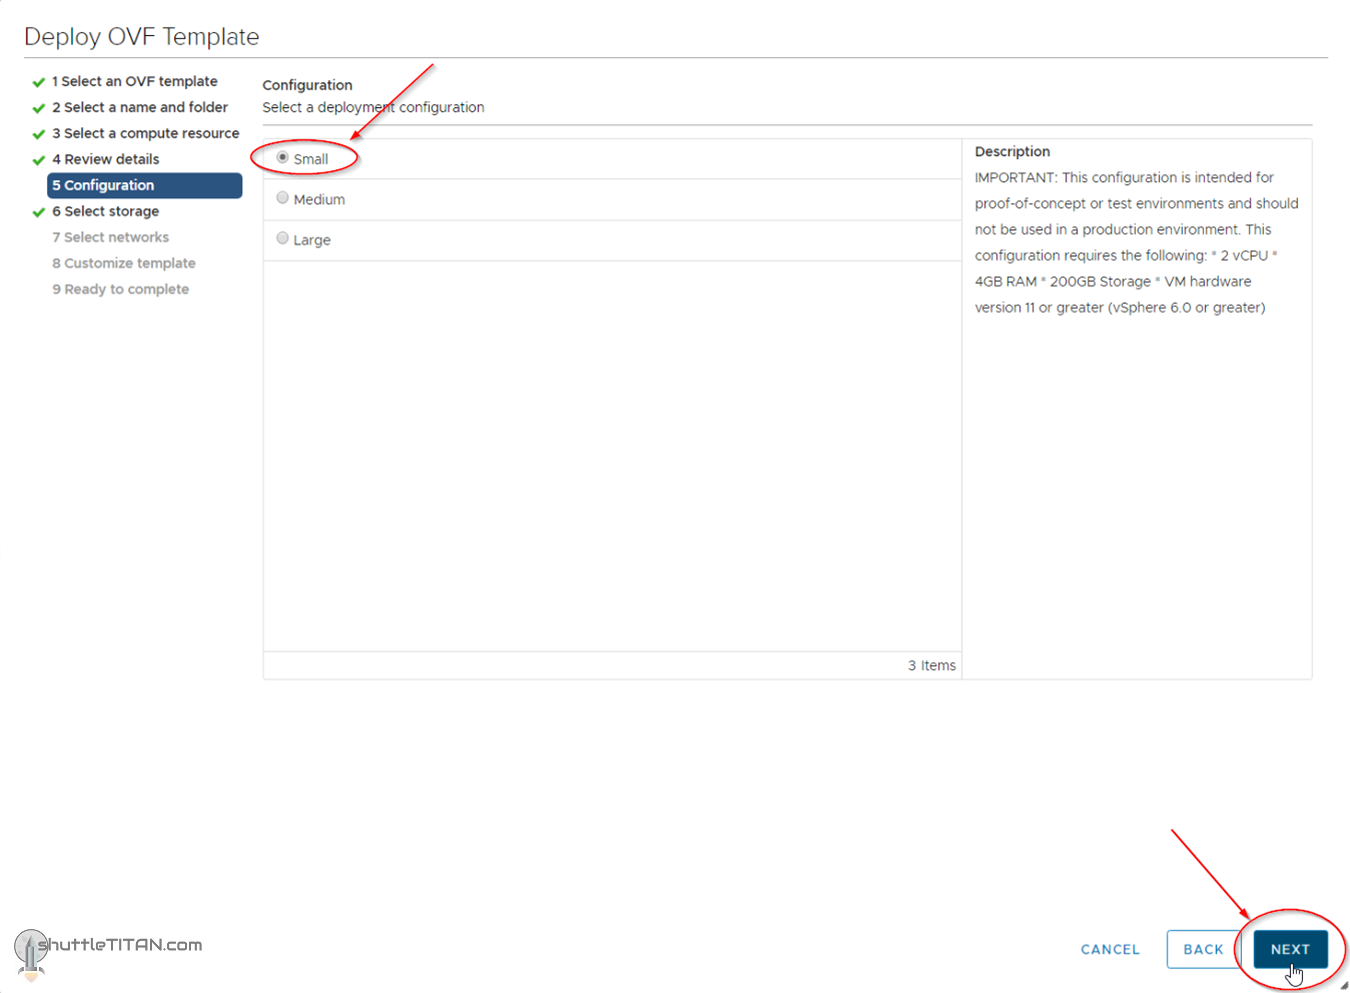
6. Select the deployment configuration size as appropriate and click Next:
Note: For production only medium and large size are supported.
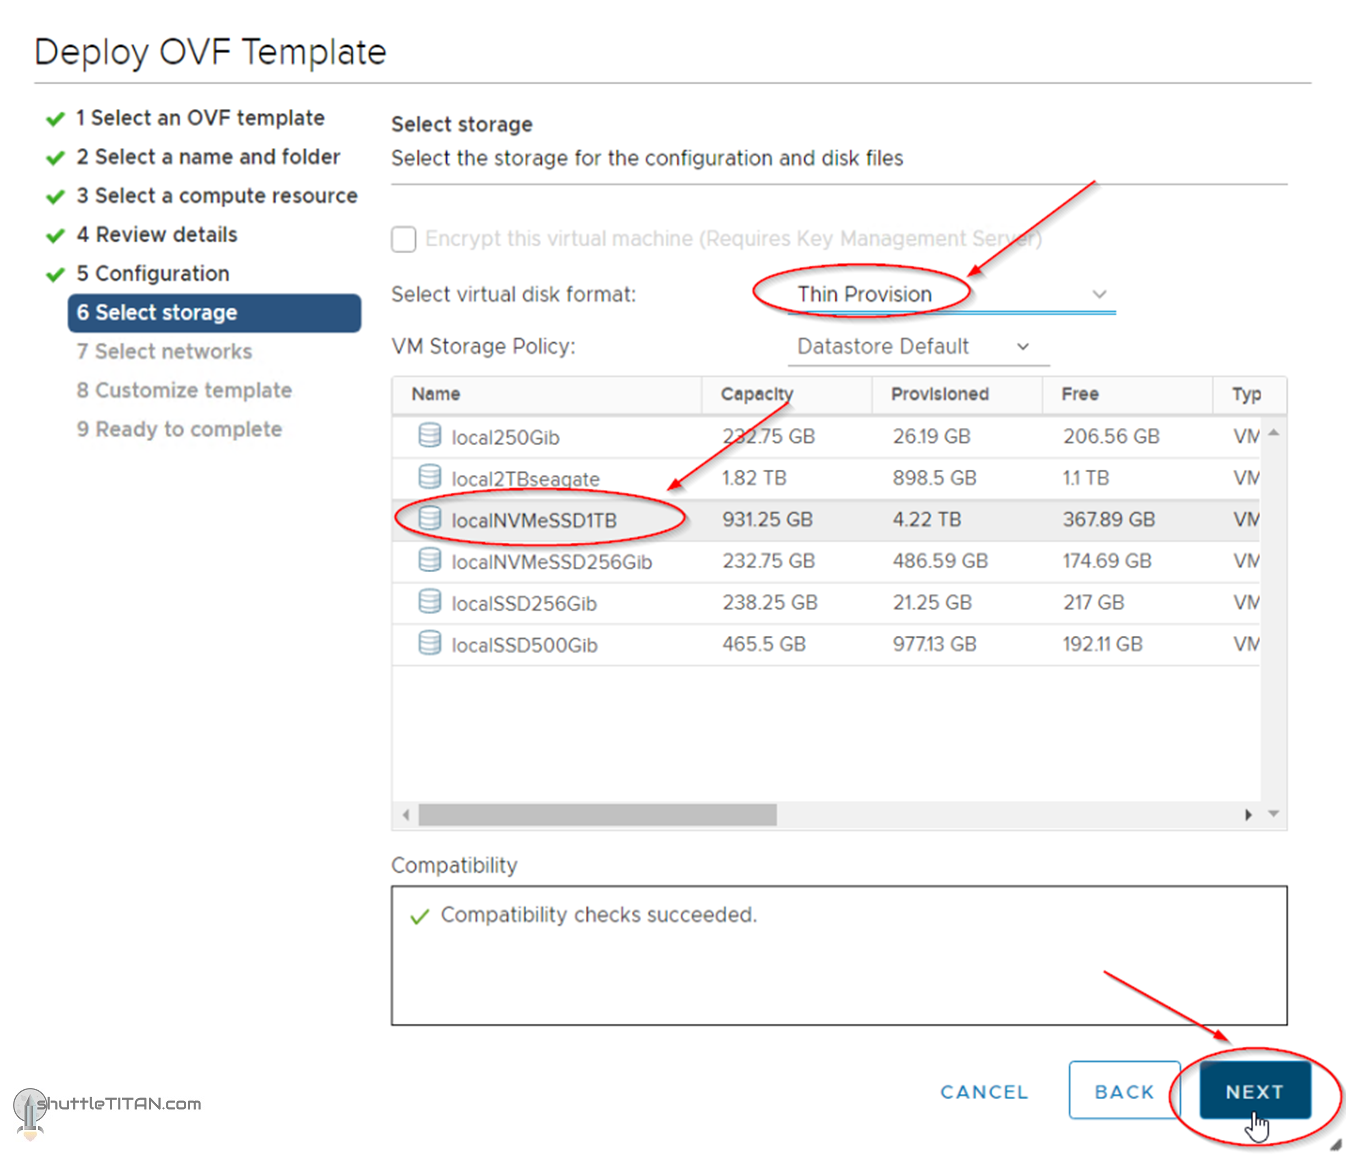
7. Select virtual disk format and Datastore and click Next:
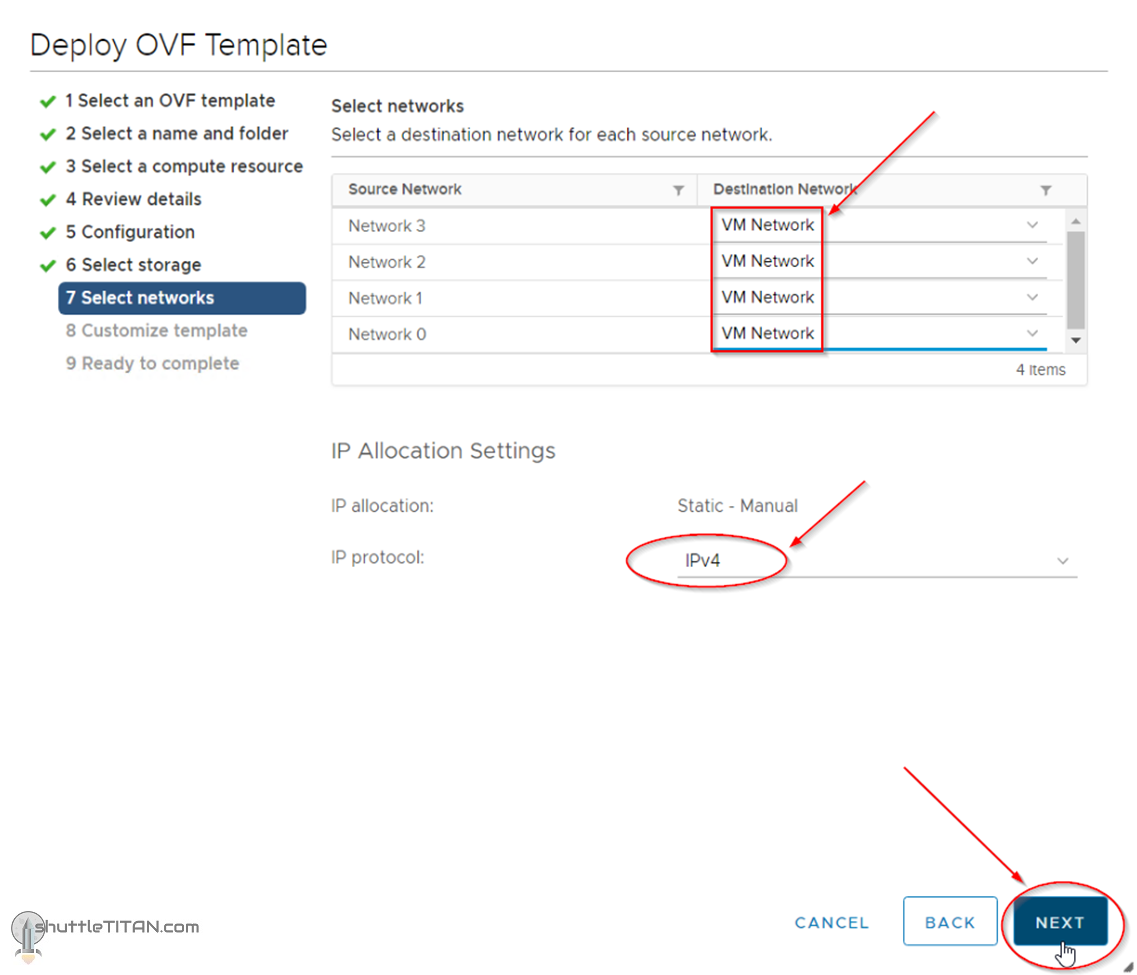
8. You could leave all vNIC connected to the “VM Network” for now (we will configure these in Step 11 – Configure Edge Transport Node), select IPv4 and click Next:
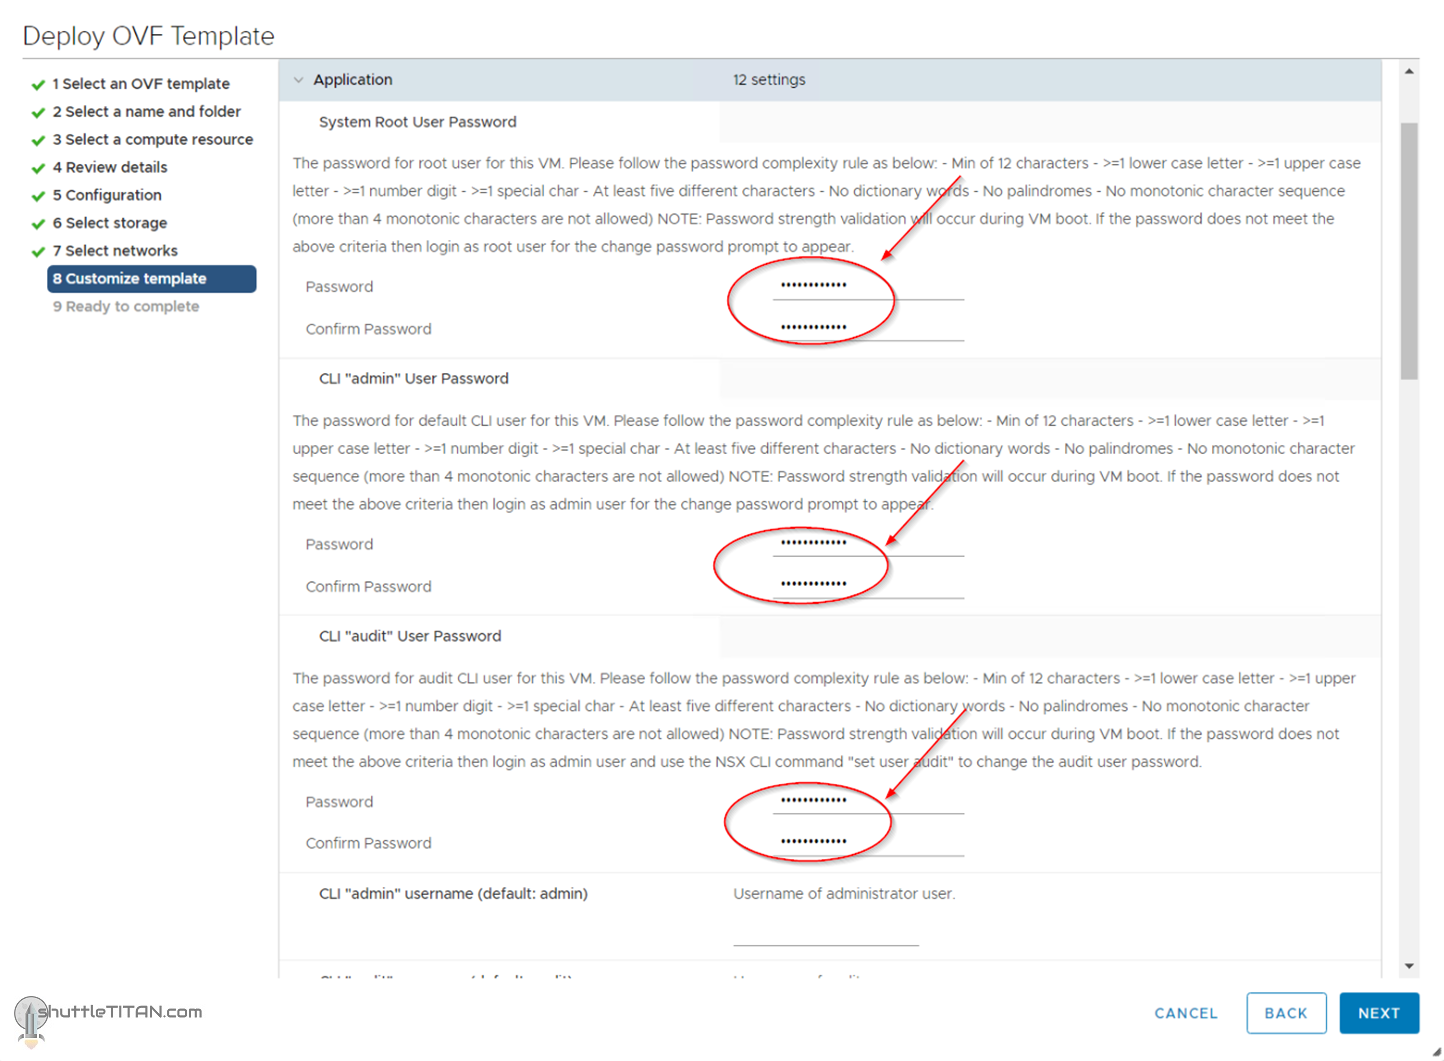
9. Specify the root, admin and audit credentials and scroll down:
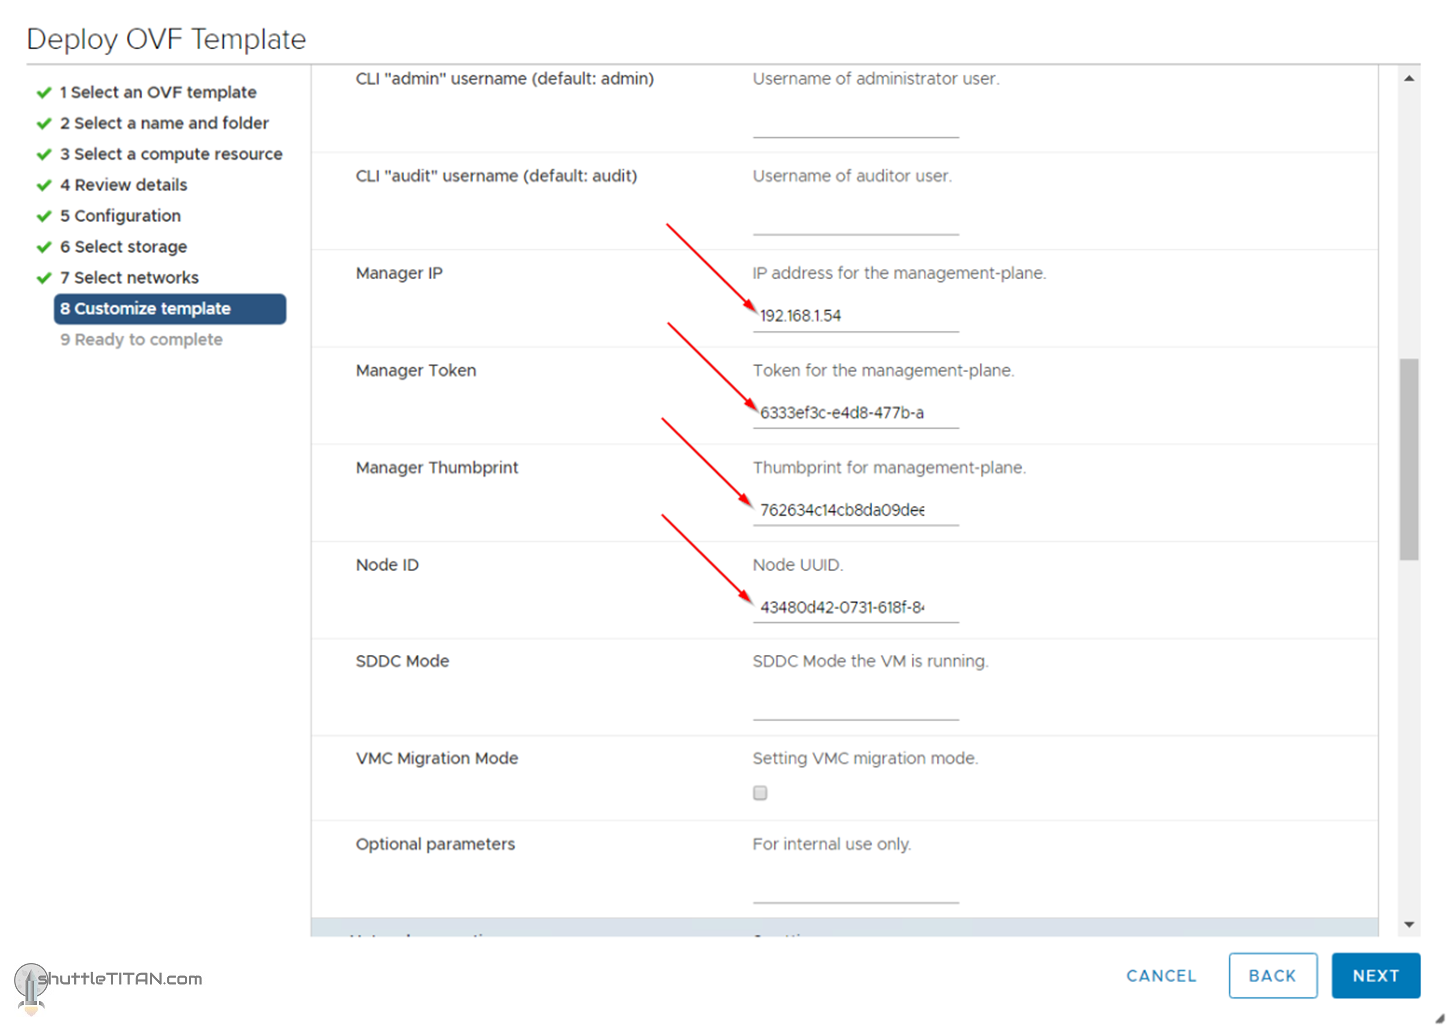
10. [Optional] Enter the NSX-T Manager’s IP, Token, Thumbprint and ID.
Refer the following links to get the thumbprint, UUID and registration token from the NSX-T Manager:
Quick Tip: How to get the NSX-T Manager’s Thumbprint and Node UUID
Quick Tip: How to generate a registration token from NSX-T Manager
Note: The above step is optional but if you decide not to specify the details, you will need to join the NSX-T Edge Appliance to the management plane via command line.
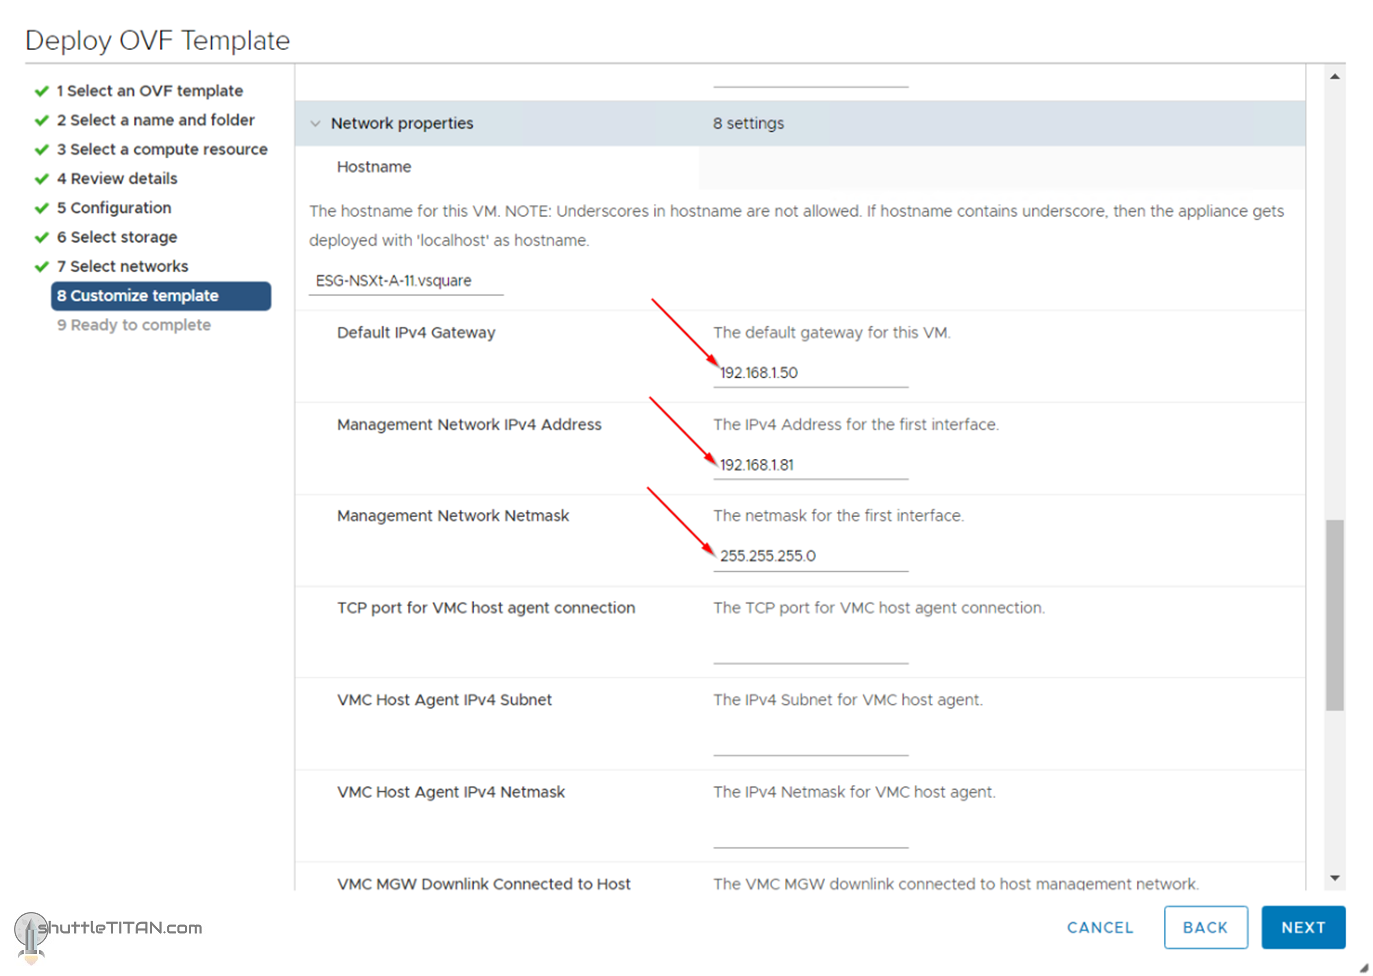
11. Specify the IP, DG, and subnet mask and scroll down:
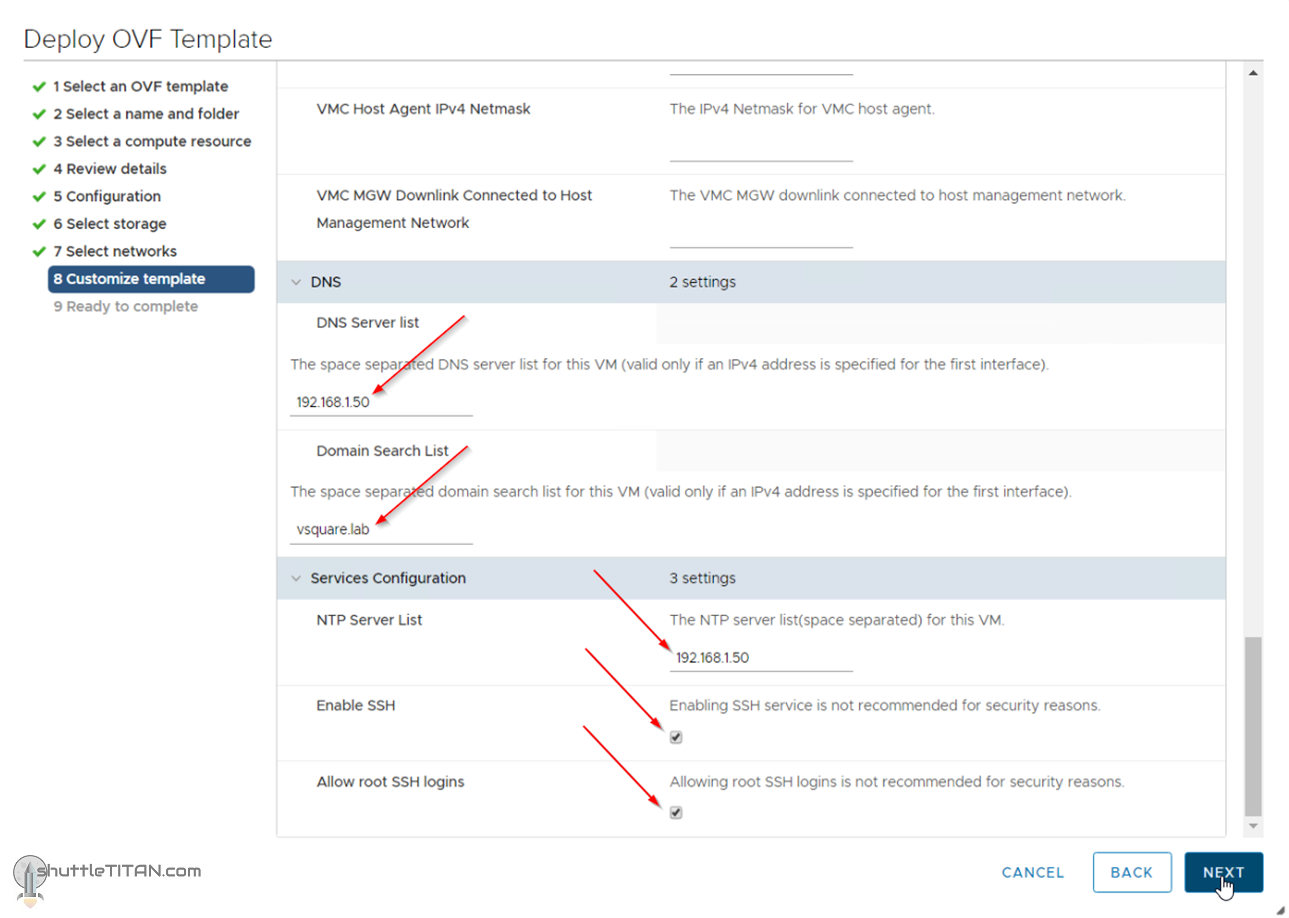
12. Specify the DNS Server list, domain search list and click Next:
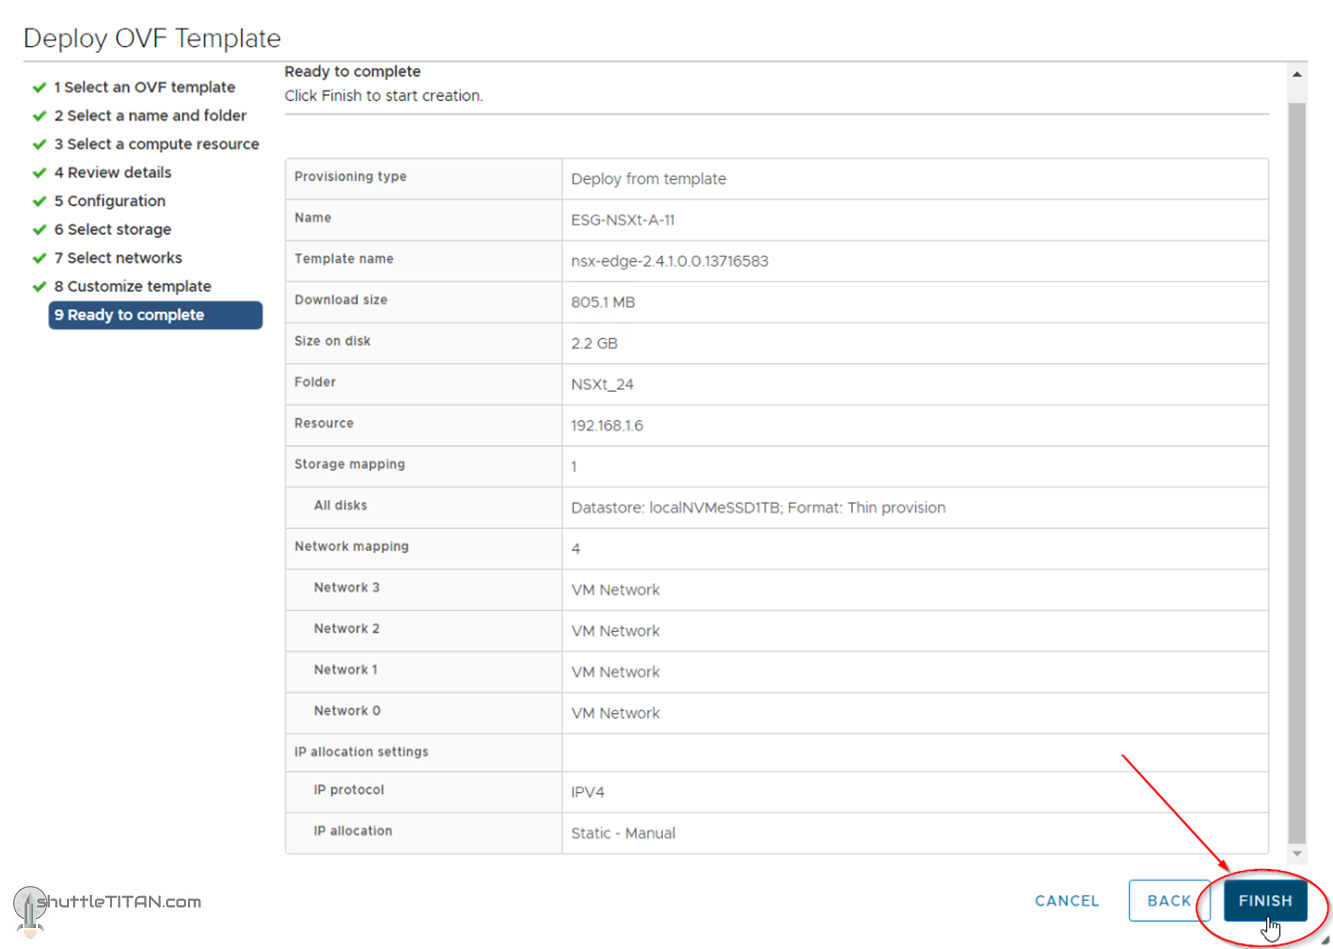
13. Review the details and click Finish:
14. Edge VM deployment progress can also be monitored by logging on to the vCenter -> “Recent Tasks”:
The installation may take 7-8 minutes. Power on the VM, it will reboot a couple of time and will eventually show the login prompt.
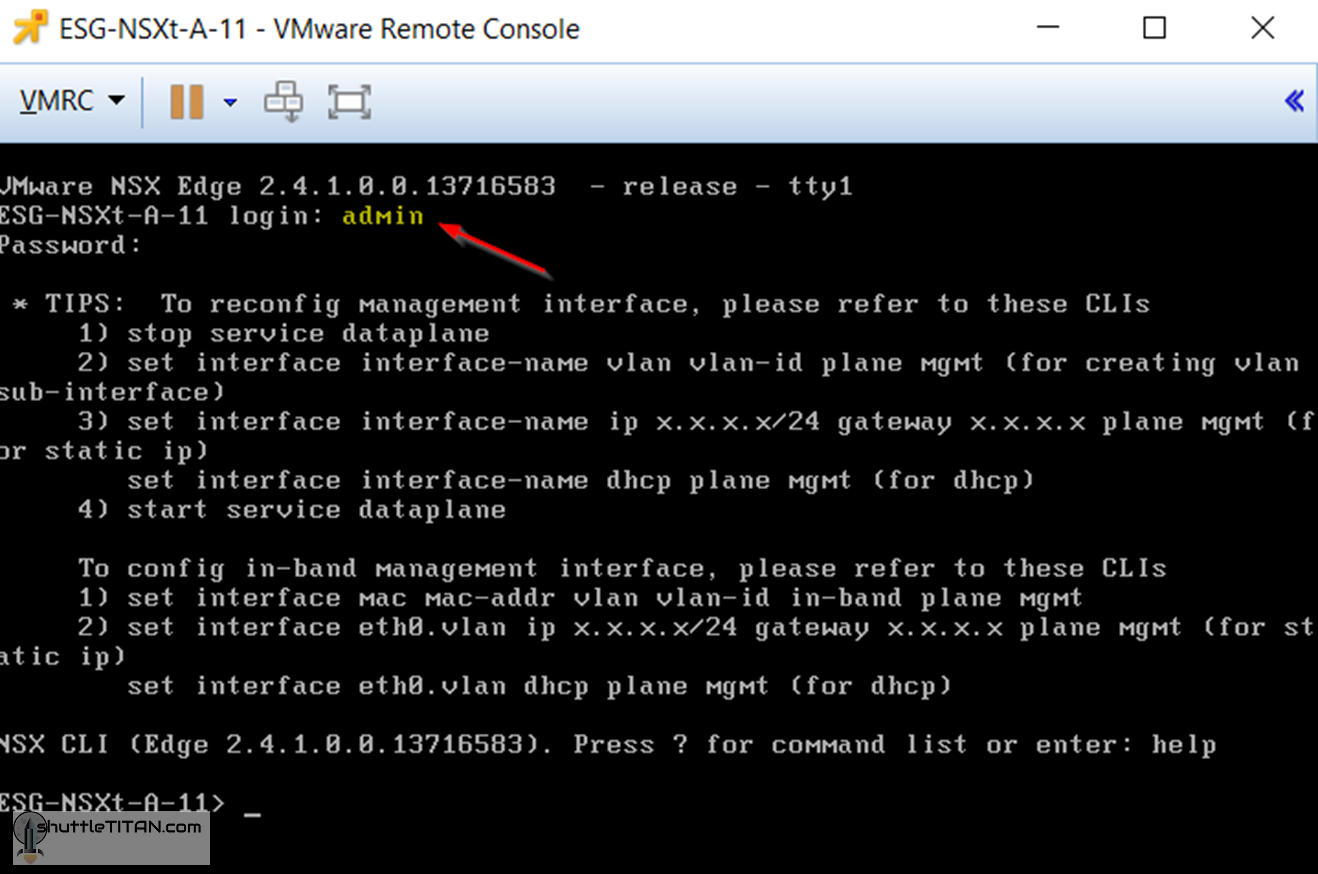
15. Logon to the NSX-T Edge Appliance with the admin credentials:
Note: Logging in with admin credentials is quite important after deployment (for the first time) as the data plane service does not automatically start on NSX-T Edge.
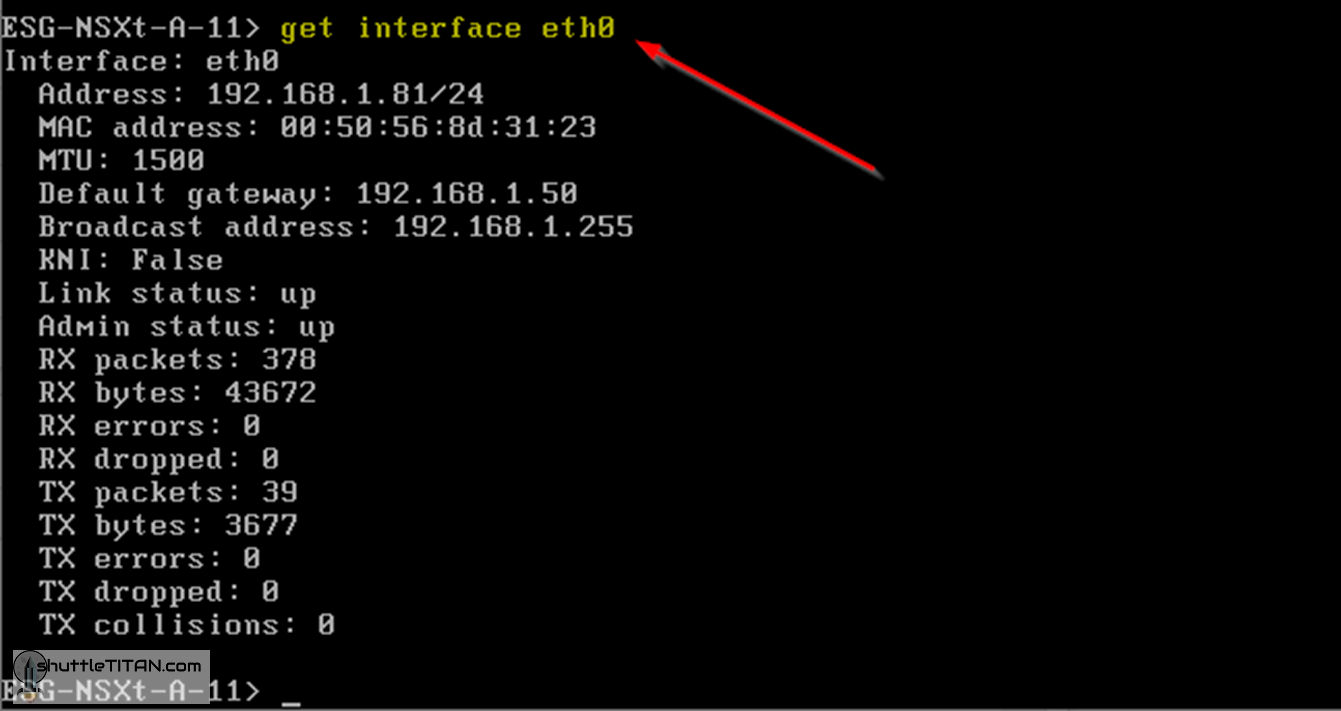
16. Verify the network settings are correct by running the command below:
get interface eth0.<vlan_ID>
or
get interface eth0
17. Verify the NSX-T Edge appliance has joined the management plane by running the following command:
get managers
If the Edge Appliance does not join the management plane and shows the output as “No Managers Configured” as shown in the screenshot below, follow the steps in my other blog NSX-T Edge: “get managers” command return “No Managers Configured”.
Follow the same steps for the second ESGs as shown in the screenshot below:
Lastly, if you intend to keep SNMP/SSH enabled – follow the steps in Quick Tip: Enable/Disable a service e.g. SSH/SNMP to persist on NSX-T EDGE VM reboots
This concludes this step of Installing NSX-T Edge VM on ESXi using vSphere UI successfully.
Let’s proceed ahead with the next blog in this series Step 11 – Configure Edge Transport Node.

