The previous step, showed step-by-step instructions on how to create “IP Pools” that are going to be used for “Tunnel Endpoints” later in the series. This blog is the “Step 6” of the NSX-T Installation series, where we will discuss “Transport Zones” (its types and limitations), N-VDS and step-by-step instructions to create vLan and Overlay Transport Zones.
—————————————————————————————————————————————————————
But before we proceed, I would encourage you to briefly skim through my other blogs below, which you may find useful for this step:
- NSX-T Architecture (Revamped)for v2.4 and later
- Series Overview: Step 0 – High Level Design
If you are deploying this in your home lab or performing a PoC in a nested vSphere Environment, I would also suggest you have a quick glance of my blog Home Lab Setup – Nested ESXi Host’s networking for NSX-T.
—————————————————————————————————————————————————————
Let’s begin with the question – What is a Transport Zone?
A transport zone limits the hosts on segments (known as logical switches) it can see and therefore which VMs can be connected to those segment(s). A transport zone can span one or more hosts clusters and a host can belong to multiple transport zones.
Limitations:
- A segment (logical switch) can belong to only one transport zone.
- VMs in different transport zones do not have any communication in the layer 2 network.
- The span of a segment (logical switch) is limited to a transport zone, so virtual machines in different transport zones cannot be on the same Layer 2 network.
Types of Transport Zones
- Overlay: Overlay transport zone is used by both host (VMware ESXi and supported third party hypervisors) and NSX Edge transport nodes. When a host or NSX Edge transport node is added to an overlay transport zone, an N-VDS is installed on the host or NSX Edge.
- VLAN: VLAN transport zone is also used by both host (VMware ESXi and supported third party hypervisors) and NSX Edge transport nodes but for its VLAN uplinks.
What is N-VDS?
N-VDS stands for NSX virtual distributed switch, which allows for virtual-to-physical packet flow by binding logical router uplinks and downlinks to physical NICs. For both types of Transport Zones discussed above – when a host or NSX Edge transport node is added, an appropriate N-VDS is installed.
With technical background out of the way, let’s get started…
1. Click System -> Fabric -> Transport Zones -> Add:

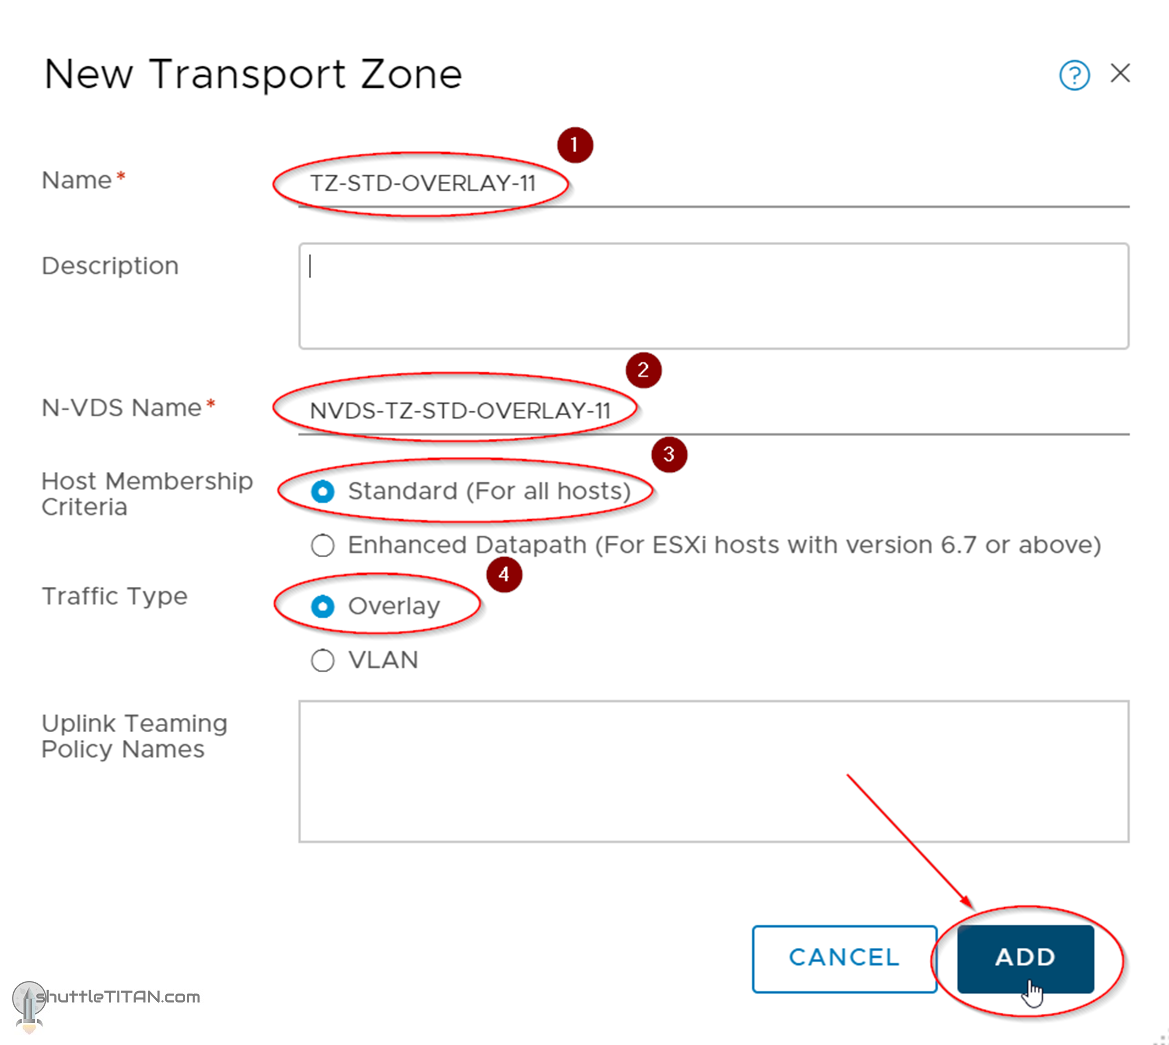
2. Specify the Transport Zone and N-VDS name, host membership criteria, the traffic type dictates the type of “Transport Zone” you create. Select Overlay for now and click ADD:
3. Upon successful creation, a message will be displayed as shown in the screenshot below:

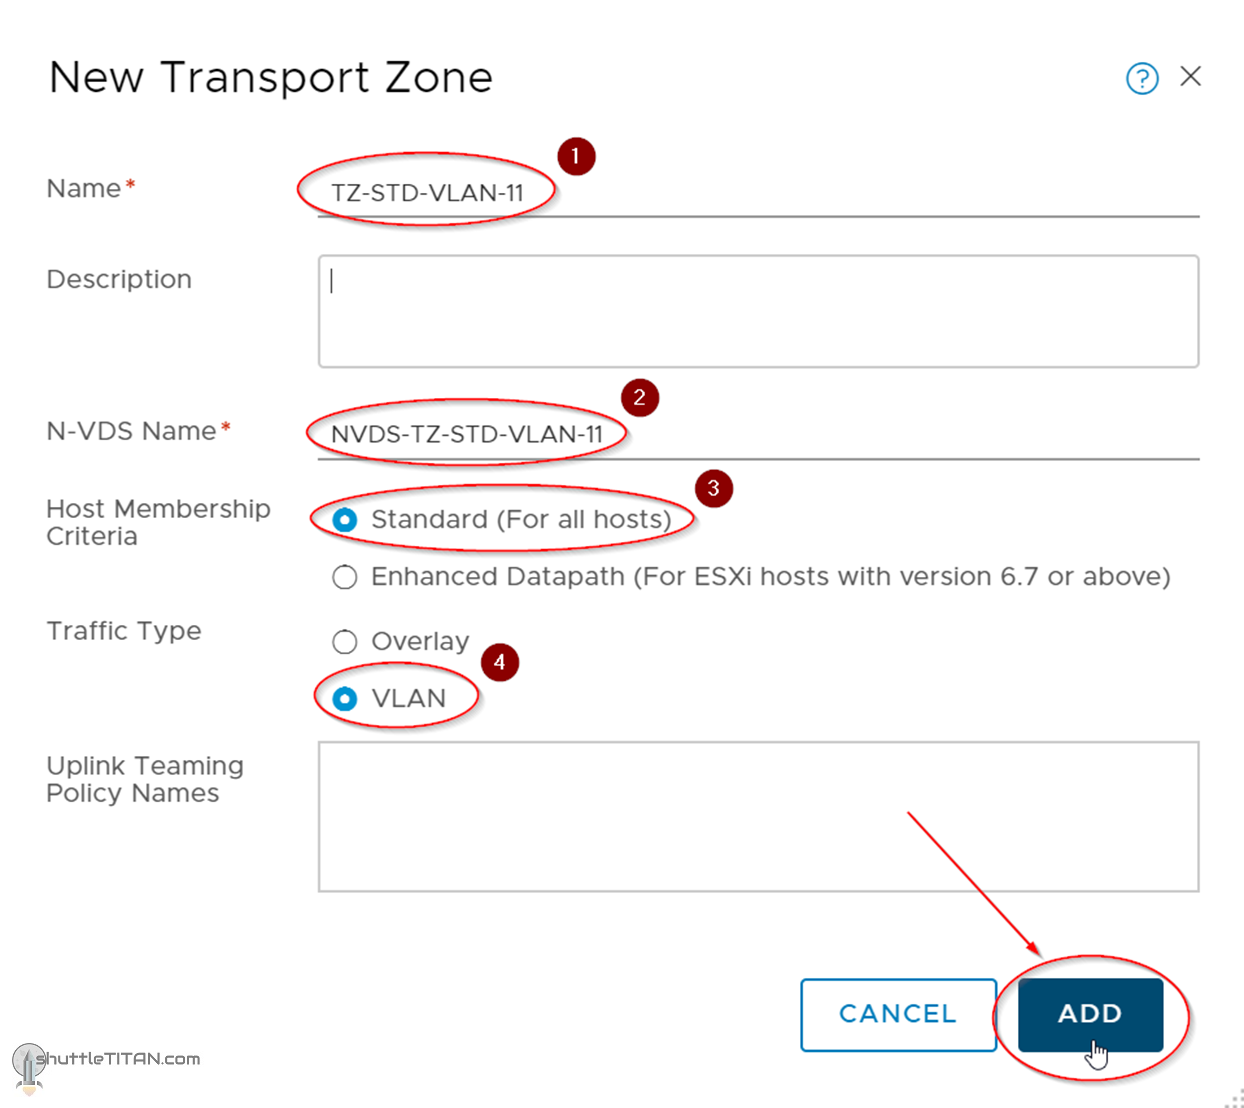
Let’s create a VLAN transport zone by following same steps but selecting vLAN “Transport Zone” traffic type as depicted in the screenshot below:
Following are the transport zones “to be” utilized in this installation series:
| Transport Zone Name | Transport Zone Type | Details/Relevance |
|---|---|---|
| TZ-STD-OVERLAY-11 | Overlay | Geneve Encapsulated Traffic |
| TZ-STD-VLAN-11 | vLAN | Migrating vmkernel networks from vDS to N-VDS (optional) |
| TZ-STD-VLAN-ToR-A-11 | vLAN | Site A Top of the rack switch network |
| TZ-STD-VLAN-ToR-A-12 | vLAN | Site A Top of the rack switch network |
| TZ-STD-VLAN-ToR-B-11 | vLAN | Site B Top of the rack switch network |
| TZ-STD-VLAN-ToR-B-12 | vLAN | Site B Top of the rack switch network |
So far we have created the first two in the table above, create the remaining vLAN based transport zones as shown in the screenshot below:

This concludes this step of creating Transport Zone successfully.
Let’s proceed ahead with the next blog in this series Step 7 – Create Uplink Profile.
Thank you very much for the detailed explanations, but one question is still not clear, for what purposes and why do we need transport zone vlan?
Hi Sergio,
VLAN transport zone are used by VMware ESXi and supported third party hypervisors hosts (see table above and the “Details/Relevance” column), NSX Edge transport nodes for Dynamic Routing with ToR/Leaf Switches, etc. Another use case could be – Micro-segmentation without overlay.
If you go through each step of the NSX-T Installation Series, it will start making sense.
Hope this helps.