In this blog post, we will discuss NSX-T Hosts preparation methods, pre-requisites, followed by the step by step instructions.
If you are new to NSX-T, I would also encourage you to refer my NSX-T Architecture blog post to get a bit more understanding and touch bases on its architecture briefly.
Before I begin, I would like to thank feedspot.com to consider shuttleTITAN.com as one of the best influential blogsites in the virtualization community. Feedspot is a platform used by more than a million users and helps keep track of all your favourite blogs, news sites and rss feeds in one place. I am honoured for shuttleTITAN.com to be ranked in the “Top 25 Virtualization Blogs” on the web, on 5th February 2019.
OK, coming back to step 4 – When a hypervisor host is prepared to function with NSX-T Data Center, the host is known as “Fabric Node”. All fabric nodes have NSX-T Data Center modules installed and are registered with the NSX-T Data Center management plane.
For a hypervisor host or a bare metal server to be part of the NSX-T Data Center overlay, it must first be added to the NSX-T Data Center fabric.
There are two methods of preparing host for NSX-T Datacenter:
Command Line (Manual):
Install Kernel Modules on hypervisors – ESXi, KVM (Ubuntu, RHEL and CentOS)
Join hypervisor hosts to Management Plane
Via NSX Manager UI (Automated): Both the manual installation steps i.e. installation of kernel modules and joining the host to the management plane are automatically performed using this method.
Note:
Bare-Metal Servers can only be added as fabric nodes via NSX Manager UI and NSX-T Datacenter kernel mode modules cannot be installed on them manually via command line.
NSX-T Datacenter kernel mode modules can also be packaged with ESXi Image for bulk deployments.
On vSphere ESXi, the modules are packaged as VIBs. for KVM or bare metal server on RHEL and Ubuntu, they are packaged as RPMs and DEBs respectively.
For Non ESXi Hosts, there are a couple of pre-requisites:
Third-Party Packages installation on a KVM Host or Bare Metal Server.
Openvswitch version 2.9.1.8614397-1 on RHEL KVM Hosts.
For this blog post, I will be adding ESXi Hosts as fabric nodes via NSX-T manager UI.
With that, lets get started…
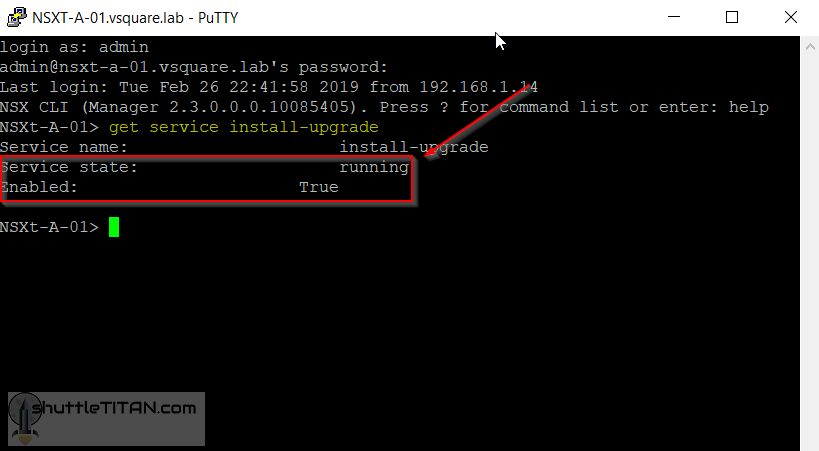
Logon to the NSX-T Manager via putty, verify that the “install-upgrade” service is running by entering the following command:
get service install-upgrade
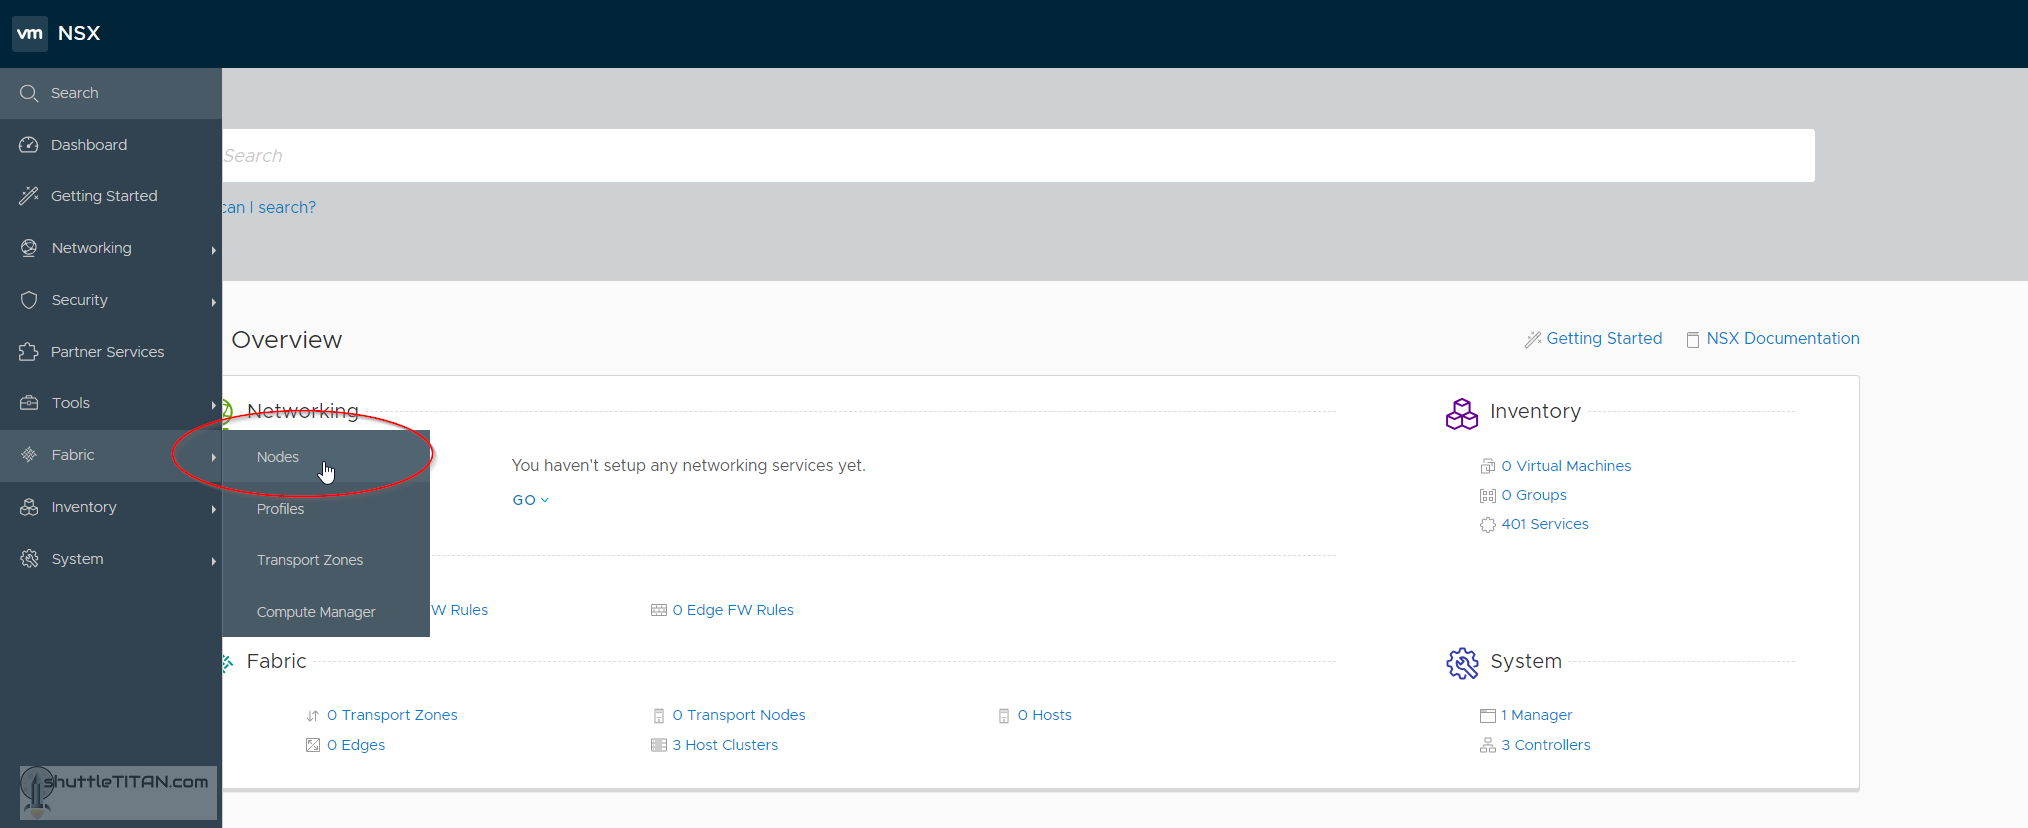
Logon to the NSX-T Manager https://<nsx-t_manager_FQDN>, hover the mouse pointer over “Fabric” and click “Nodes”:
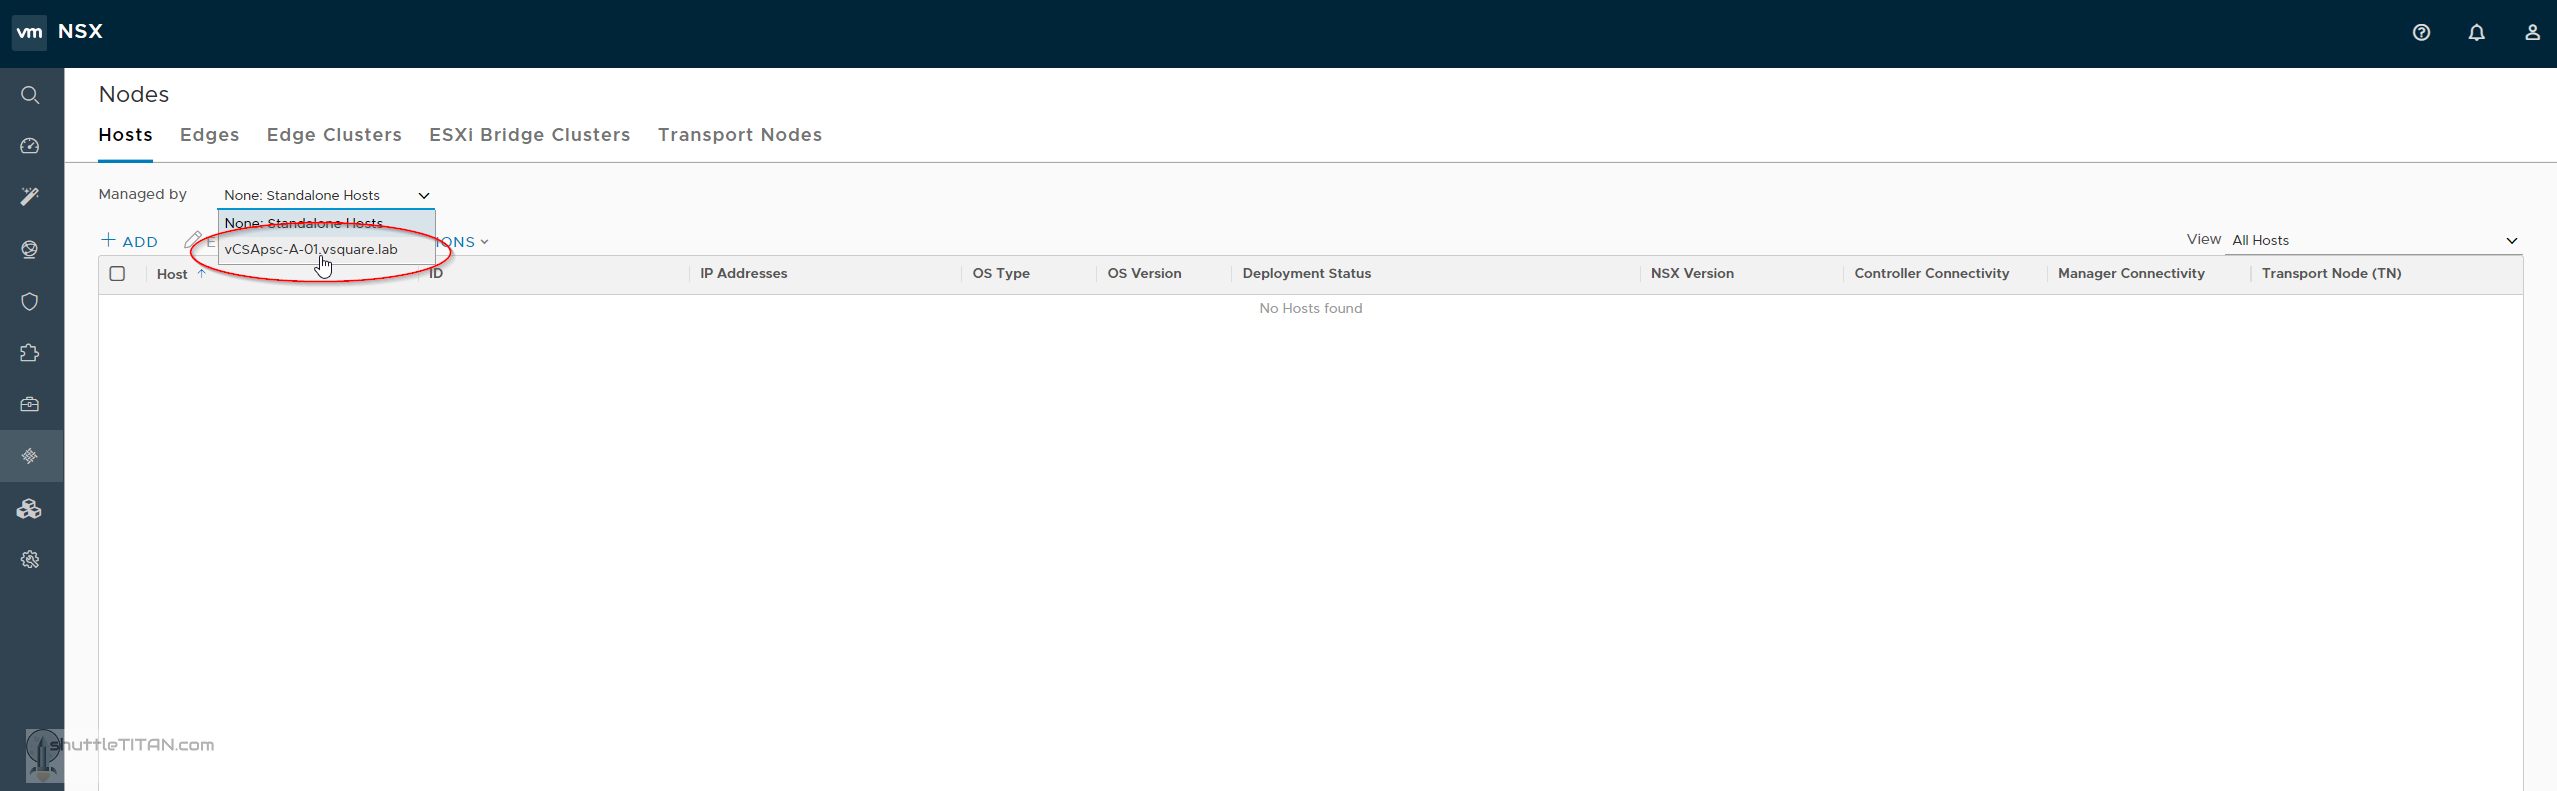
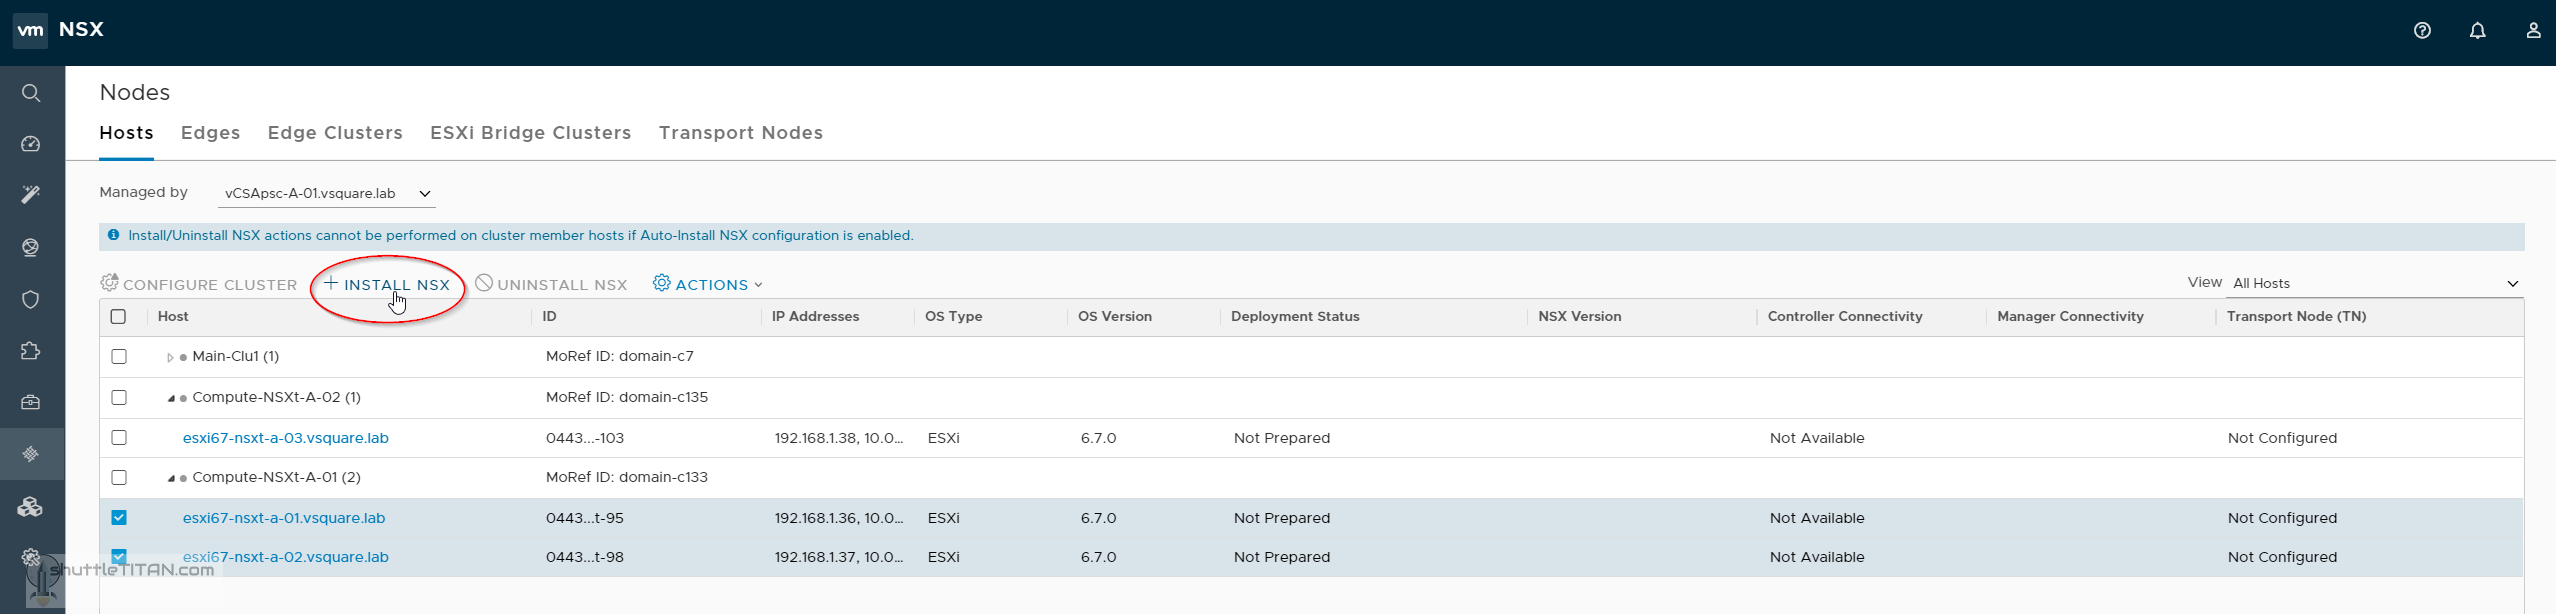
Under “Hosts”, click the drop down menu, next to “Managed by” and select the compute manager, in my case it is “vCSApsc-A-01.vsquare.lab”:
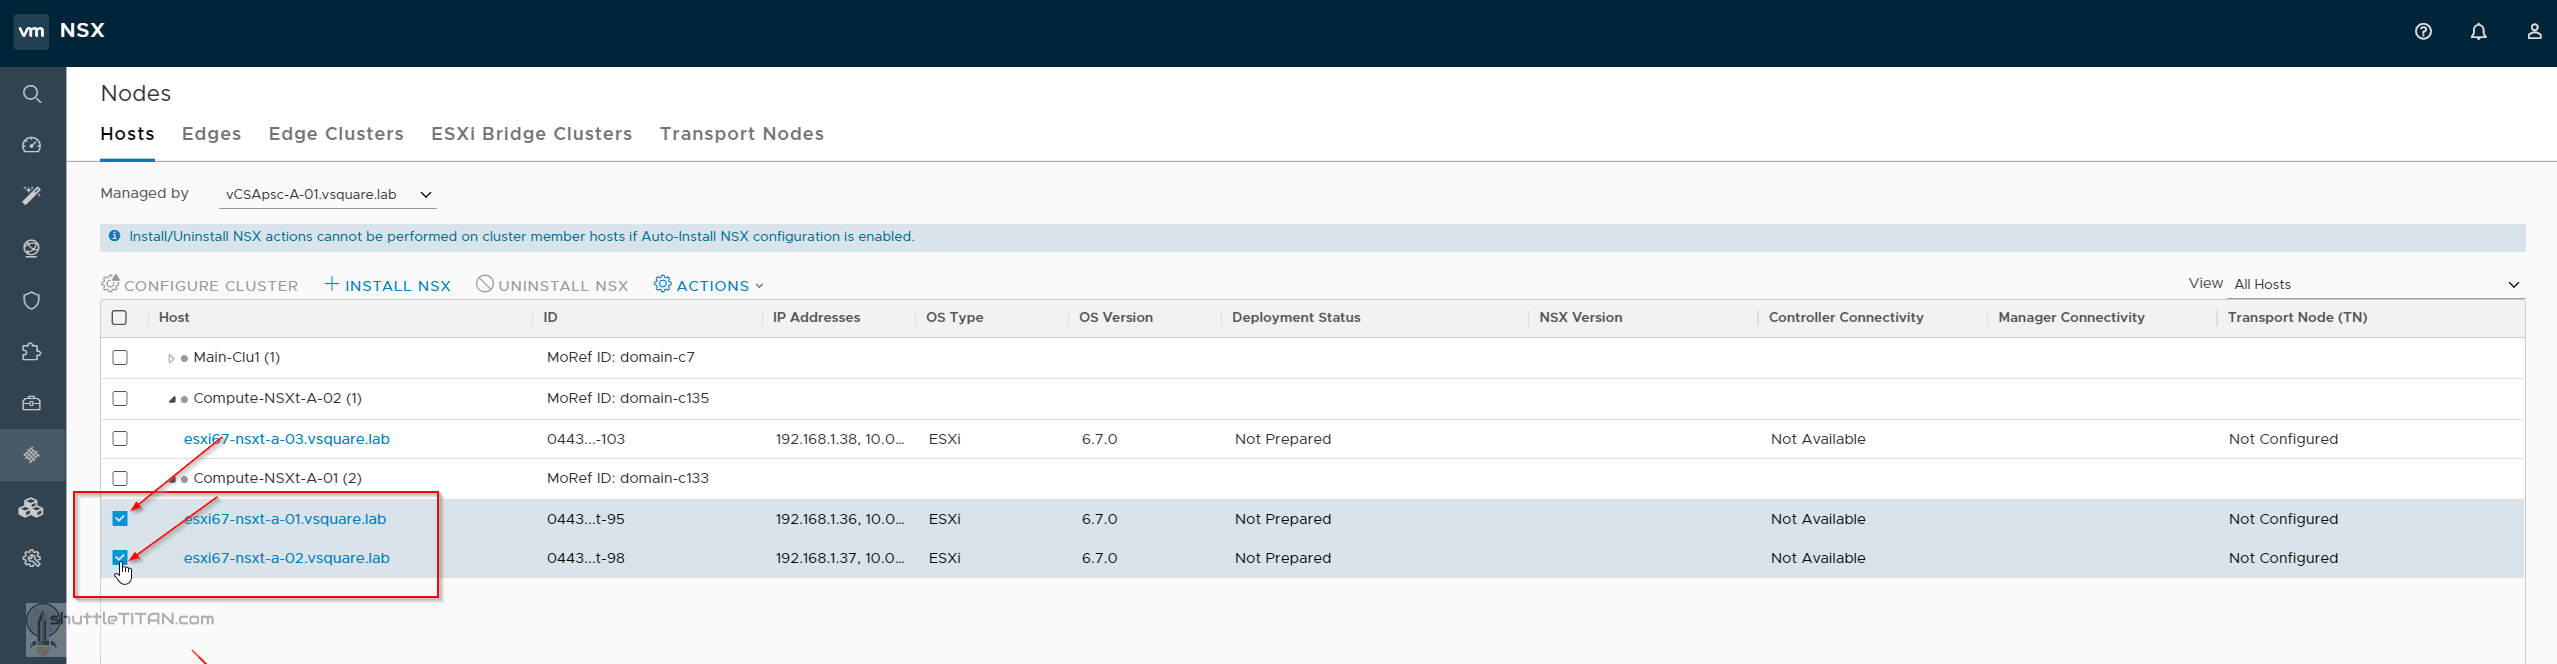
“Check” the box next to the hosts that needs to be prepared for NSX-T Datacenter:
Click “Install NSX” as shown in the screenshot below:
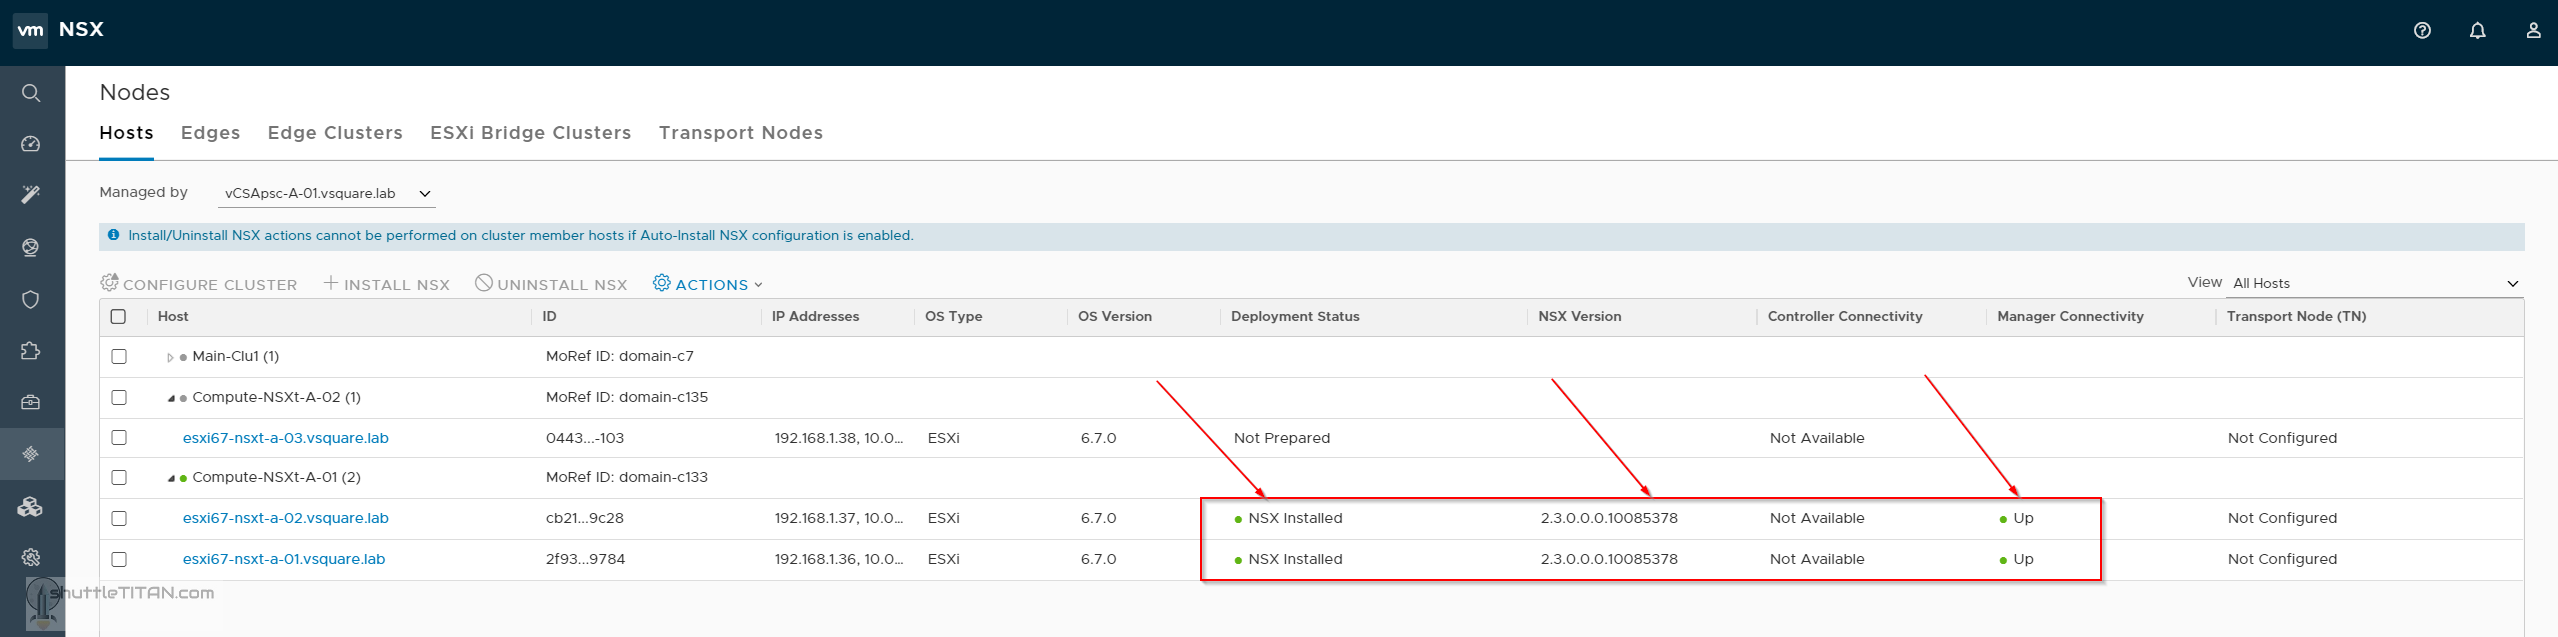
The screenshot below shows the deployment status:
When a host is successfully added to the NSX-T Data Center fabric, the NSX-T Manager hosts page displays: Deployment Status – NSX Installed Manager Connectivity – Up Controller Connectivity remains “Not Available” until after you have made the fabric node into a transport node as shown in the screenshot below:
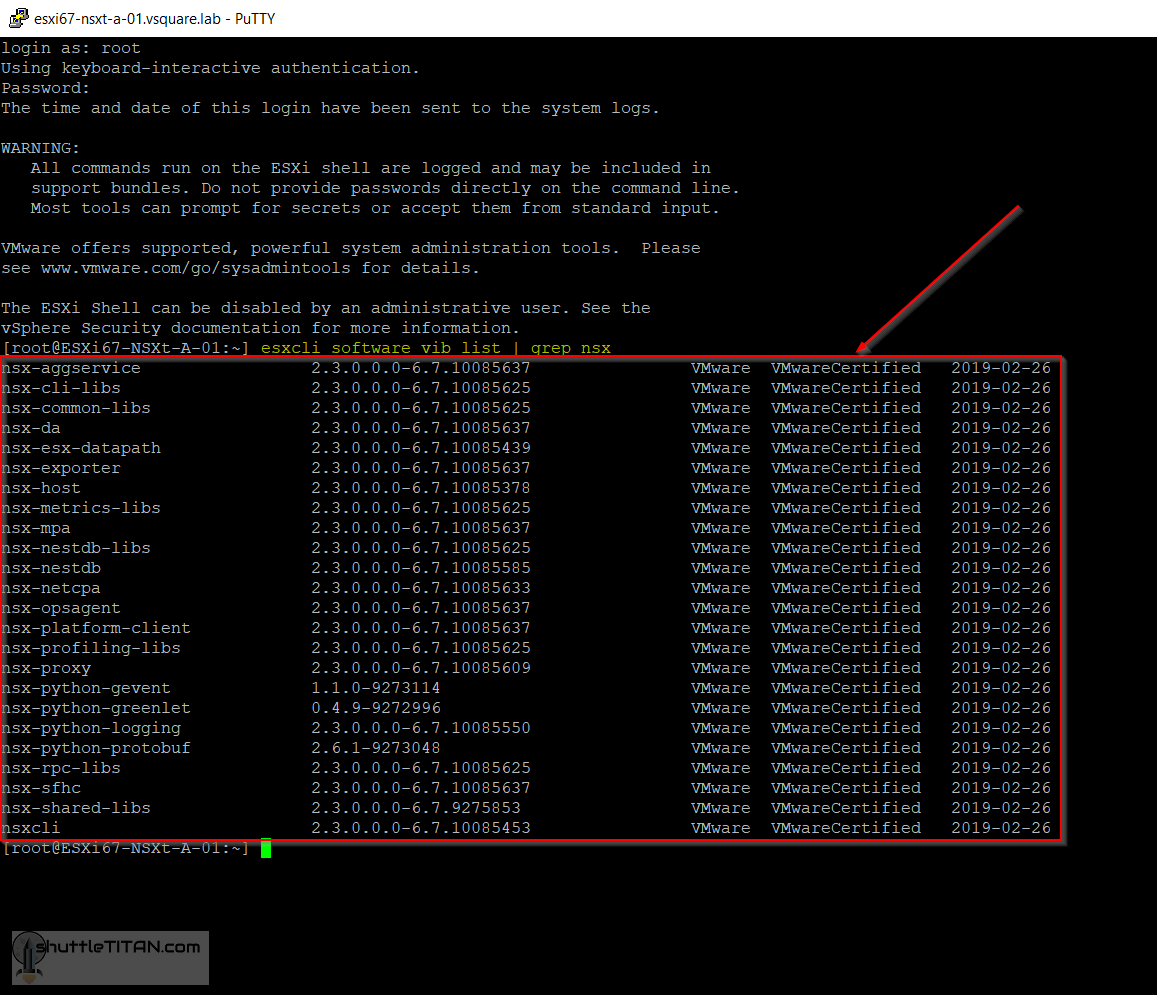
Alternatively, you can view the nsx modules installed on the ESXi hosts, by running the following command via putty:
esxcli software vib list | grep nsx
This completes the NSX-T Host Preparation step, in the next step we’ll discuss Transport Zones… coming soon 😉
All the fundamentals for NSX-T are really good Can you post the same for Transport Zones and other NSX-T components, If it is already posted share the links pls
We use cookies on our website to give you the most relevant experience by remembering your preferences and repeat visits. By clicking “Accept”, you consent to the use of ALL the cookies.
This website uses cookies to improve your experience while you navigate through the website. Out of these cookies, the cookies that are categorized as necessary are stored on your browser as they are essential for the working of basic functionalities of the website. We also use third-party cookies that help us analyze and understand how you use this website. These cookies will be stored in your browser only with your consent. You also have the option to opt-out of these cookies. But opting out of some of these cookies may have an effect on your browsing experience.
Necessary cookies are absolutely essential for the website to function properly. This category only includes cookies that ensures basic functionalities and security features of the website. These cookies do not store any personal information.
Any cookies that may not be particularly necessary for the website to function and is used specifically to collect user personal data via analytics, ads, other embedded contents are termed as non-necessary cookies. It is mandatory to procure user consent prior to running these cookies on your website.

I was able to understand NSX as a beginner from your website. 🙂
All the fundamentals for NSX-T are really good Can you post the same for Transport Zones and other NSX-T components, If it is already posted share the links pls
Hi Viki,
Have a look here.
Good Luck!